Deep Sky Gear
As I have moved into more and more astro and nightscape photography my gear has evolved… a lot. So over the next few weeks I will start to list some of the equipment I use for different subjects. First up is my deep sky astro set up to capture images like the one of the tarantula nebula below.
The Tarantua Nebula, ASI2600MCpro, Askar80PHQ, ZWO AM5 mount, Antlia QB filter, ASIAir+, 18 x 10 min exposures
One of the reasons I love doing astro images like the one above (a mere 160,000 light years distant) is that I can actually do it from my suburban back yard. Even though I live in a light polluted neighbourhood (Bortle 5) with judicious use of filters and a bit of effort I can capture amazing images without having to travel (or loose that much sleep). Nightscapes and landscapes are still my first love as I love capturing the sky and the land together, but there is something deeply profound about looking so deep into the heaven above. However to it does require at least some specialist gear and below is the setup I am often using for nebulas and such like.
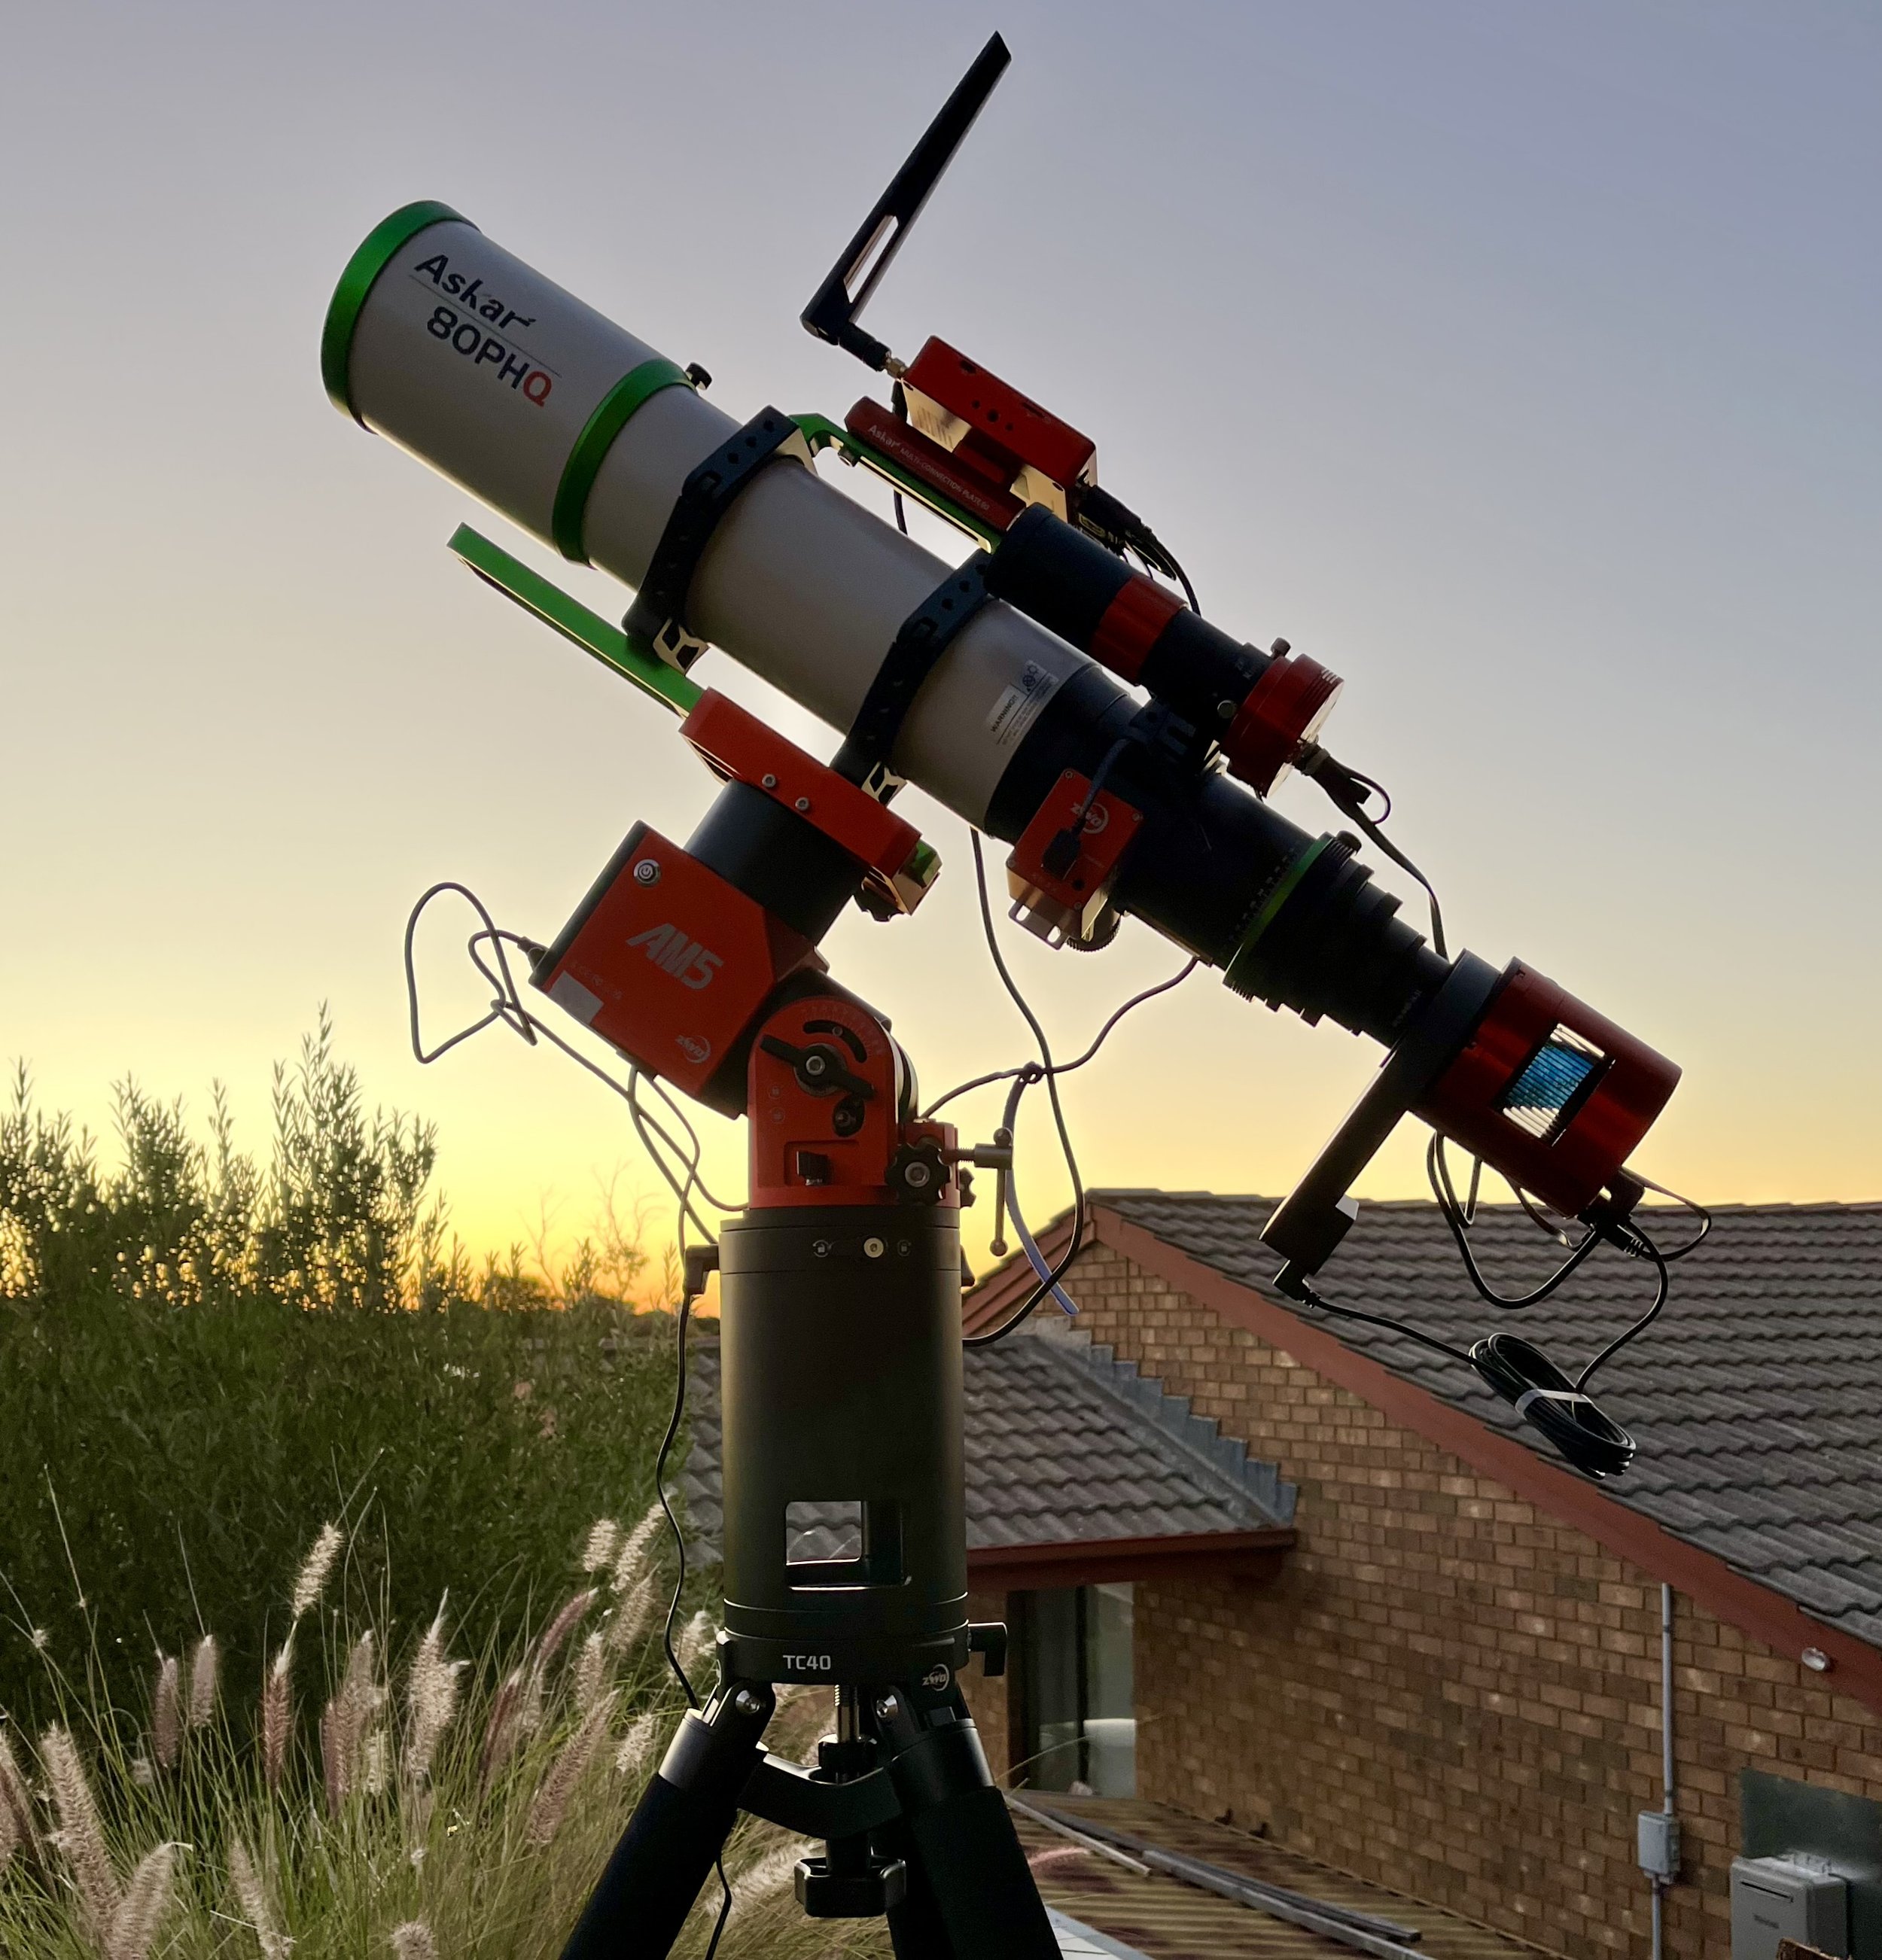
My Askar 80PHQ and AM5 setup.
The camera, a ZWO 2600MCPro. This is an full colour camera (with an apc cropped sensor in normal camera speak) and is the red cylinder hanging off the back of the scope. Very different to my landscape camera(s) in that it is essentially a sensor and some electronics with no viewfinder, storage, shutter or essentially anything that we normally associate with a camera, just a means to capture the light. The one thing it does have which a more run of the mill camera does not is inbuilt cooling. This means that when I am doing 10 minute long exposures (which I regularly do) it does not heat up leading to lots of (extra) noise in the image, I generally run it at about -10 deg C. This is not a camera you can use independently, it has to have a computer to control it and capture the data.
The lens, or more appropriately, the OTA (optical tube assembly, it is only a telescope when the mount is included) is an Askar 80 mm aperture unit with a focal length of 600mm and f ratio of 7.5. This is the equivalent of about 960 mm on a full frame normal camera, but its optical qualities are very carefully designed to get the maximum sharpness across the frame with the least possible distortion or chromatic aboration. Definitely not useful for everyday photography but awesome for photos of the night sky.
The mount, a ZWO AM5 harmonic drive mount. This is the red part connecting the black tripod to the to the white and green scope. It plays a really important part in that it keeps the lens and camera pointed at a single point of the sky cancelling out the earths rotation. It is incredibly accurate allowing exposures in excess of 10 minutes and without it such deep sky images would be impossible. Another nice feature of this computer controlled kit is that you can tell it the object in the sky you want the telescope to point at and it will automatically goto the object and keep pointing at it as long as you are taking images. Pretty useful when for the image above the total exposure time was around 3 hours (and I have done some images for 30 hours over multiple nights).
The computer, an ASIAir+. This is the little red box perched on the top of the telescope (I can call it that as long as I am referring to the scope and mount 😆) and it brings it all togeteher contolling the camera , the mount, collecting the data and finding things in the sky, all controlled from my phone. This little bit of kit makes astrophotography much easier as it lets me focus on what I want to photograph and not get to caught up in all the bits and peices.
The guide scope, a ZWO 120mm telscope and ZWO ASI120mm-s mono camera. This is the little mini scope and camera just below and behind the computer. Its job is to help the mount track the sky by measuring the motion of the stars and making minute adjustments to the mount so that it stays pointing accurately at the same objust in the sky. So yes there is actually two scopes and cameras involved.
The focuser, ZWO EAF. This is the little red box (yeah, ZWO has a thing about red for its gear) attached to the telescope just below the guide scope. This does the focussing for the whole set up. You can manually focus a telecope like this, but having a focusing motor like this allows the computer to do it for you and tweak it through the evening to adjust for temperature or filter changes, which can make a difference to the final image.
The filter wheel, ZWO 5 position, 2 inch electronic filter wheel. The black bit directly in front of the main camera. It can hold 5 different filters which I can change to suit the target I am shooting. The filters help cut out light polution as well as capturing specific wavelengths of light suited to different targets. For the image above I was using Antlia Quad band Anti-light ollution filter since there was a broad range of colours in the target, but I use some others as well depending on what I am shooting.
And really, that is all the important bits. With this I can capture hours of data over multiple nights, combining it to bring out those faint photons which have traveled hundreds of thousand of light years to fall on my yard in suburban Adelaide.

