So what can screw up polar alignment?
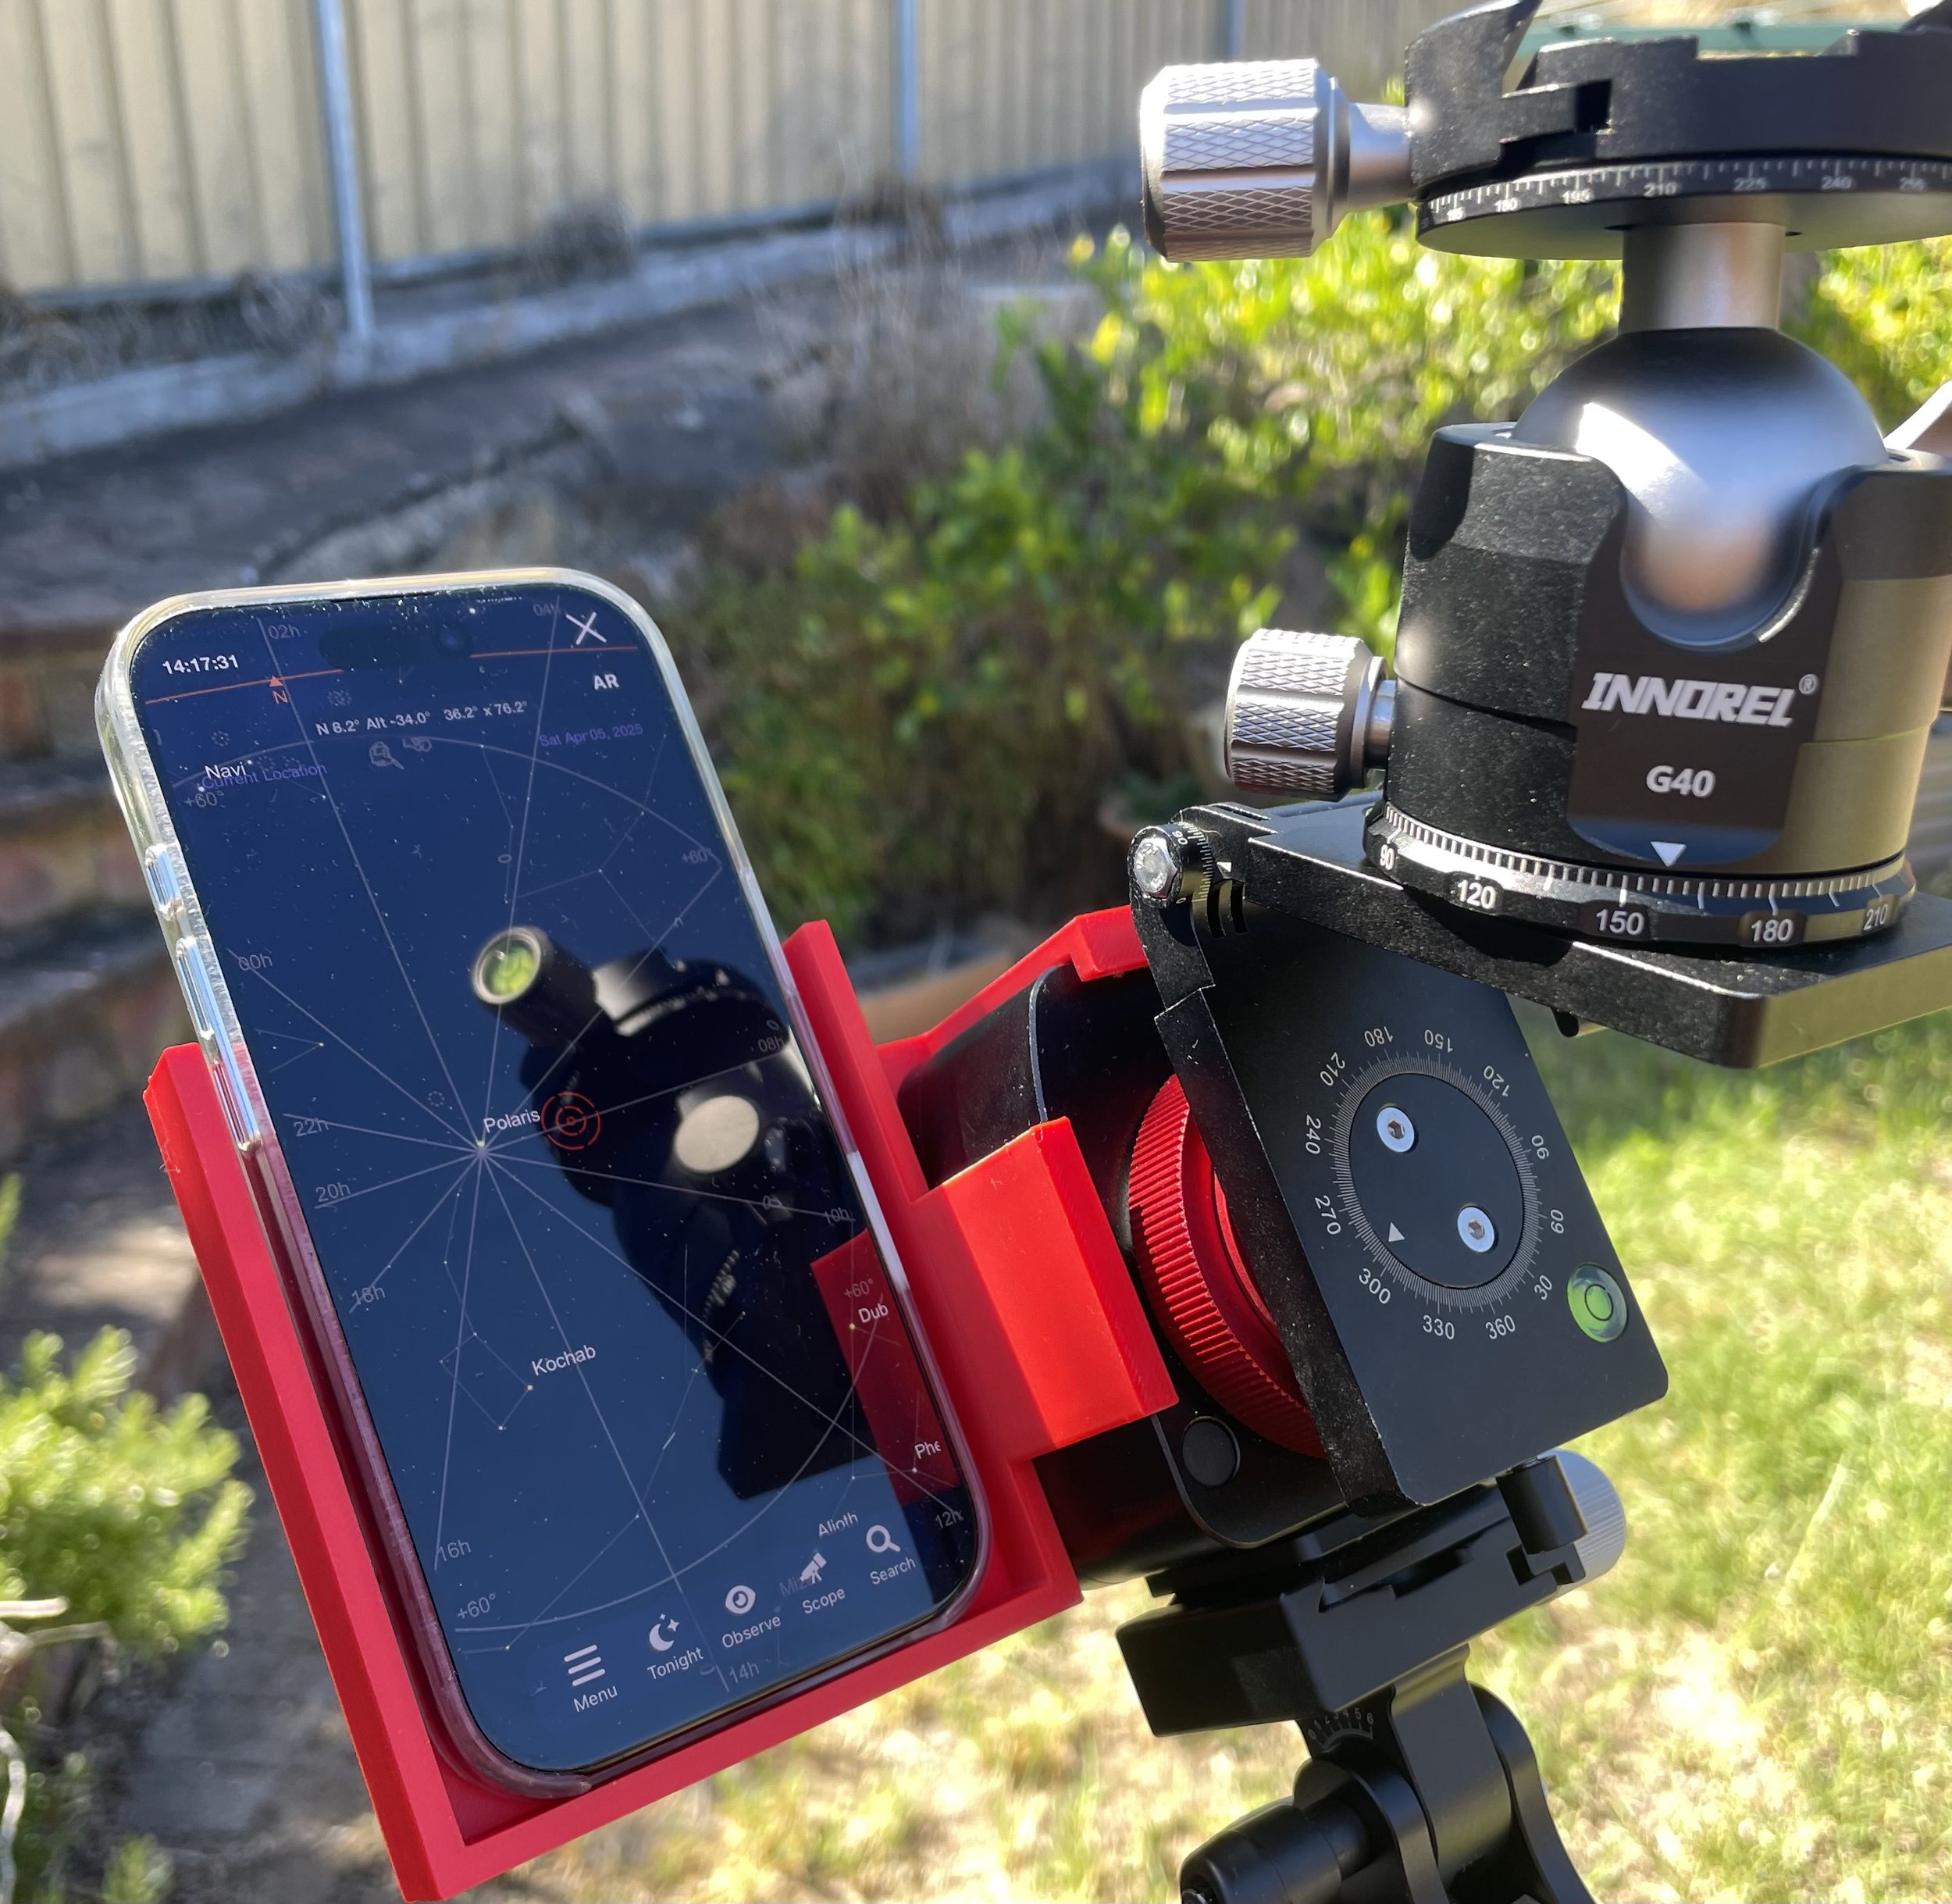
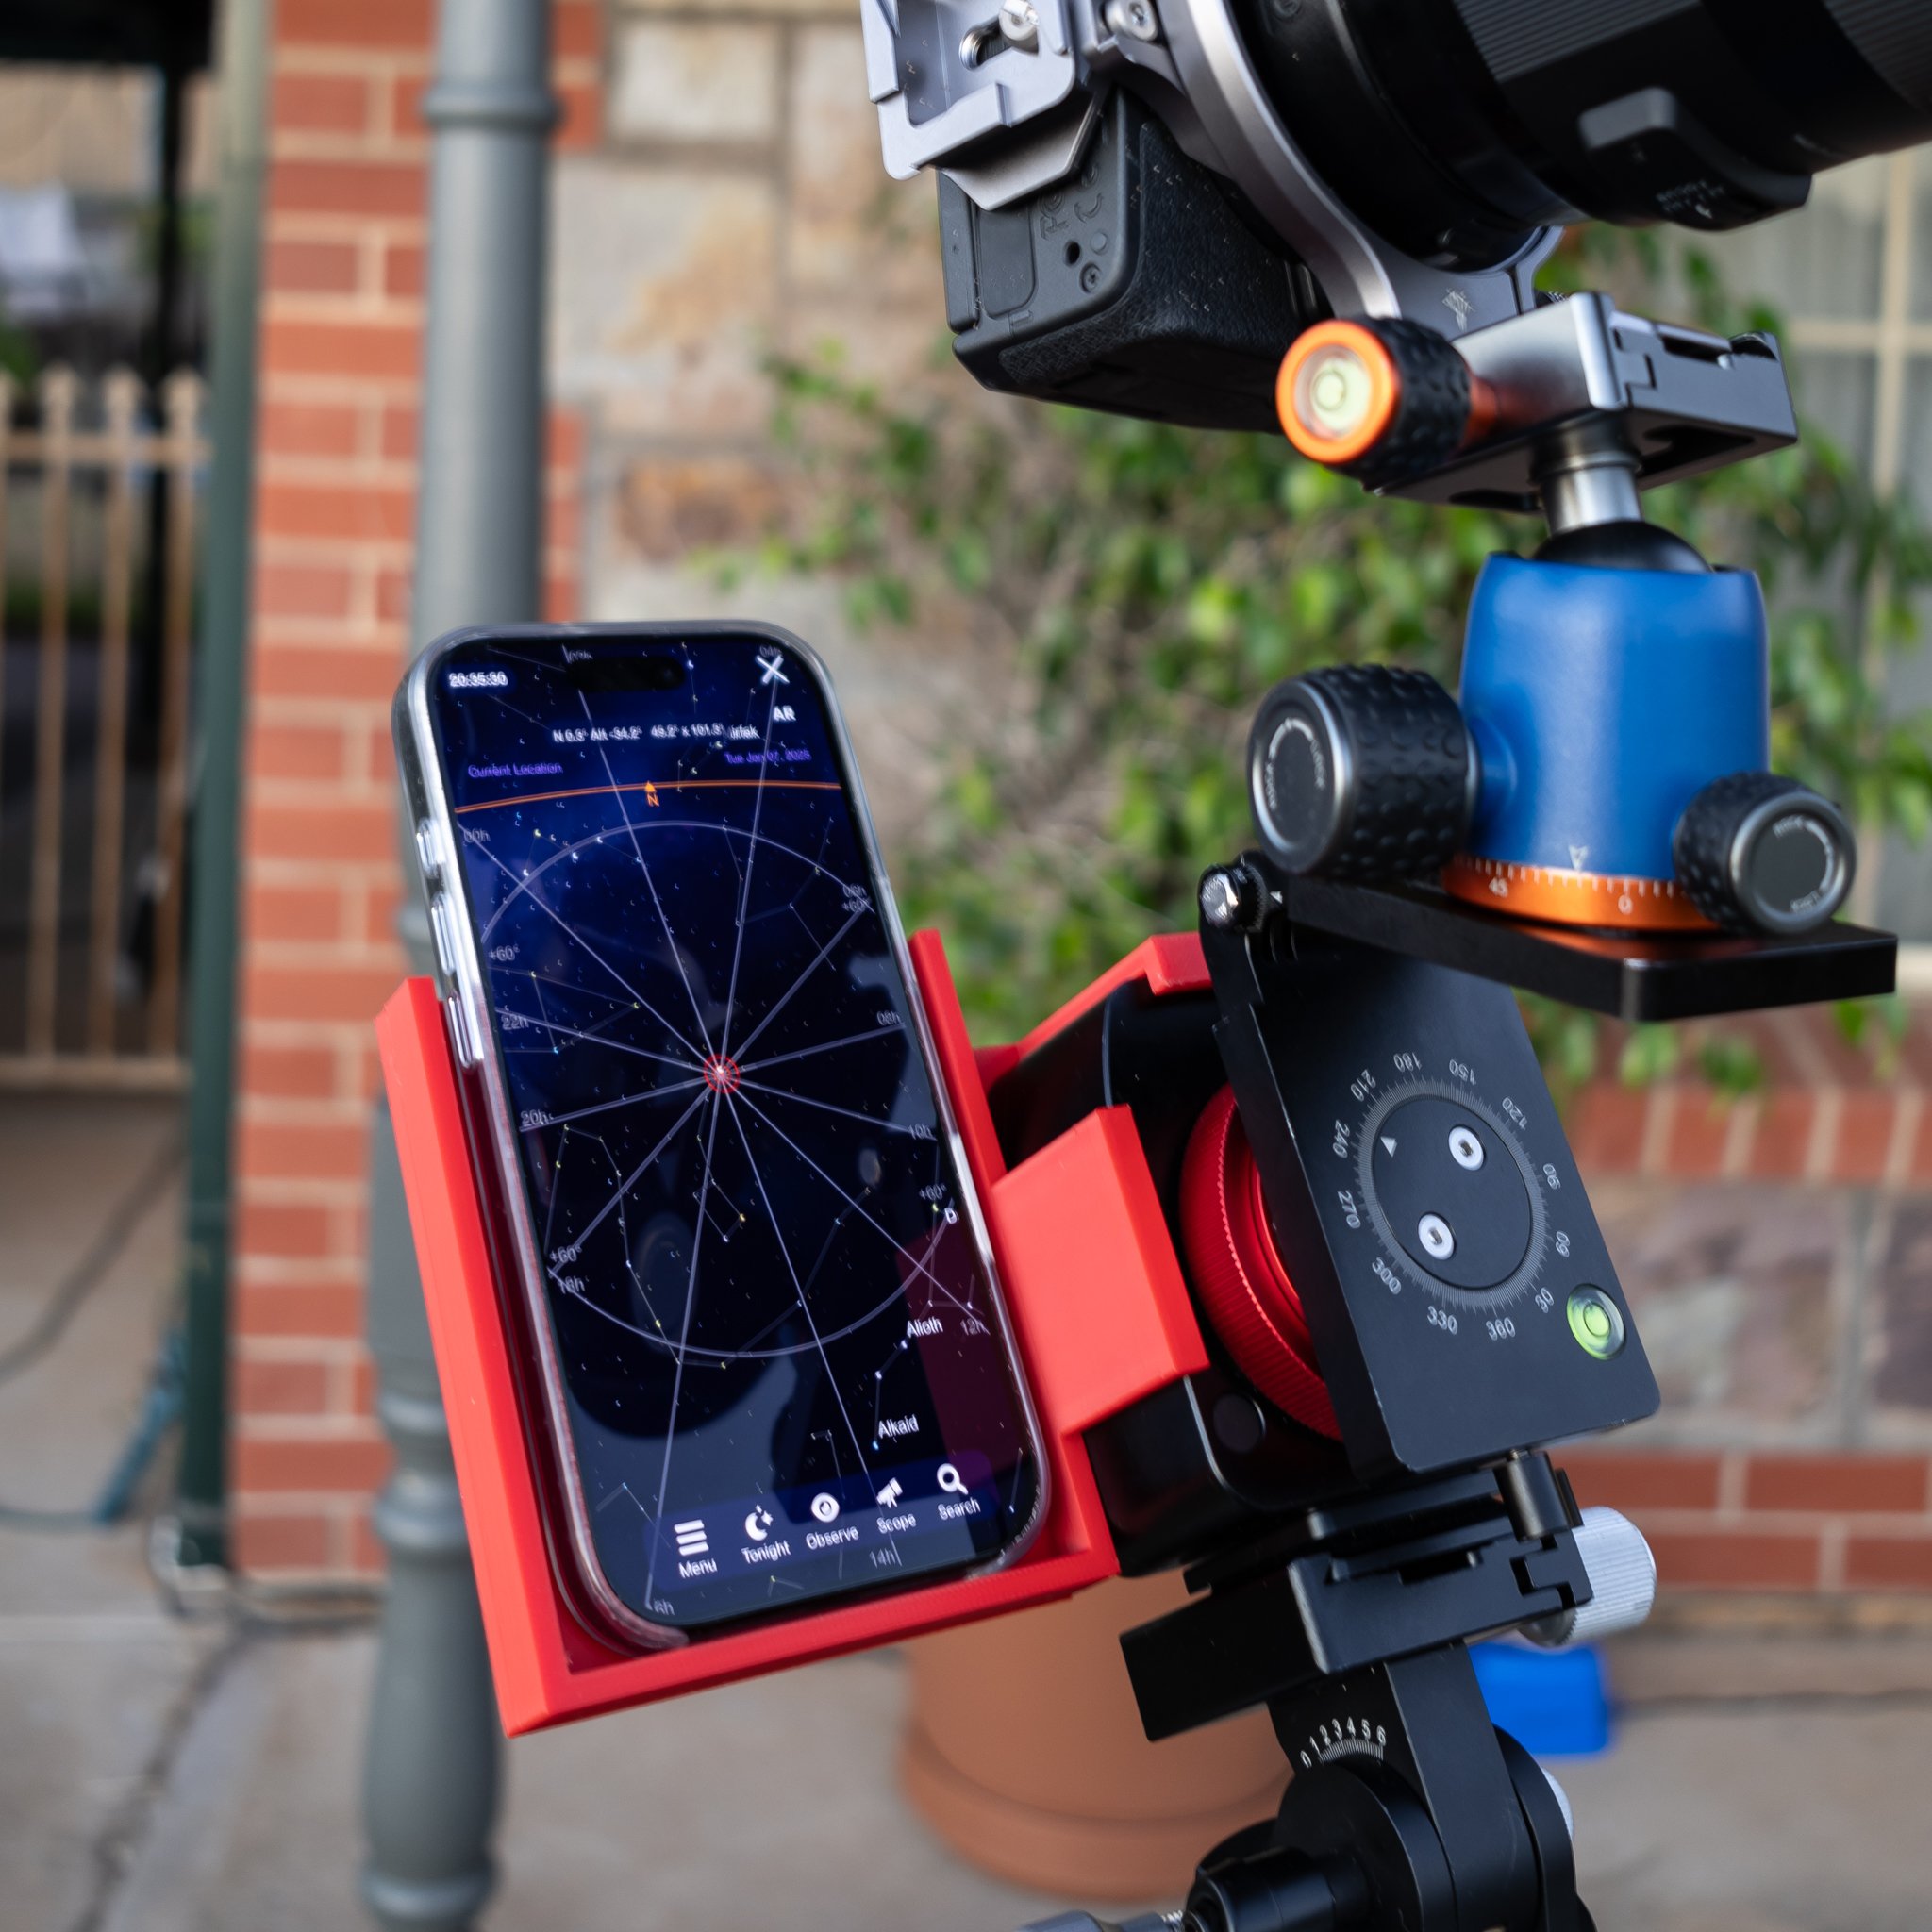
My standard set up these days for star tracking. This was polar aligned, until I bought another iPhone close the rig!
As is well known by now I have followed the lead of a lot of great astrophotographers out there and polar align my Nomad star tracker using my phone and the Sky Safari app. I liked this method so much I designed my own phone holder to make it even easier. However a question I often get asked is “Doesn’t the tracker interfere with the compass in the phone?” My experience has been it doesn’t, but some other parts of my gear definitely seem to, so being a scientist by training I could not resit doing an experiment.
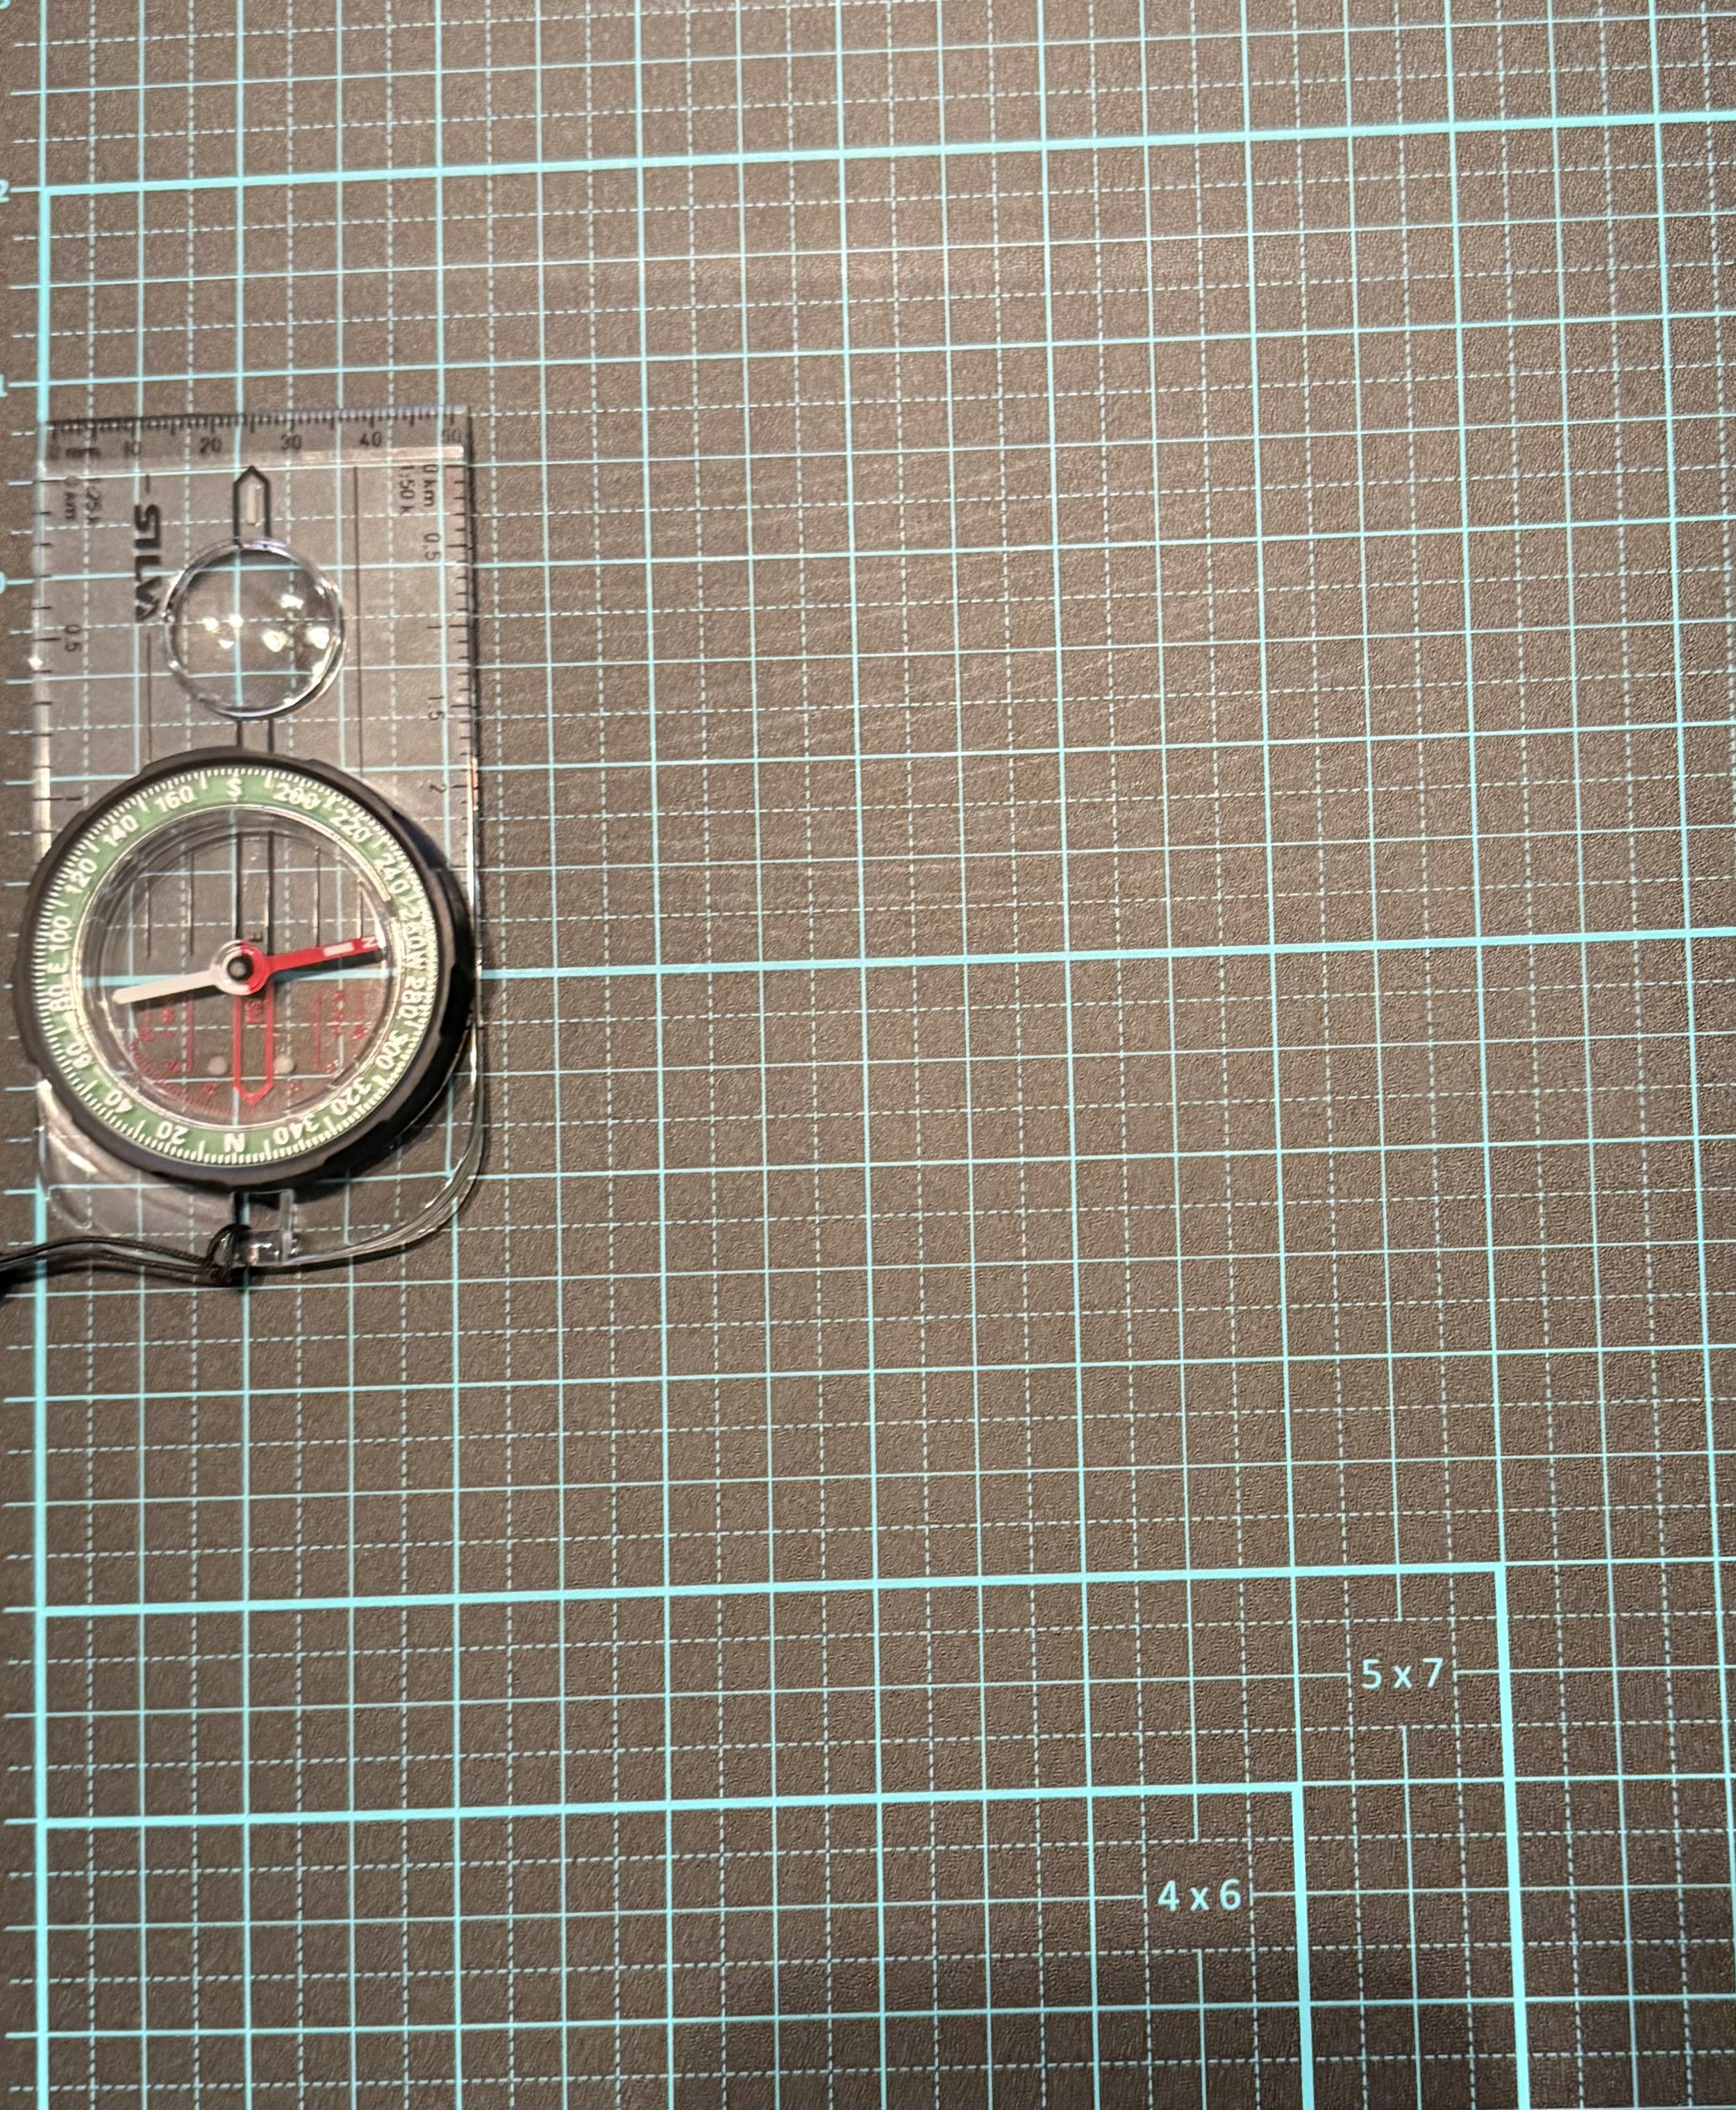
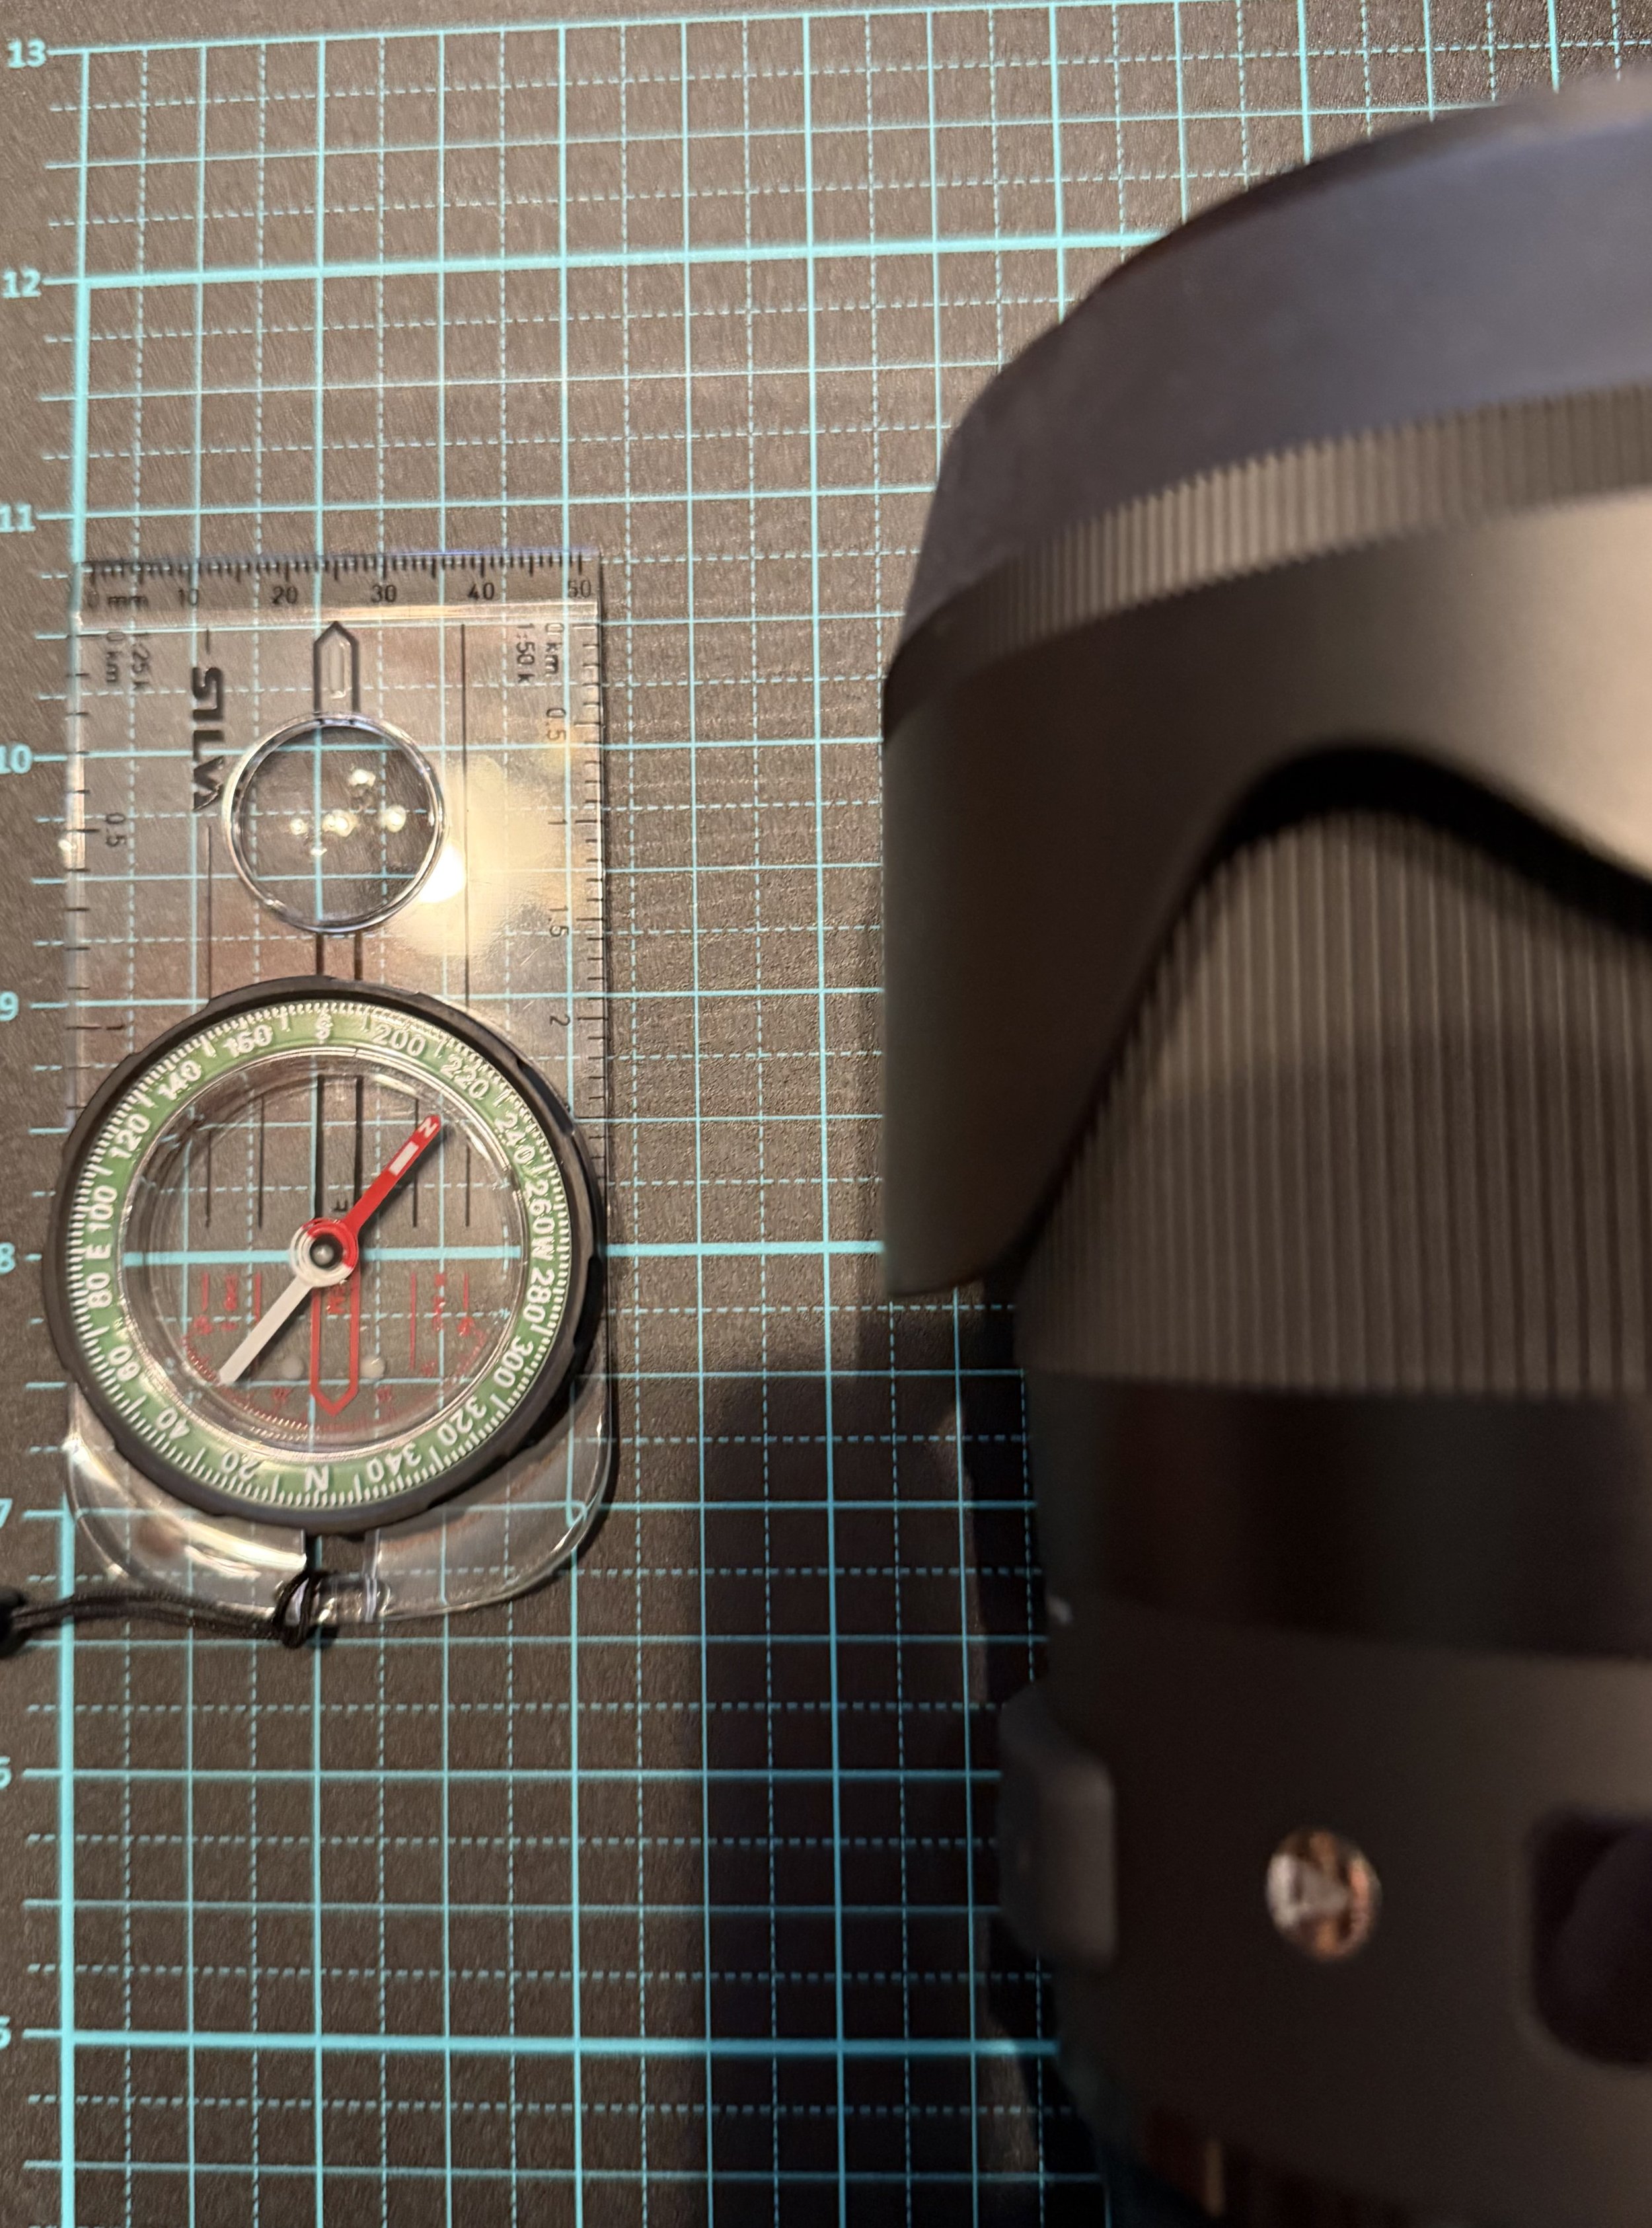
The experimental set up, simple enough. A compass on a gridded mat.
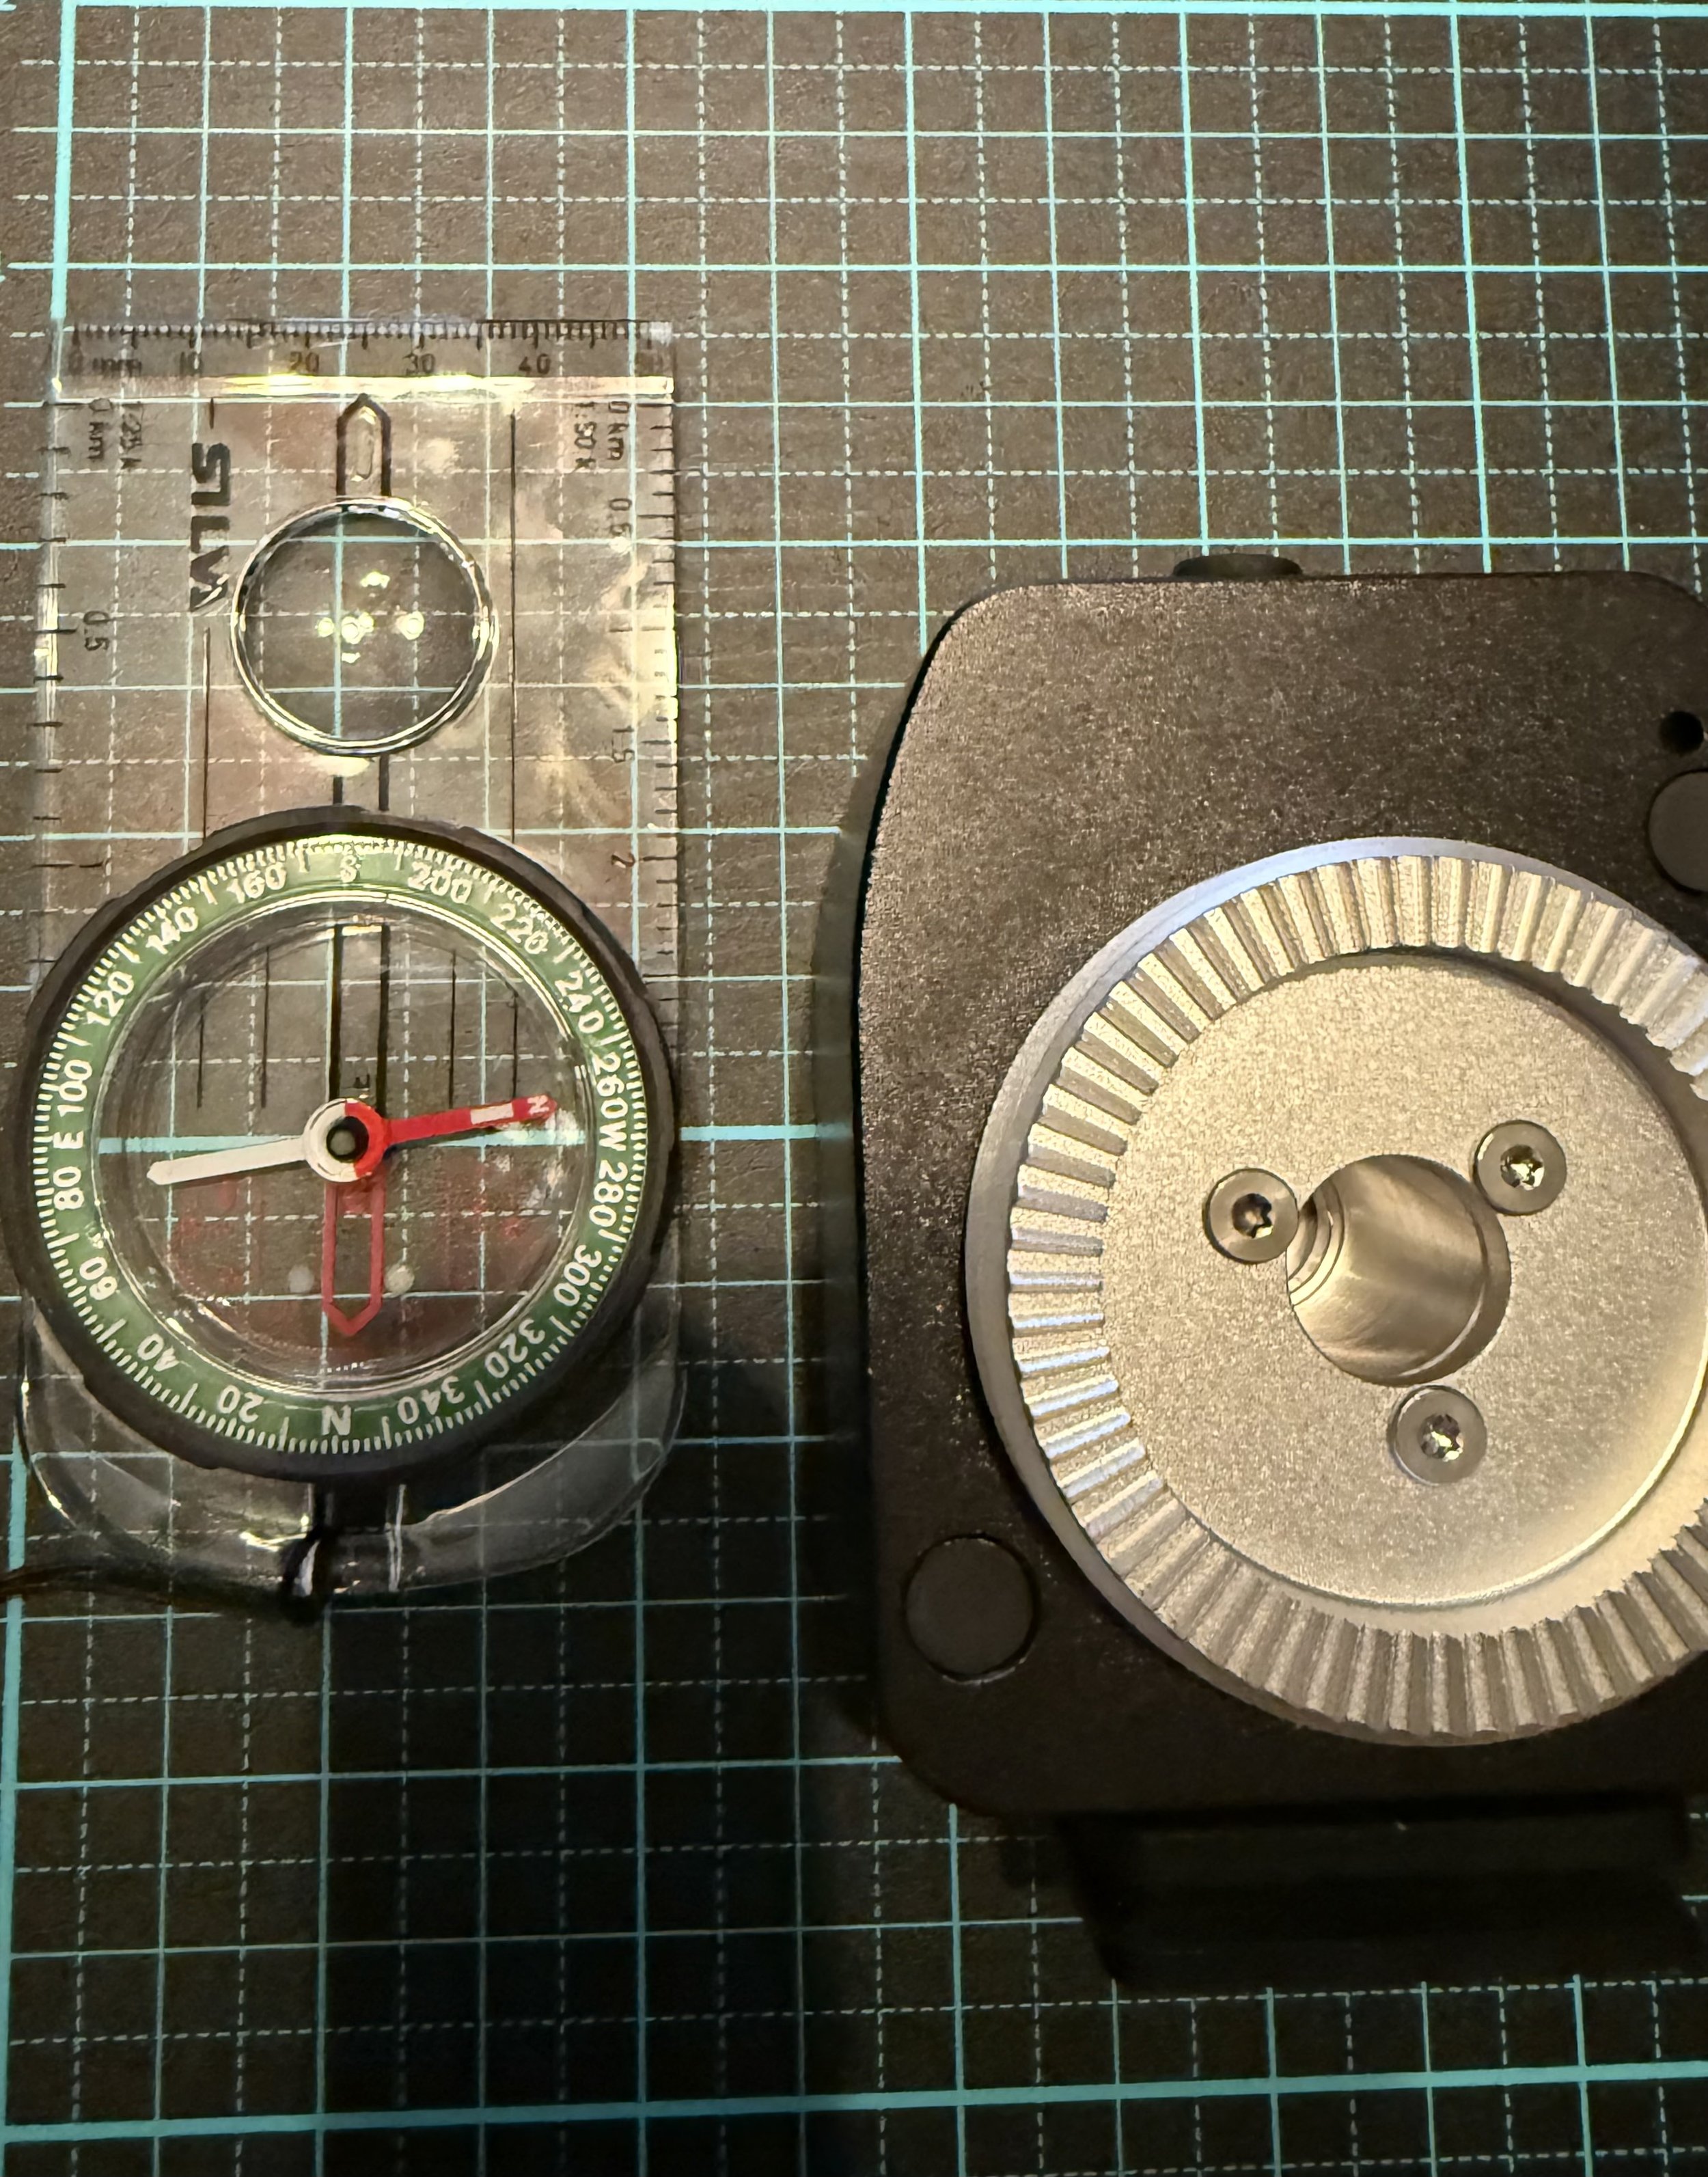
The tracker had no significant effect on the compass (I did repeat this with the amount and bullhead, it didn’t make a difference). The tracker was turned off for the trial.
The setup was very simple. Put a compass on a guided mat and then place the tracker close to it in the same orientation that it would be in my photography set up (why not use the compass on my phone, ahhh…. was using it to take the photos). The good news was, as you can see in the photos above, that the tracker did not impact the compass so I think it is safe to assume that it is not causing any problems when I am polar aligning out in the field. This supports my practical experience as I have been getting great tracking using the phone mounted next to the tracker. Next, time to test another suspect.
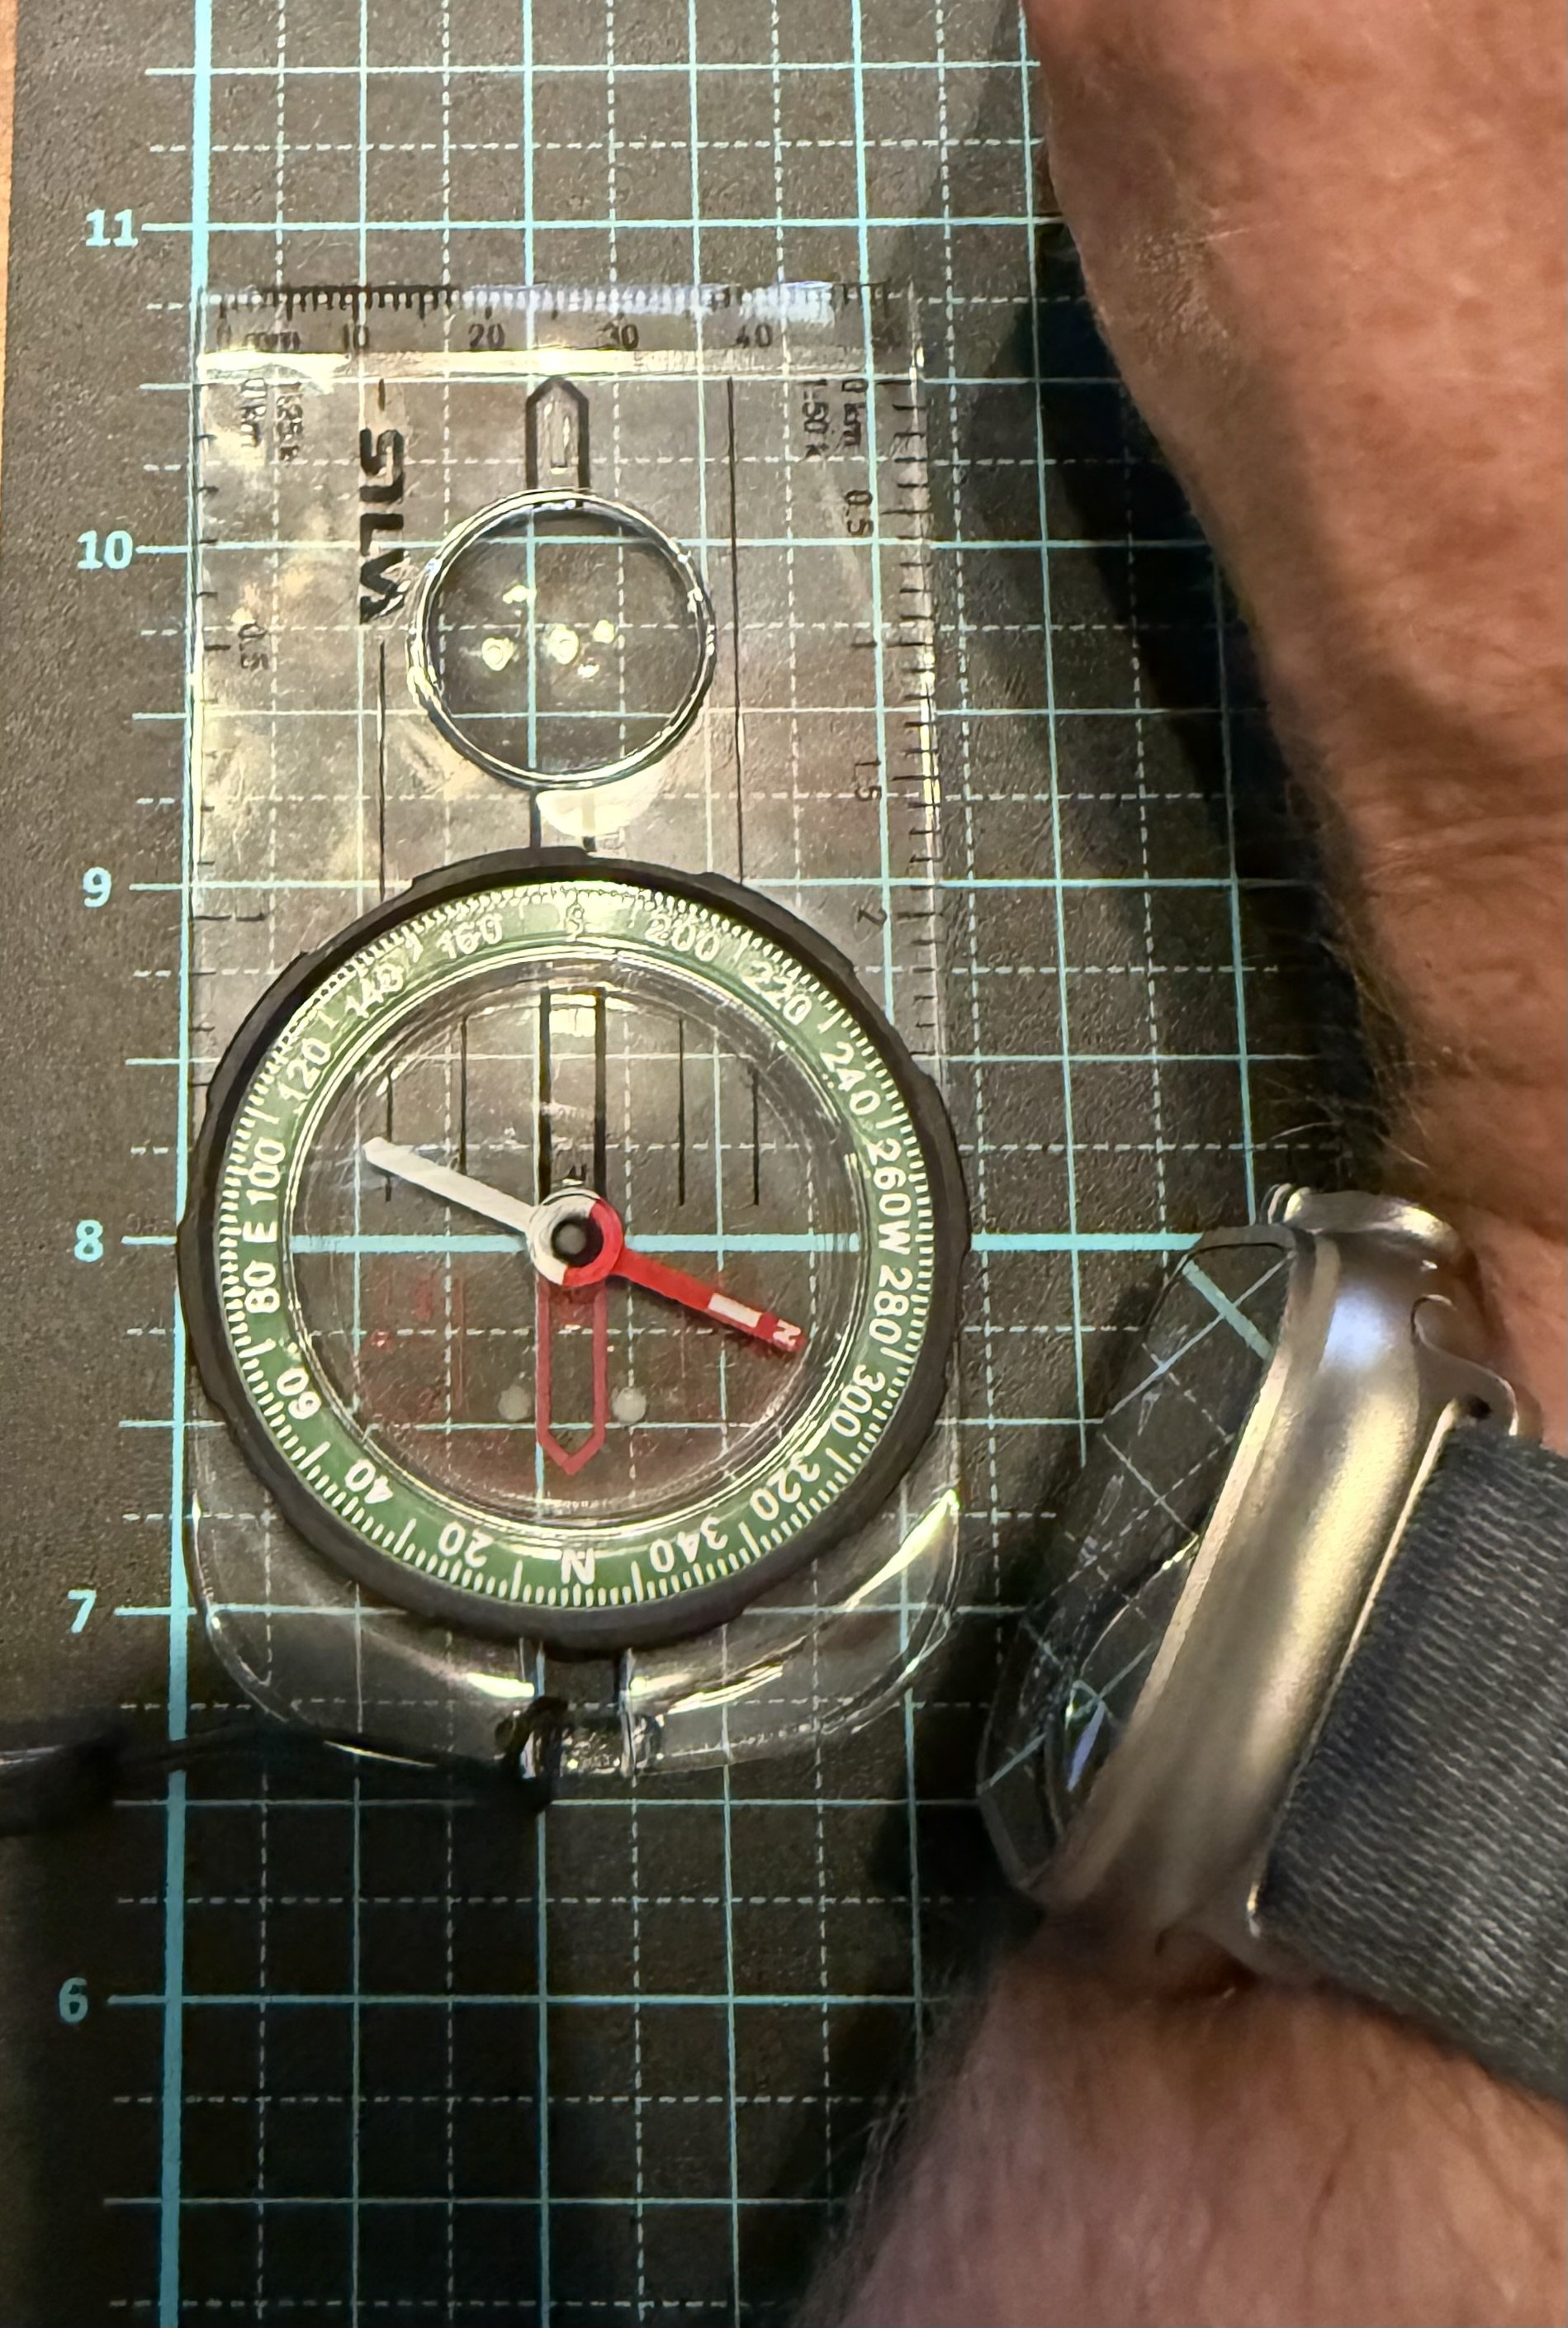
The smart watch had a definite impact.
A number of YouTubers and bloggers had commented that smart watches could be a problem, and the test showed that this was the case with the compass showing a clearly different direction when I bought my smart watch close. Probably suggests it is best practice to take it off when you are polar aligning (and perhaps to hold your compass in the opposite hand if you are navigating through the jungle).
One of my favourite lenses had a huge impact.
Next I decided to look act the impact of a lens and camera. As you can see above, one of my favourite lenses, the RF15-35 f2.8 had a massive impact swinging the compass by about 90 degrees. The camera, autofocus and image stabilisation were all turned off. The effect was only short range and seemed to disappear totally if you moved the camera 50-60cm away, but it is definitely real. The amount of deviation also depended on the orientation of the camera. It shouldn’t be surprising that this happens because modern lenses such as this have powerful motors, containing coils and permanent magnets in them for the autofocus and image stabilisation functions and would create a field even if turned off. Below is an image with another of my favourite lenses, The Sigma Art 20mm 1.4. As you can see it had a significant impact as well.
The Sigma art 20mm 1.4 also had a significant impact, autofocus was turned off in this trial.
Interestingly the, camera without the lens did not seem to have a significant impact, so perhaps a simpler manual focus lens and camera would not cause problems. Unfortunately I did not have one around to test. Also, I have noted that in the field, depending on the orientation of the camera it does not always seem to be an issue, but this is hard to replicate and could be just the direction it is pointing.
So, given these trials I think that if I stick to the process of aligning the tracker with a phone before putting the camera on the ball head (and keeping my smart watch in my pocket) I will continue to get really good polar alignment and nice long trail free images.
Ground breaking science, nah. But still nice to know.
Tripod levelling, it is a small thing….
One of my seriously pet hates when looking at landscapes is a non-level horizon. Once I see it in a photo I can’t unseen it and no matter how amazing the image, it nags at me. It is part of the reason that my main tripods have levelling heads, just to make the basic set up so much quicker. Now for normal images you can usually fix it in post, but when doing panoramas a non level camera during sweep can be much harder to stitch and cause lots of headaches.
Then there is astro-landscape photography, if you are using a tracker as I often do, it is is really important that you start off with the tripod level so it makes it easier to polar align going forward. And, if you are using something like the Benro Polaris, well it is essentially mandatory for it to work. Most tripods and levelling heads these days come with a small bubble level, but they are small and sometimes, well, they suck… Lots of people (including myself) use either their phone or one of the larger bubble levels readily available in stores like Amazon to level the tripod. There is the small inconvenience here that before you put the tracker on the tripod there is a really inconvenient bolt sticking up from the centre of its otherwise nice level surface. You can work around it, I often level the tripod once I have the Polaris in place, but it is a bit of pain.
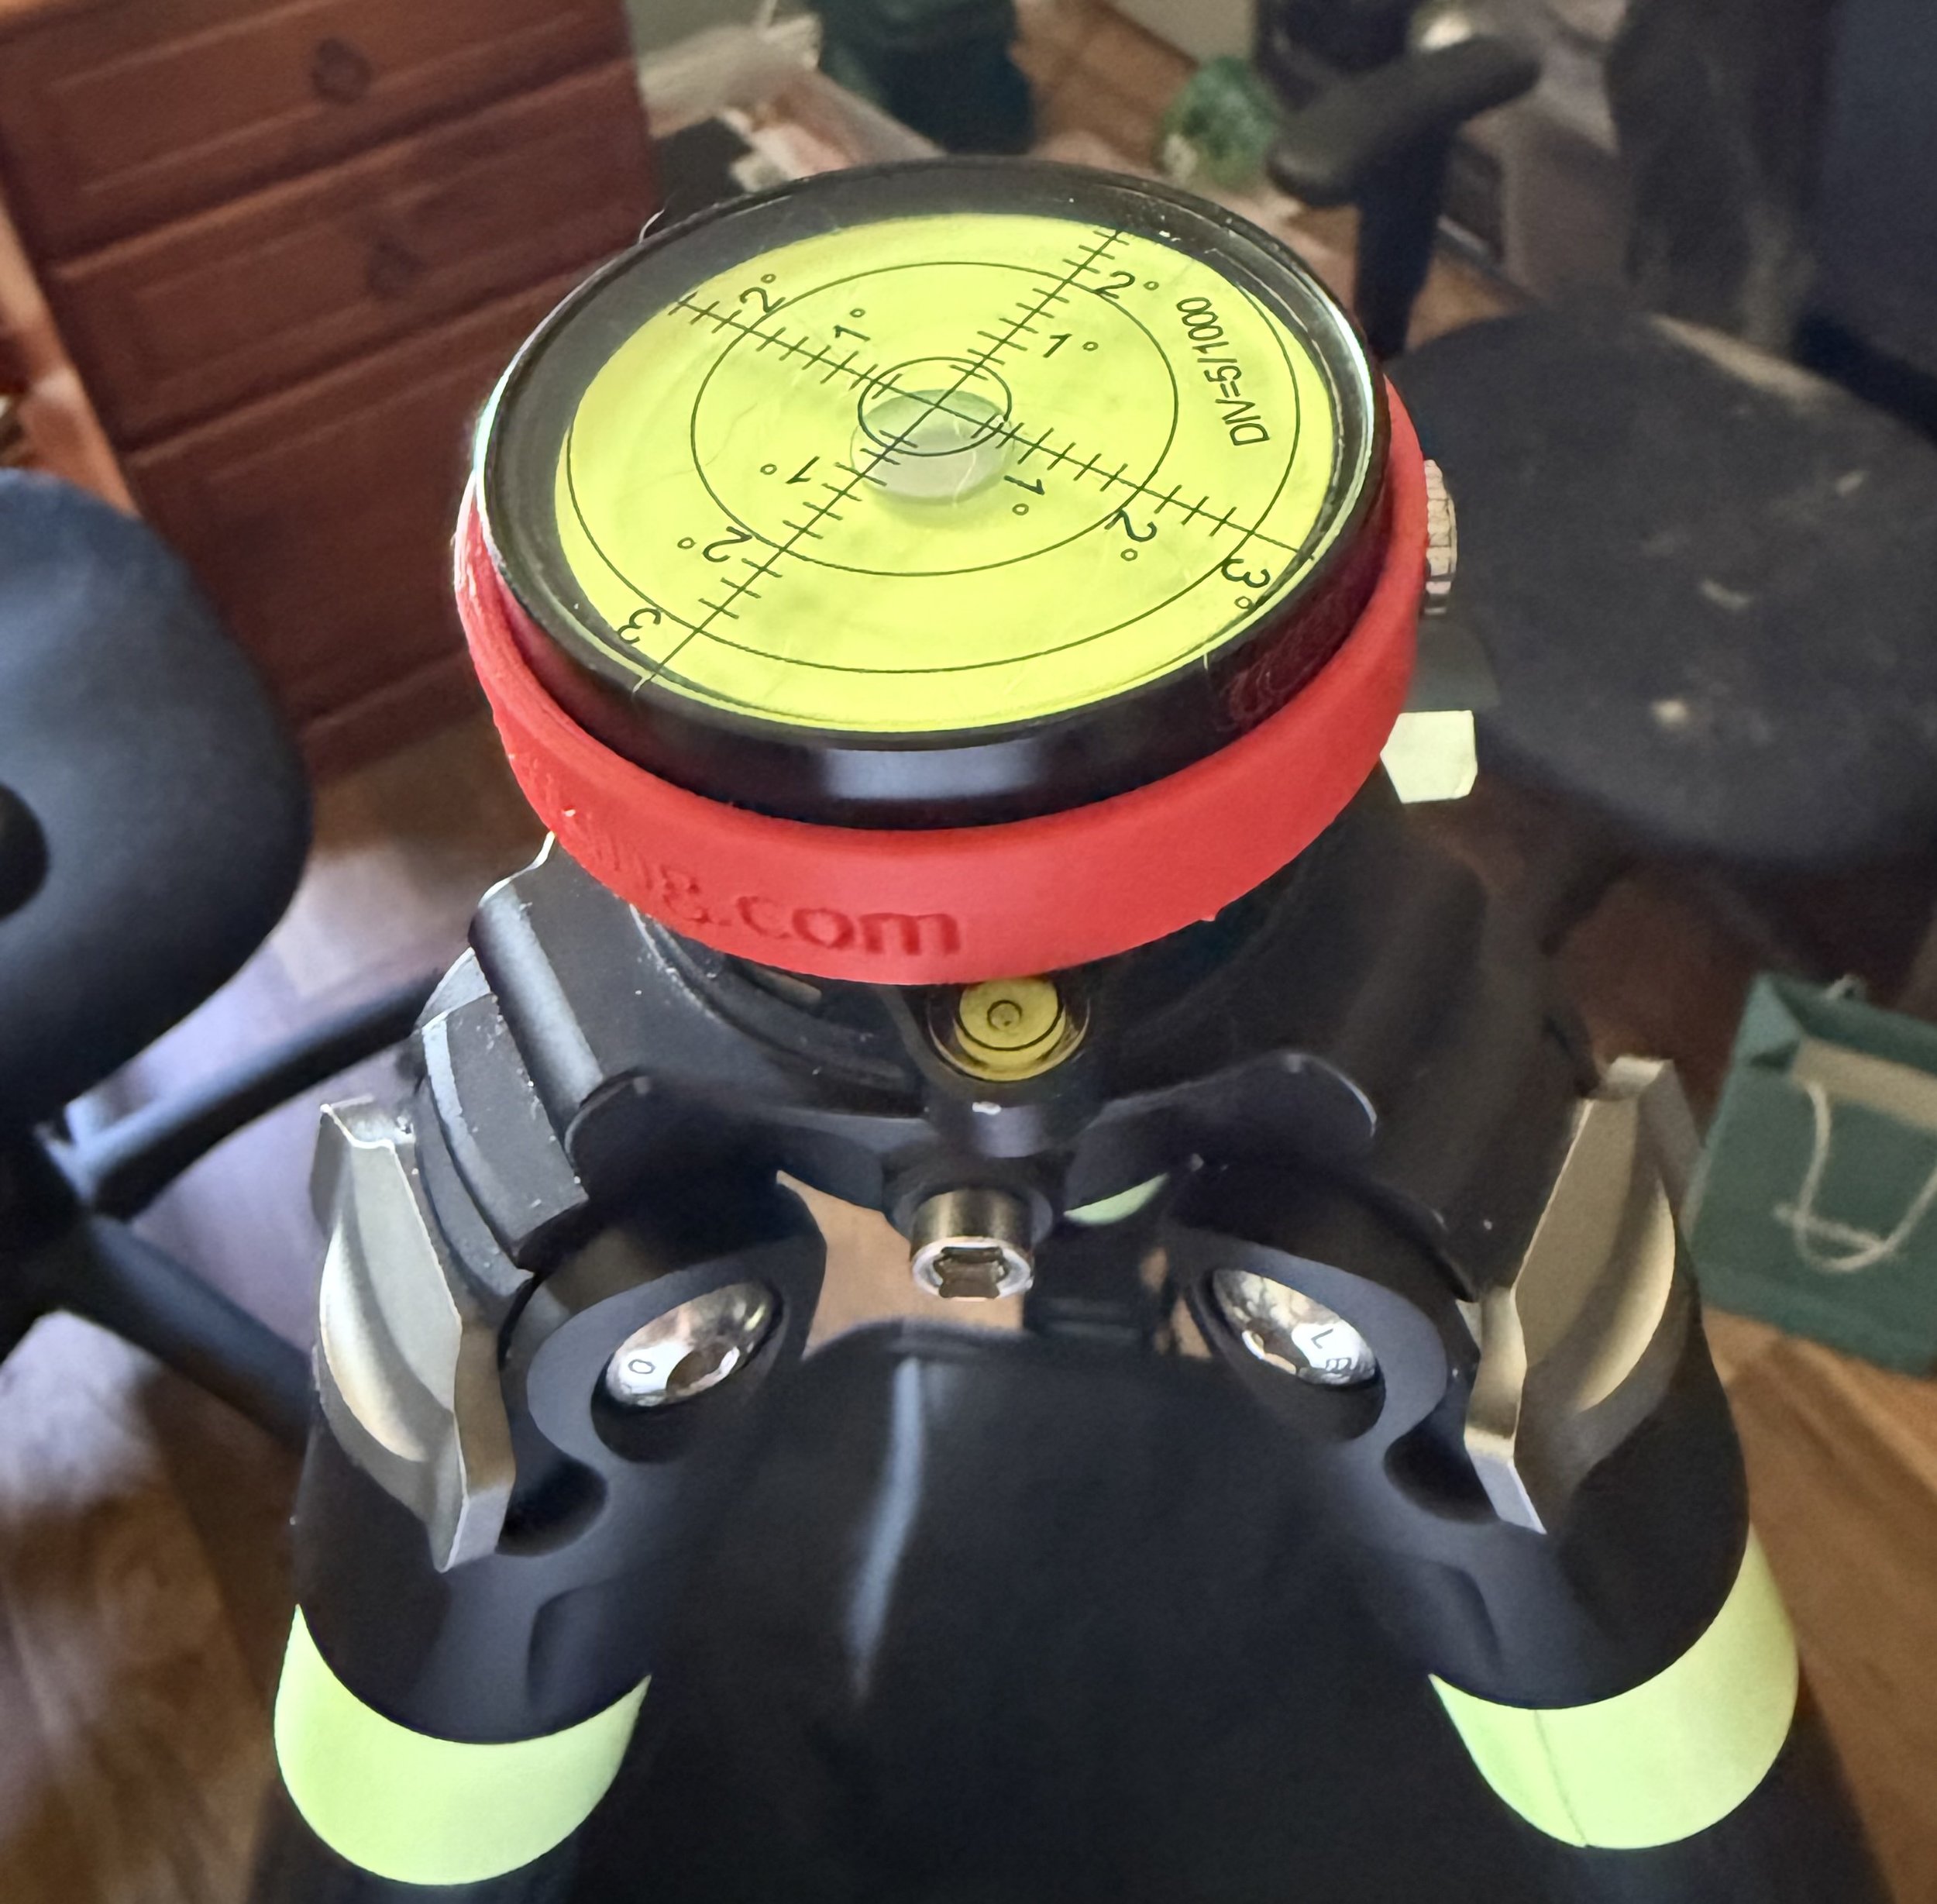
So once again a bit of 3d printing to the rescue. I made a simple little disk that slipped over the bolt and created a level surface that you can fit a 60mm level in as shown below.
This is plenty big enough for my poor old eyes to use and takes up no more space in the bag than the level itself. If I want to use my phone as level instead it still provides a nice level surface to put it on.
Now this is seriously not an original or novel idea (I think I have seen a number of similar work arounds on the various forums), but it makes my life easier and if anyone else would like one, the file to print it out is available below. It is the little things that make life easier.
The original MSM Tracker, yet another phone bracket
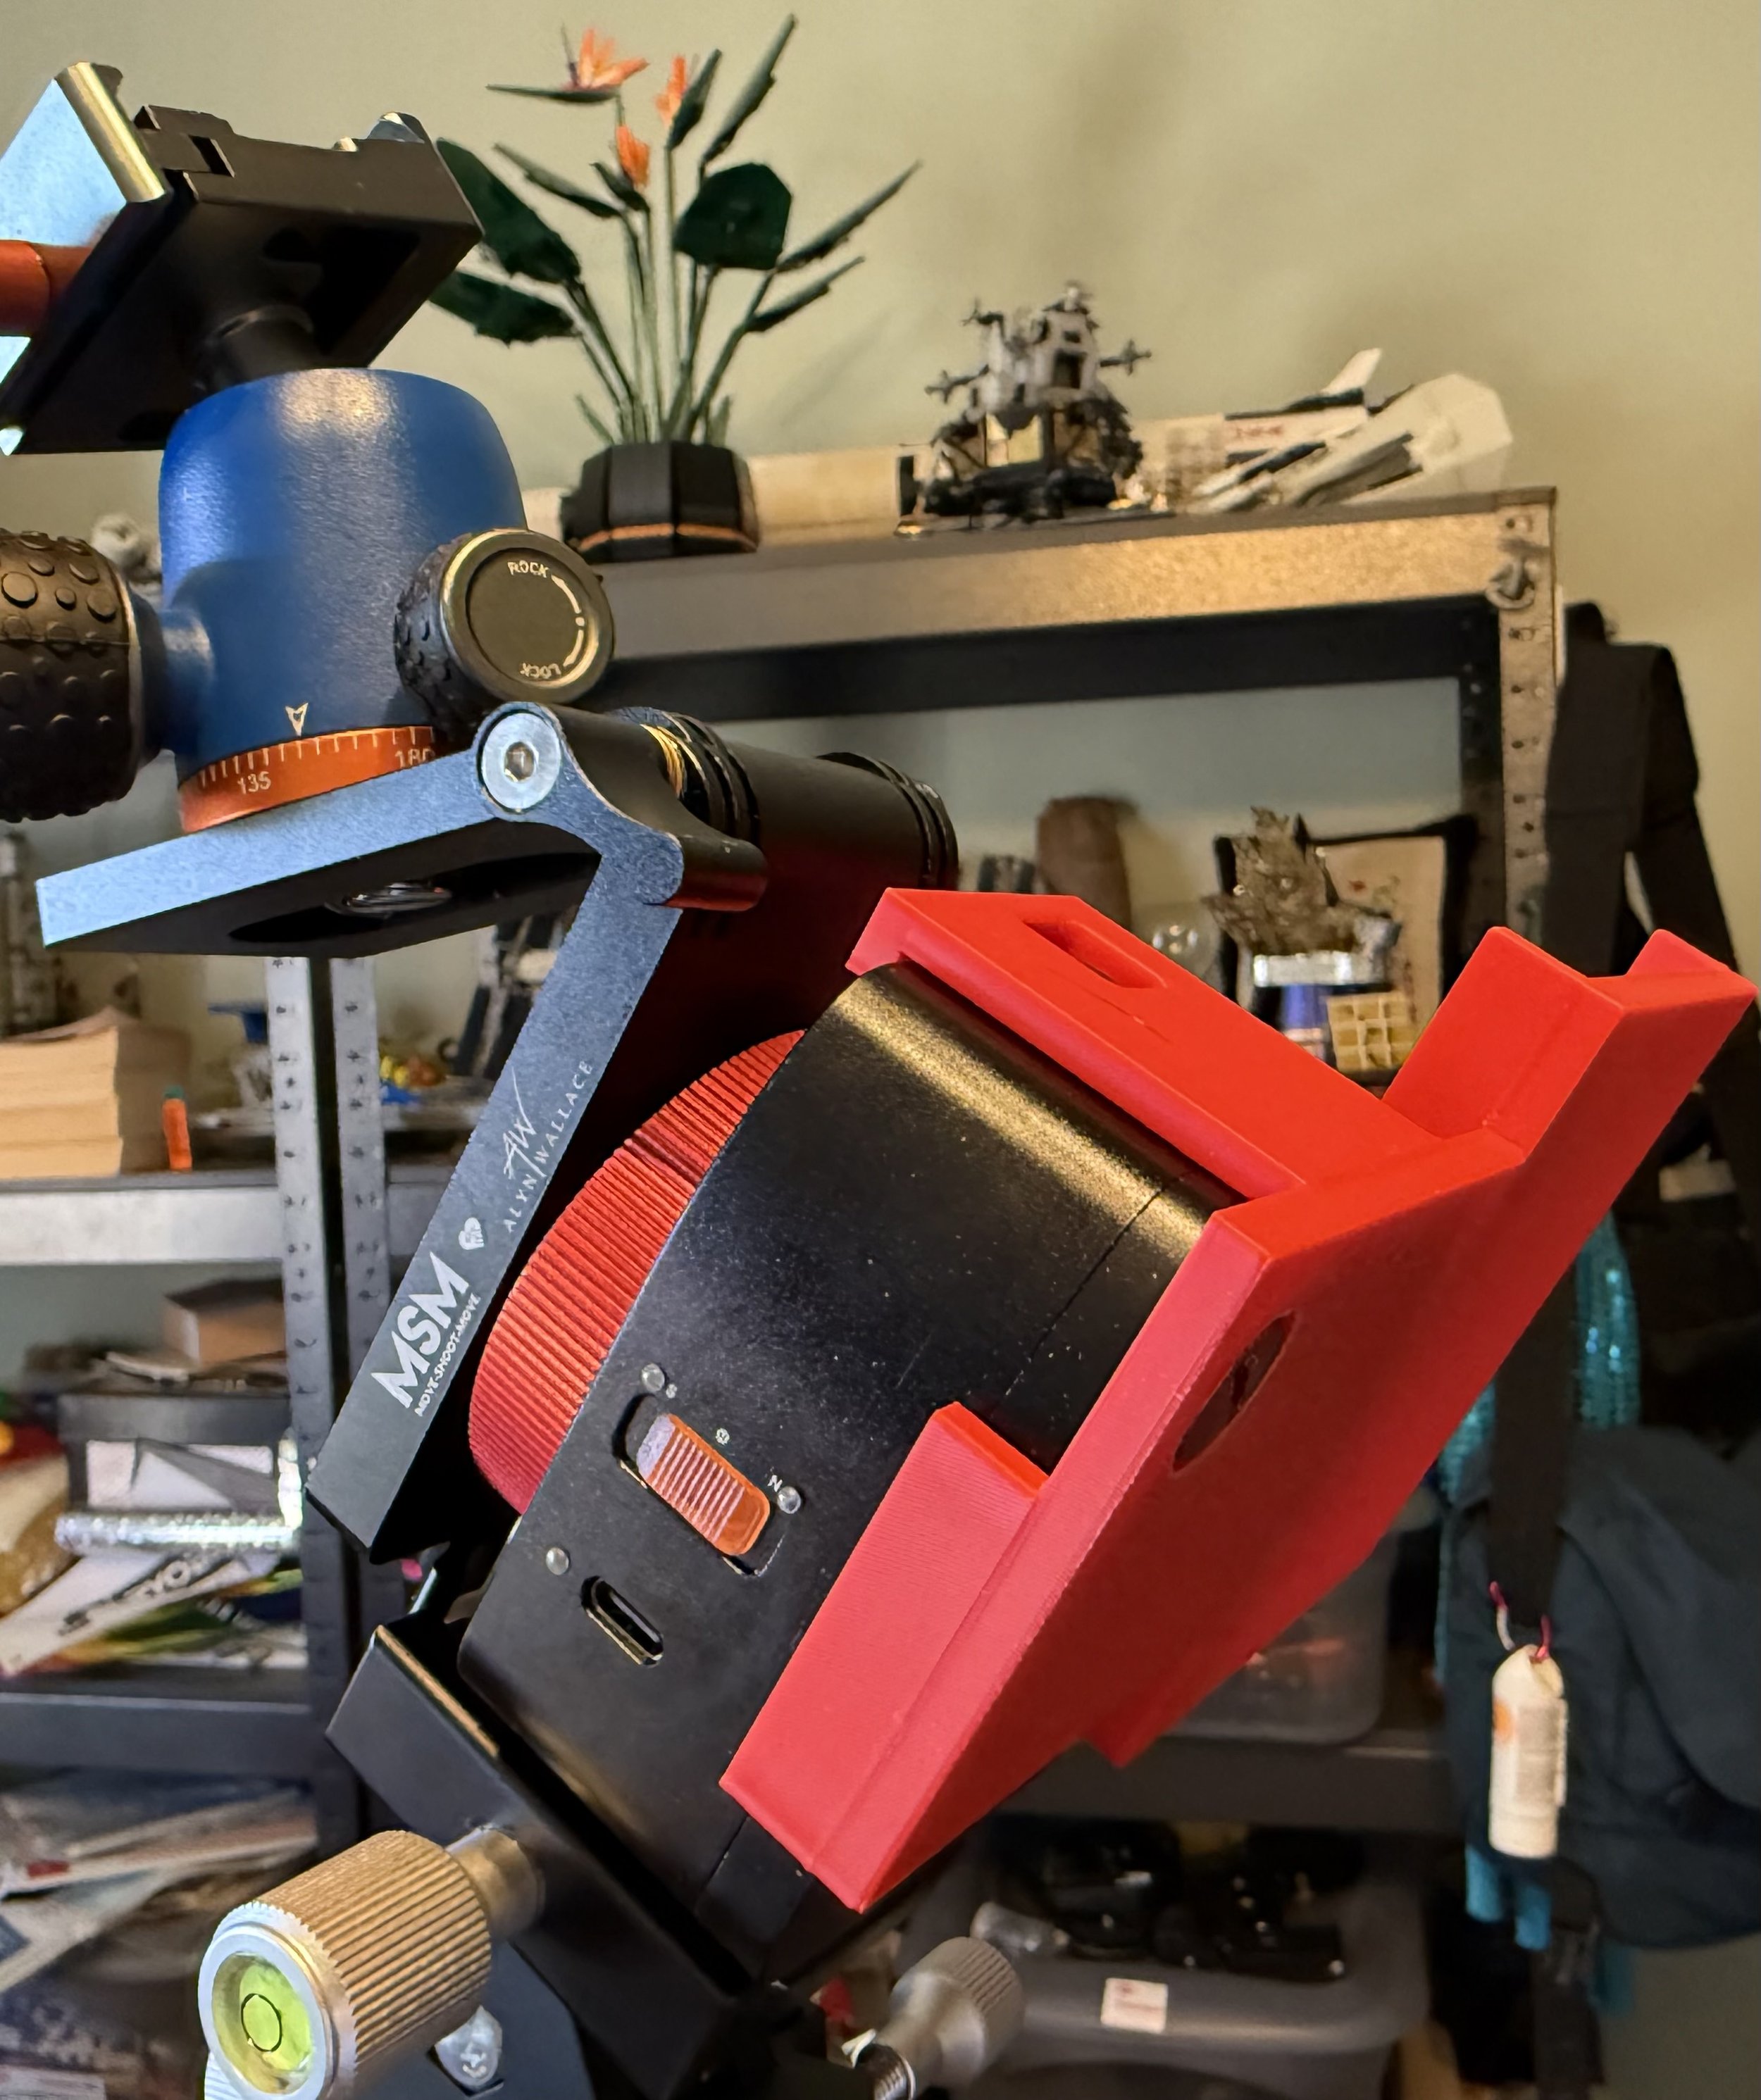
A number of people asked if a similar holder was available for the original MSM tracker, and late one cloudy night (when I could not take photos of the night sky) I created one.
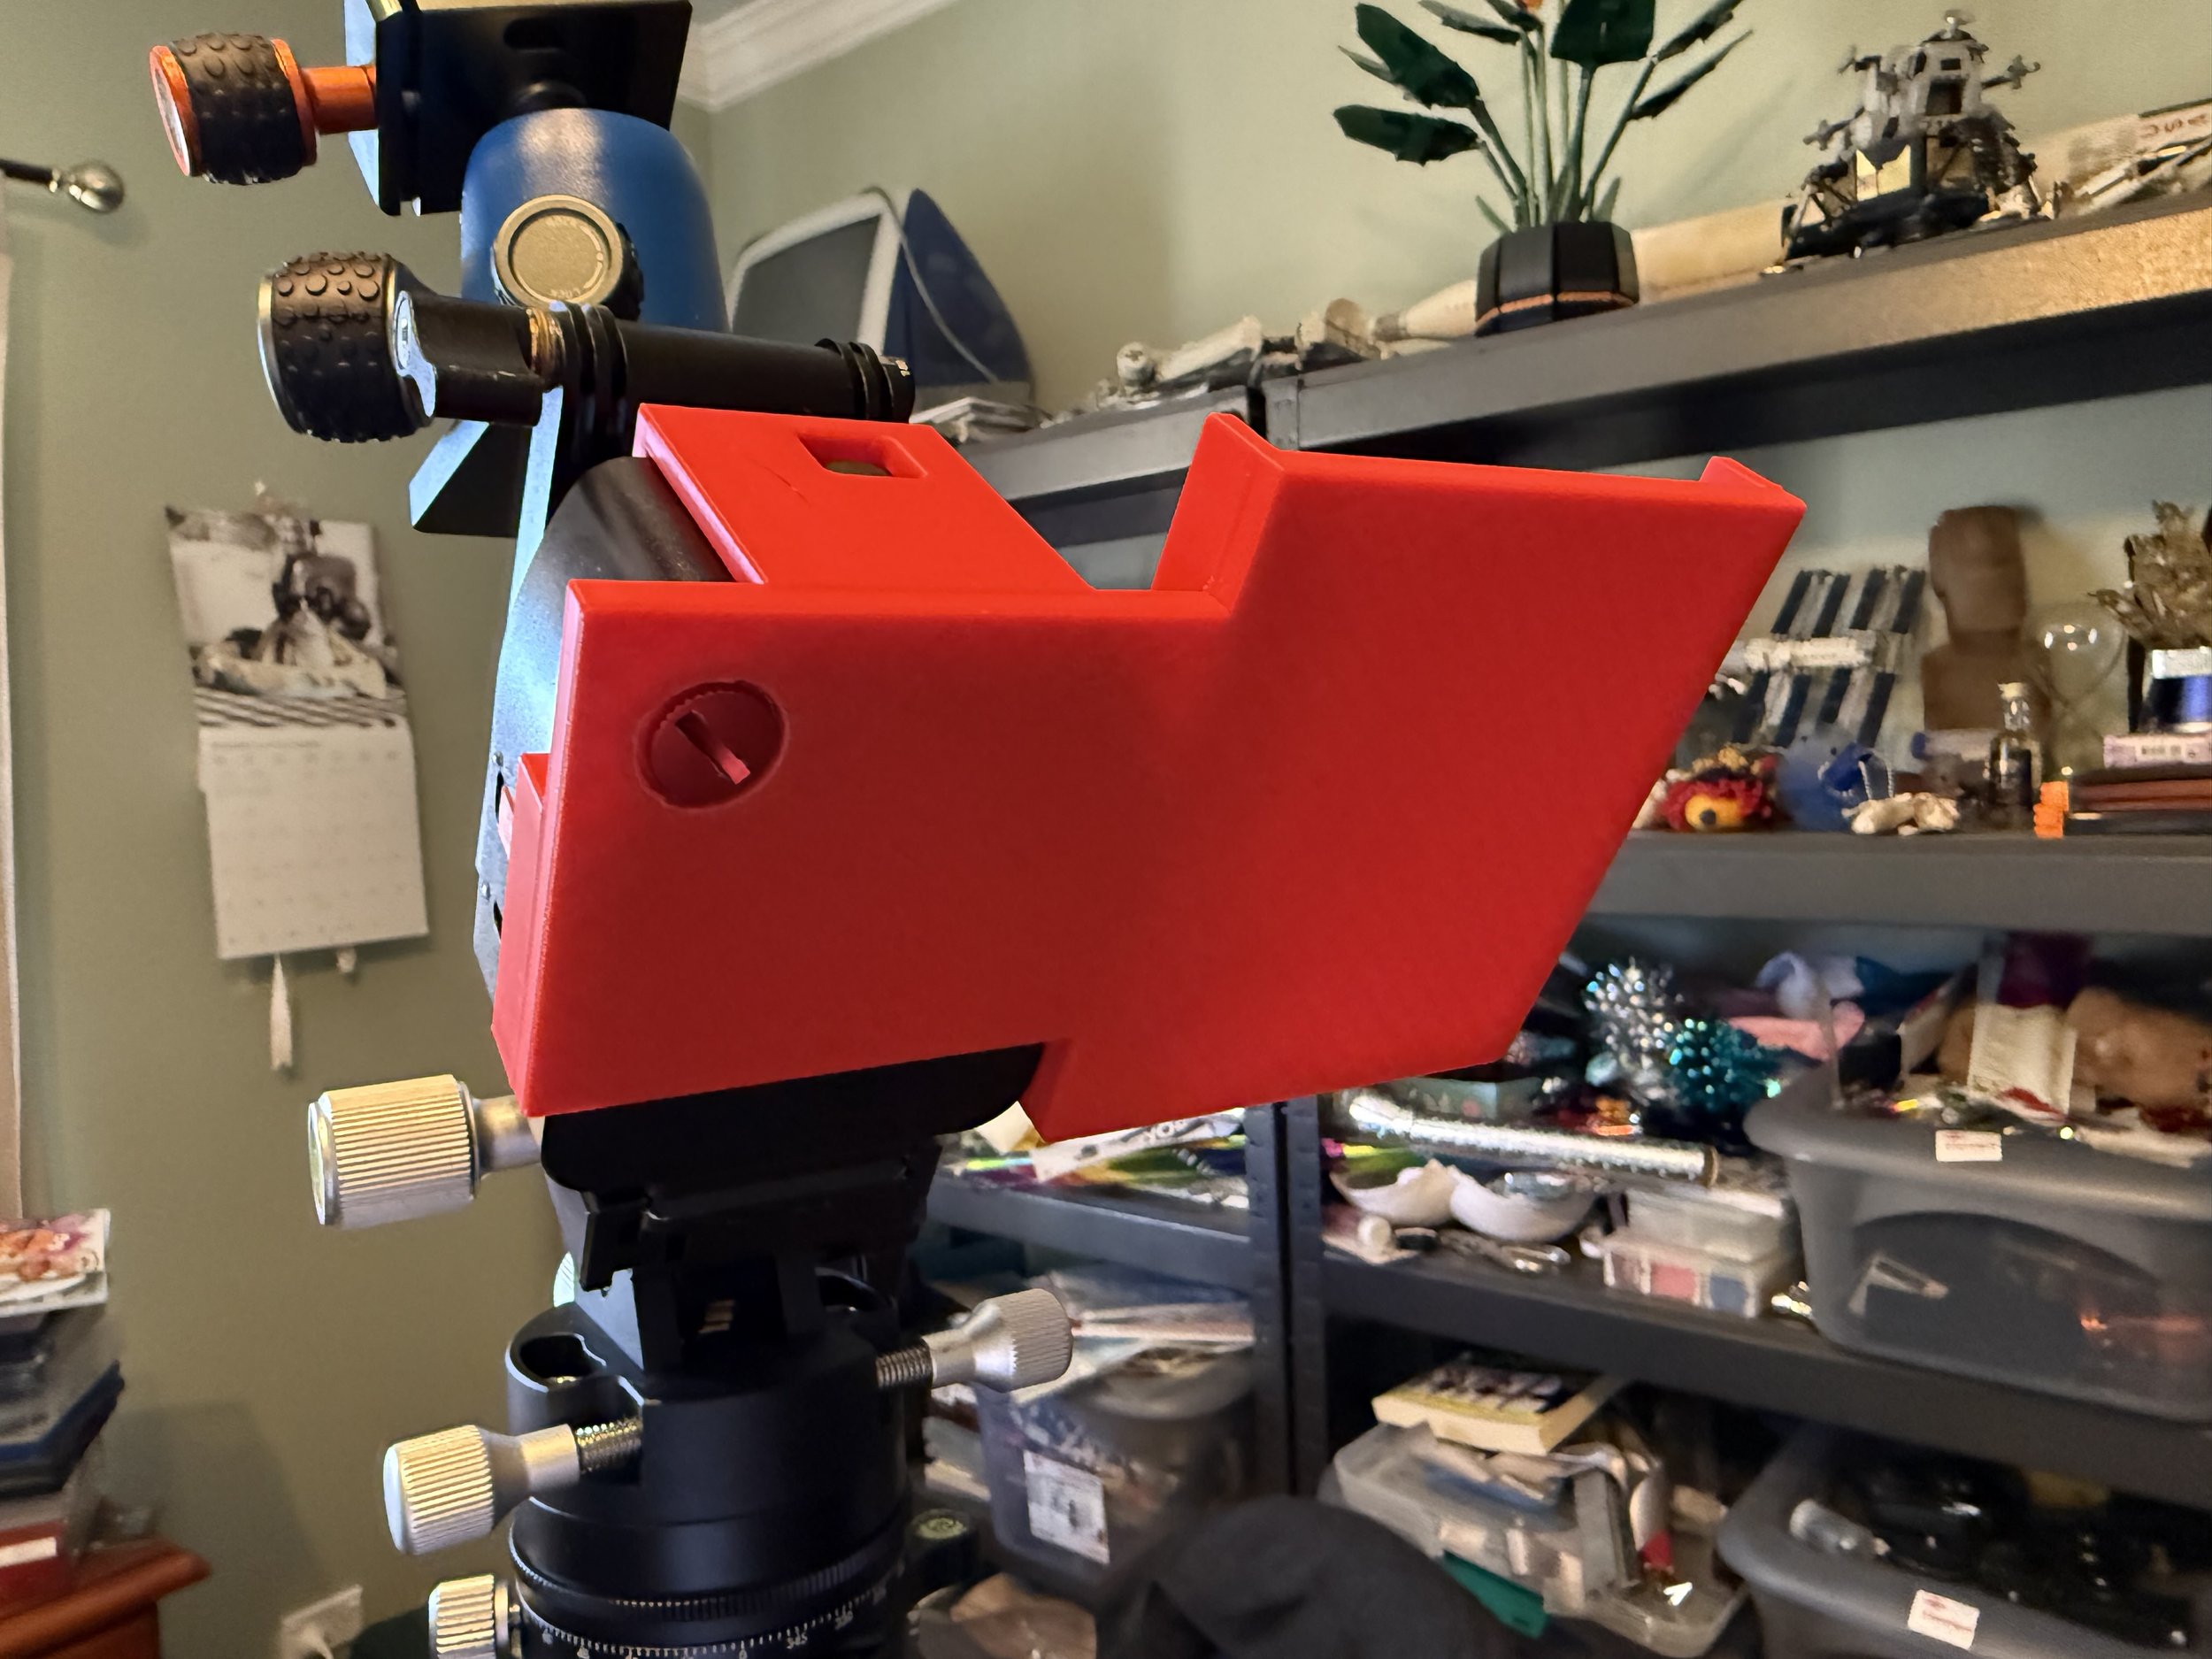
This version just slips over the body of the original MSM tracker.
Once again I am happy to share this with anyone who wants to print it up themselves. Just remember the following:
1. The phone holder has been sized to fit the normal sized iPhone 16pro in a standard apple case. I cannot comment if any other phone will fit (as I don’t have any other phones sorry), however the holder is 80mm wide internally and should hold most medium sized phones.
2. Unfortunately I have had some feedback that some phones have better compasses and inclinometers than others and so this may effect polar alignment so I cannot guarantee you will get as good results as I have been, but in most cases you should get a good enough result to do typical astro landscape work.
3. The orientation of this holder is for use with apps like Sky Safari Pro. For information on using these kinds of apps have a look at Richard Tatti’s YouTube videos (if you haven’t watched them and subscribed you really should, he is a great guy).
4. I am not after any payment for this design, just sharing it with like minded people in case it is useful. Happy if you give me a follow on instagram or Facebook page in return (https://www.instagram.com/eric_wilkes_photography/ or https://www.facebook.com/EricWilkesPhotography). But I do ask that you do not pass it on or upload the design to any sites for further distribution. If you know anyone interested just point them at me.
5. I will be updating the design as things occur to me so have a look at blog from time to time..
6. When printing, make sure you use supports, not doing so leads to issues with the overhangs and than the tracker may not fit.
7. Finally, get out, look at the universe, take some photos and have fun. It really is worth it.
Once you start.....
Yes, once you start designing brackets and other widgets it is hard to stop. A few people pointed out they preferred to use Apps such as Sky Safari to polar align and this requires the phone to be at 90 deg to the orientation I had in the previous design. It occurred to me that setting up for this would make it easier to create a more generic phone holder and escape the need for the Arca Swiss adaptor from MSM. So back to the drawing board (well CAD package really).
Nothing that will win design awards here, but it works really well as I was getting 3 minute exposures with a 40 mm lens in my backyard tests. More than good enough for epic astro landscapes.
This version grips the body of the Nomad itself and is secured with the back screw on the Nomad just to be safe.
It leaves the on switch and charging port free.
If you would like to get the print file red on.
If you do print it yourself, I used 20% infil and 4 walls in PLA just to add a bit more stiffness. You could possibly get away with less if you are using a stronger filament. Word of warning, not all phones are created equal and some have very average implementations of compass and inclinometers, so you may not get quite as good tracking result (you may even get better), but no matter what it should be fine for astro landscapes where we rarely need to shoot for more than a minute or so (unless you are using Ha filters, but that is a future blog).
A few things to note before you print this out.
1. The phone holder has been sized to fit the normal sized iPhone 16pro in a standard apple case. I cannot comment if any other phone will fit (as I don’t have any other phones sorry), however the holder is 80mm wide internally and should hold most medium sized phones.
2. Unfortunately I have had some feedback that some phones have better compasses and inclinometers than others and so this may effect polar alignment so I cannot guarantee you will get as good results as I have been, but in most cases you should get a good enough result to do typical astro landscape work.
3. The orientation of this holder is for use with apps like Sky Safari Pro, the previous version was suitable for PS Align pro which needs to have the phone at 90 degrees compared to this. For information on using these kinds of apps have a look at Richard Tatti’s videos (if you haven’t watched them and subscribed you really should, he is a great guy).
4. I am not after any payment for this design, just sharing it with like minded people in case it is useful. Happy if you give me a follow on instagram in return (https://www.instagram.com/eric_wilkes_photography/ ). But I do ask that you do not pass it on or upload the design to any sites for further distribution. If you know anyone interested just point them at me.
5. I will be updating the design as things occur to me so check on this blog occasionally..
6. When printing, make sure you use supports, including on the small recess at the back for the Nomad red screw.
7. Finally, get out, look at the universe, take some photos and have fun. It really is worth it.
Want a new bracket for polar aligning, may as well make it yourself....
While the way I was polar aligning I outlined early last year works well for me, I have wanted a way to do it with the phone actually mounted on the tracker and while there are solutions out there I was never quite satisfied. So decided I may as well design what I wanted and print one out.
Now this is never as easy as it seems and I am up version 7 now after spending hours watching YouTube to learn how to use one and then a second design package, realising my measurements were wrong, dealing with the simple fact I am not very bright, etc… But finally got to something that can be used, and took it with me on a shoot down near Meningie.
Above is a 60 second untracked and tracked shot done with a 20mm lens zoomed in by 200%. In short I think the alignment using the new bracket was pretty good. The image below seemed to work ok.
Now to start working on version 8!
Processing can be fun
A quick sped up view of what kind of editing is done when I put together an astro landscape. Have included lot of missteps and this is not meant to be a how to video, but just a taste. Hoping to set up a proper tutorial if enough people are interested as an online meeting soon.
Deep Sky Gear
As I have moved into more and more astro and nightscape photography my gear has evolved… a lot. So over the next few weeks I will start to list some of the equipment I use for different subjects. First up is my deep sky astro set up to capture images like the one of the tarantula nebula below.
The Tarantua Nebula, ASI2600MCpro, Askar80PHQ, ZWO AM5 mount, Antlia QB filter, ASIAir+, 18 x 10 min exposures
One of the reasons I love doing astro images like the one above (a mere 160,000 light years distant) is that I can actually do it from my suburban back yard. Even though I live in a light polluted neighbourhood (Bortle 5) with judicious use of filters and a bit of effort I can capture amazing images without having to travel (or loose that much sleep). Nightscapes and landscapes are still my first love as I love capturing the sky and the land together, but there is something deeply profound about looking so deep into the heaven above. However to it does require at least some specialist gear and below is the setup I am often using for nebulas and such like.
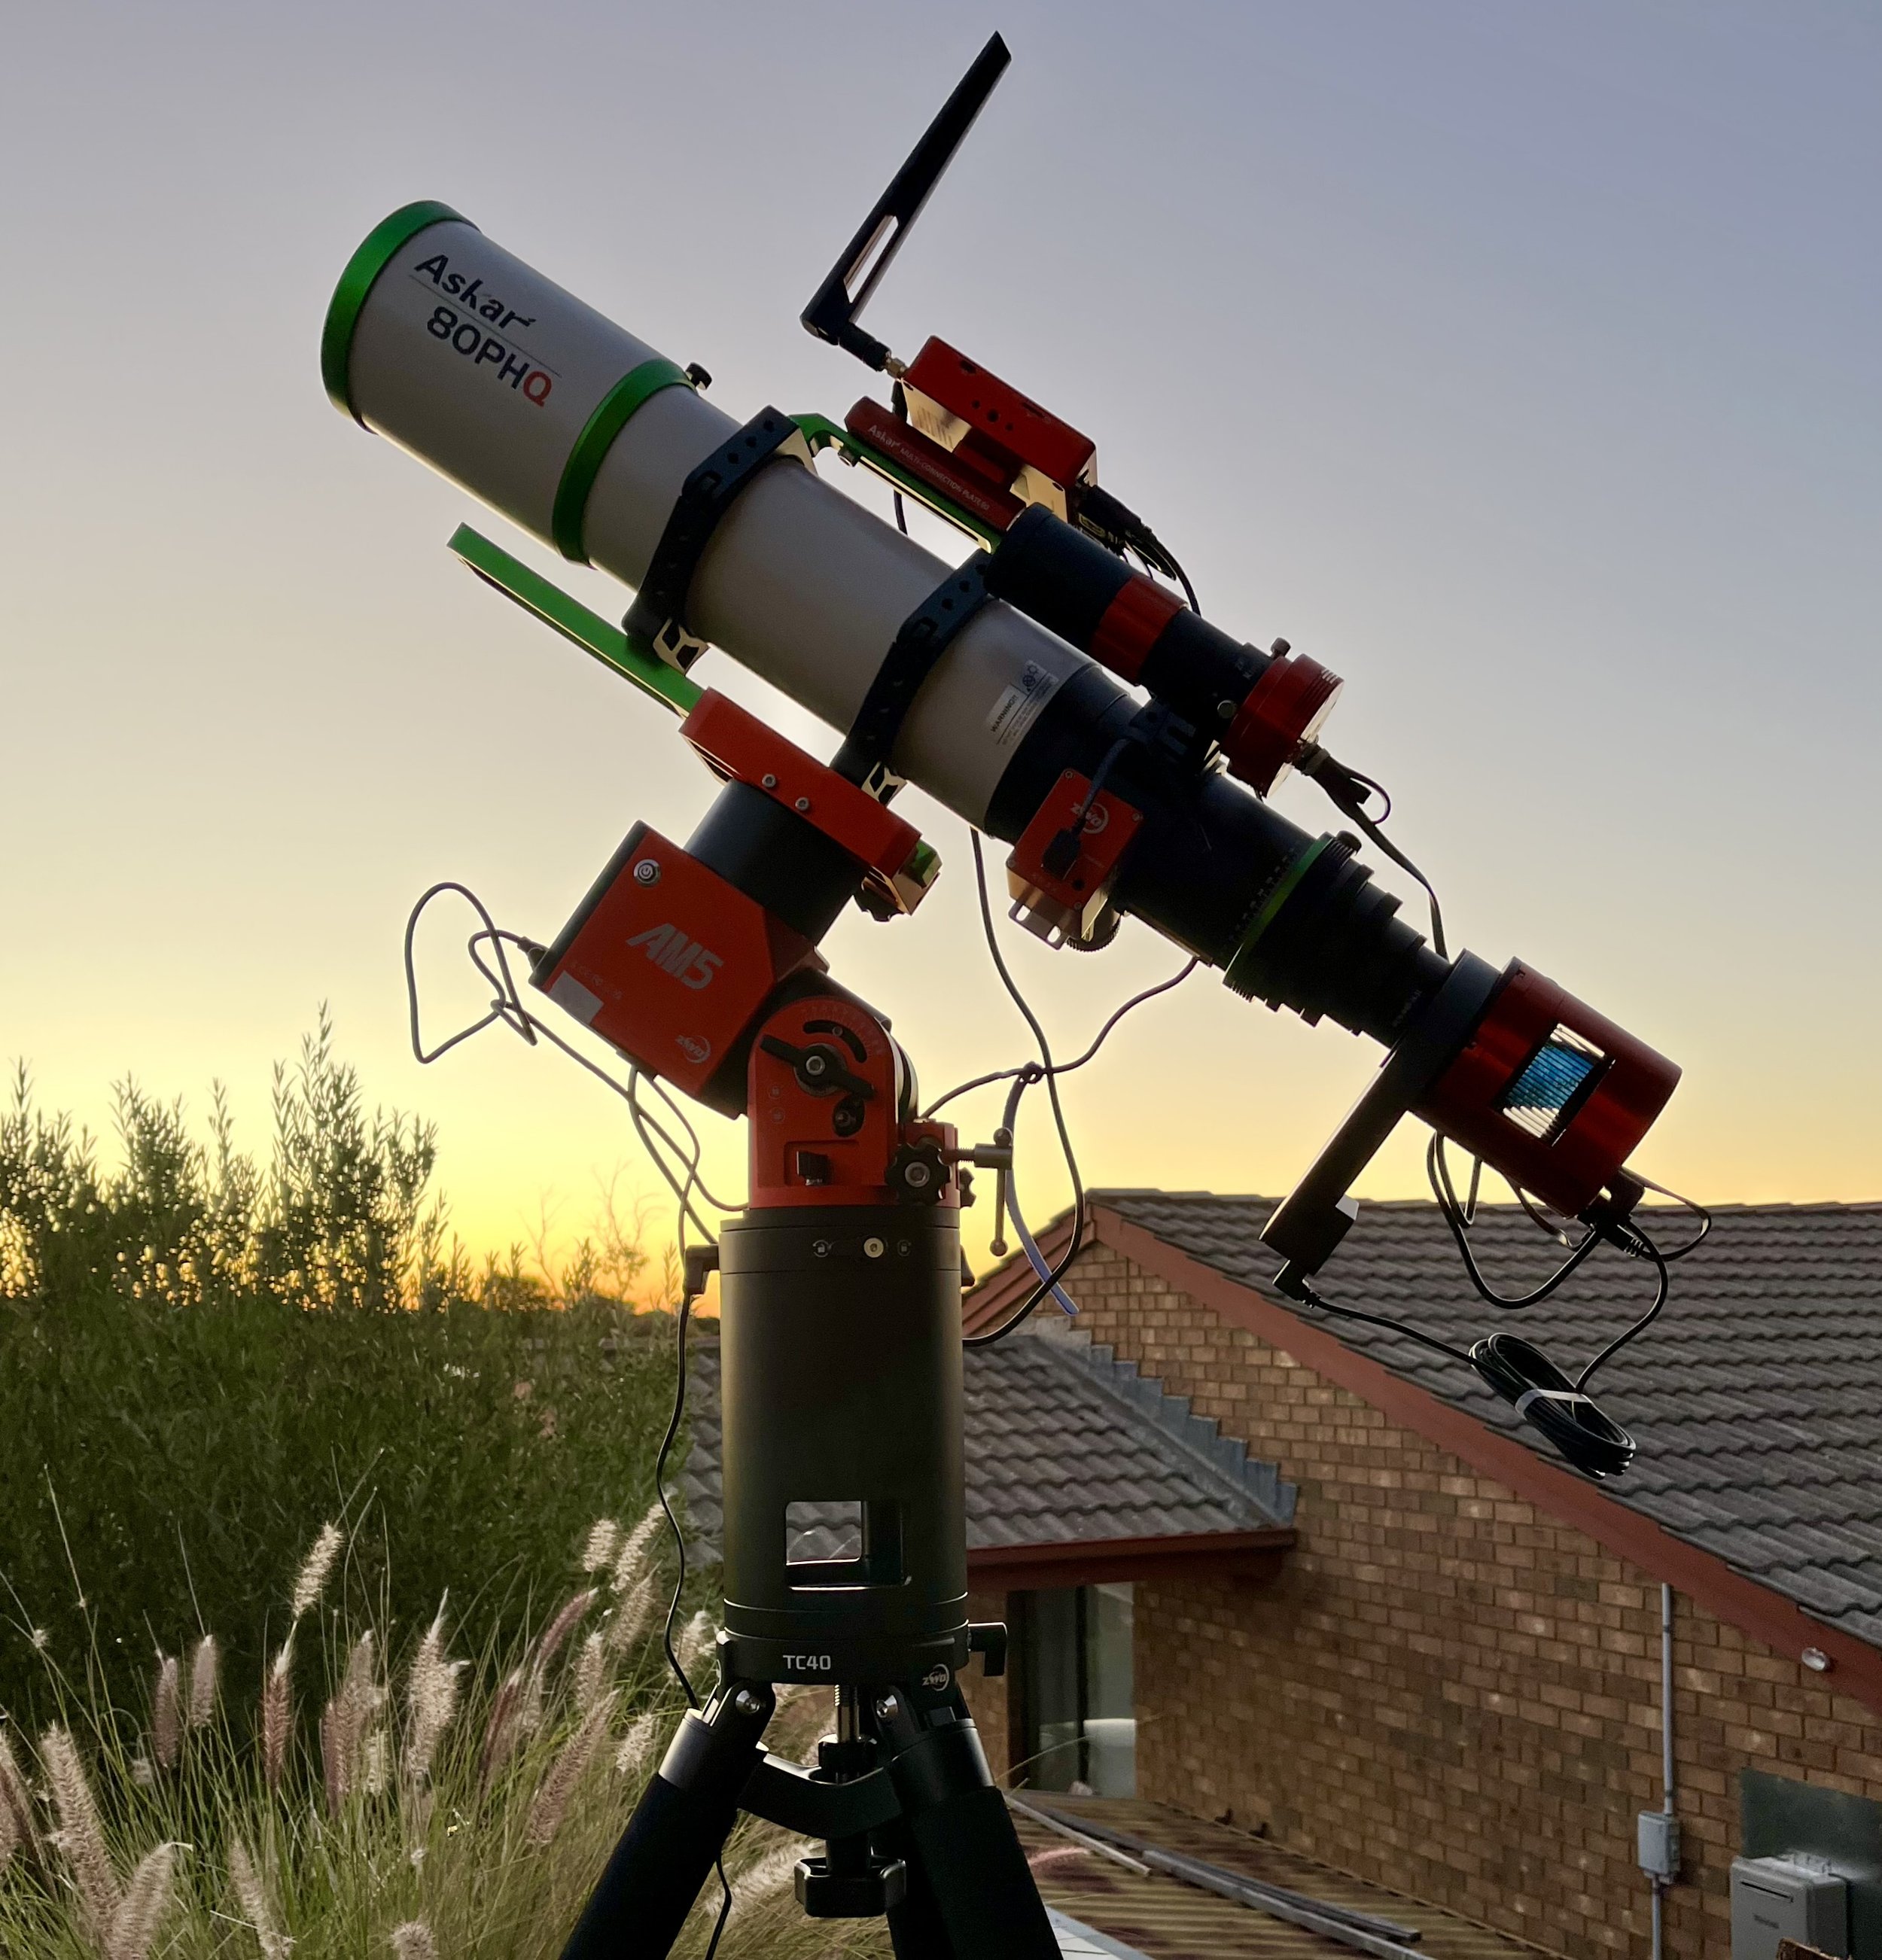
My Askar 80PHQ and AM5 setup.
The camera, a ZWO 2600MCPro. This is an full colour camera (with an apc cropped sensor in normal camera speak) and is the red cylinder hanging off the back of the scope. Very different to my landscape camera(s) in that it is essentially a sensor and some electronics with no viewfinder, storage, shutter or essentially anything that we normally associate with a camera, just a means to capture the light. The one thing it does have which a more run of the mill camera does not is inbuilt cooling. This means that when I am doing 10 minute long exposures (which I regularly do) it does not heat up leading to lots of (extra) noise in the image, I generally run it at about -10 deg C. This is not a camera you can use independently, it has to have a computer to control it and capture the data.
The lens, or more appropriately, the OTA (optical tube assembly, it is only a telescope when the mount is included) is an Askar 80 mm aperture unit with a focal length of 600mm and f ratio of 7.5. This is the equivalent of about 960 mm on a full frame normal camera, but its optical qualities are very carefully designed to get the maximum sharpness across the frame with the least possible distortion or chromatic aboration. Definitely not useful for everyday photography but awesome for photos of the night sky.
The mount, a ZWO AM5 harmonic drive mount. This is the red part connecting the black tripod to the to the white and green scope. It plays a really important part in that it keeps the lens and camera pointed at a single point of the sky cancelling out the earths rotation. It is incredibly accurate allowing exposures in excess of 10 minutes and without it such deep sky images would be impossible. Another nice feature of this computer controlled kit is that you can tell it the object in the sky you want the telescope to point at and it will automatically goto the object and keep pointing at it as long as you are taking images. Pretty useful when for the image above the total exposure time was around 3 hours (and I have done some images for 30 hours over multiple nights).
The computer, an ASIAir+. This is the little red box perched on the top of the telescope (I can call it that as long as I am referring to the scope and mount 😆) and it brings it all togeteher contolling the camera , the mount, collecting the data and finding things in the sky, all controlled from my phone. This little bit of kit makes astrophotography much easier as it lets me focus on what I want to photograph and not get to caught up in all the bits and peices.
The guide scope, a ZWO 120mm telscope and ZWO ASI120mm-s mono camera. This is the little mini scope and camera just below and behind the computer. Its job is to help the mount track the sky by measuring the motion of the stars and making minute adjustments to the mount so that it stays pointing accurately at the same objust in the sky. So yes there is actually two scopes and cameras involved.
The focuser, ZWO EAF. This is the little red box (yeah, ZWO has a thing about red for its gear) attached to the telescope just below the guide scope. This does the focussing for the whole set up. You can manually focus a telecope like this, but having a focusing motor like this allows the computer to do it for you and tweak it through the evening to adjust for temperature or filter changes, which can make a difference to the final image.
The filter wheel, ZWO 5 position, 2 inch electronic filter wheel. The black bit directly in front of the main camera. It can hold 5 different filters which I can change to suit the target I am shooting. The filters help cut out light polution as well as capturing specific wavelengths of light suited to different targets. For the image above I was using Antlia Quad band Anti-light ollution filter since there was a broad range of colours in the target, but I use some others as well depending on what I am shooting.
And really, that is all the important bits. With this I can capture hours of data over multiple nights, combining it to bring out those faint photons which have traveled hundreds of thousand of light years to fall on my yard in suburban Adelaide.
Star tracking while keeping it light and cheap(er)....
Ok, let’s get something out of the way first, photography and especially astrophotography is not cheap. It is a nightmare rabbit hole which never seems to end (see my last post from over two years ago). But that being said you really can take amazing astro photos with just an everyday DSLR or Mirrorless interchangeable lens camera and a tripod. Watch some of Richard Tatti’s YouTube videos and you can see what can be achieved without too much fuss. But to take the next step to get images even more spectacular a bit of extra equipment can help.
Canon R8, RF35mm 1.8 macro, ISO1600, f/2.8, 121 seconds, MSM Nomade tracker
The major problem we face is the night sky is, well, dark. This means that to get as much light as possible we want to use extended exposures times. Rather inconveniently (for this purpose, it is rather convenient on many other levels), the earth moves which make the stars appear to move from our point of view (the stars move as well, but that is me being pedantic and really does not impact what we are trying to achieve). This means that depending on lens focal length and sensor size we are often limited to shutter speeds as short as 10 seconds, and rarely more than 30 seconds with a very wide lens if we don’t want the stars turning in to curving lines rather than pinpoints of light. There are heaps of apps out there which can tell you the optimum shutter speed to use for your camera lens combination (I use photopills).
However if we don’t want to be limited by this we need something that can rotate our camera in such a way that it cancels out the rotation of the earth. Luckily equipment to do this is available and for nightscape photography generally is called a star tracker. They come in all sorts of shapes, sizes and capabilities, but essentially do the same thing. You point them at the celestial pole (so they are aligned with the earths rotation) and then mount your camera on it and they slowly spin your camera in the opposite direction to that the earth is moving. Currently I use an incredibly powerful unit called the Benro Polaris which can not only track the stars, but point the camera automatically at particular stellar objects and automatically create panoramas while tracking the stars. It is very cool, but it is not particularly small, simple and definitely not “cheap”.
I have wanted something much cheaper and portable that I could use with a small camera and lens for those times I am travelling or just don’t feel like dragging out the big guns. For this reason I have decide to give the new Nomade (their spelling not mine) from Move Shoot Move a try. Up front declaration, I bought it and have absolutely no association with the company or any contact with them other than paying for the unit.
From bottom to top, my leofoto tripod head, the nomade traker (the black box with orange switch), and MSM Z-bracket, a 3-legged thing ball head, Canon R8 with 35mm lens and a Hahnel remote camera trigger.
The set up above was essentially all I used (along with my phone) to take the image at the top of the blog. I won’t quote any prices, but this whole set up is way cheaper than the rig I use for most of my photos.
So what is the process using this.
Level the tripod. Really this very important and if you don’t it will create lots of grief in the next step. I use a tripod with a levelling head, have done so for years because I love them and use them in all my photography. They just make life so much easier, especially for panoramas.
Align the tripod head with the south celestial pole (because I am in Australia, in the Northern hemisphere it is the north celestial pole which is so much easier because of the presence of the Pole Star). Now this is generally a pain in the butt to do in the southern hemisphere because we don’t have nice bright polestar to point at. We can align using a group of stars called the Octans, but they are very faint and you essentially need a small telescope (which I did not buy for this tracker) to align with them and it takes a bit of practice. But all is no lost, we can use one of a number of apps on our phone to do the job in a way that is good enough for 2 minute exposure using 35 mm and wider lenses. The set up I use to do it is shown below, but really suggest you watch Richard Tatti’s excellent video on how he does it as it is a much better explanation of how to achieve it than I could ever give. https://www.youtube.com/watch?v=5D_n6ZtsZ4o The App I am using is called PS Align Pro, but Stellarium is another really good option that works. Honestly, it takes all of 2 minutes with a little practice.
The bracket I use to align my tripod head with the south celestial pole, this in was purchases through MSM, but there are heaps of brands that you can use.
The PS Align Pro app, if you use it this part is found in day time alignment as a little sun icon at the bottom of the screen.
3. Mount the tracker on the tripod. Important point here, while doing this do not bump the tripod, otherwise you will knock it out of alignment and will have to start again. This is one of the major challenges for someone as clumsy as me.
4. Mount your ball head and camera on the tracker as seen in the image above. I use a z bracket between the tracker and the bullhead as it makes it a lot easier to level the bullhead for panoramas, but it is quite OK to attach the bullhead directly to the tracker.
5. point your camera at whatever you want to photograph and have at it! Really it is that simple. As long as you do not move the tracker or tripod you can point the camera in any direction you want!
Once you have got it all set up I generally do some test shots at 30, 60 and 120 second to make sure I have not knocked anything off and to see show good the tracking is. 30 or 60 second images can give amazing results, but I have regularly used this unit now with 2 minute exposures when I want those really bright details and contrast. A remote release is useful, but I often use my phone for that purpose and many cameras also have built in bulb timers these days which let you go beyond 30 seconds.
And that is all there is to it. Yes, post processing of astro images is rarely “straight from the camera” and that is a whole other complex and lengthy topic (which I am willing to discuss if people are interested). But you don’t have to be a PhotoShop maestro to do it and if the original image is not good, well it is much harder to get a great outcome.
Let me know if this help you at all or if I can add anything else.
Going down the Astro Photography Rabbit Hole!
It all started innocently enough…..
The Orion Nebula, light from this takes over a 1000 years to reach us and is an obvious beginner target as it is large, bright, easy to find, can be captured with relatively simple gear and is unbelievably spectacular.
After chasing images comet Leonard over the Christmas break I started thinking about all those other things in the night sky I had heard about. I love shooting the Milky Way, combining it with landscapes to get images that I love, but there are a lot of smaller and dimmer objects in the night sky that with just a little more effort can provide you with absolutely amazing images. So I gave up sleep, friends, my savings and the last remnants of my sanity and started down the ridiculously deep rabbit hole that they call deep sky astrophotography.
This blog is definitely not going to be a how to class, there are a huge number of excellent YouTube videos that give great information on the topic, I now I have watched enough of them to melt my brain. If you are interested in a play list of ones I would recommend just drop me a line.
Rather this is just a quick overview of the evolution of the gear that I have used and am using currently. I say currently because the hunt for deep sky objects definitely leaves you wanting more. The gear you use is not particularly any more expensive than the good quality regular camera gear, often cheaper. It is just way more specialised. Anyway, hopefully this blog will go someway to answering the questions I get whenever I post an image like the one above on social media.
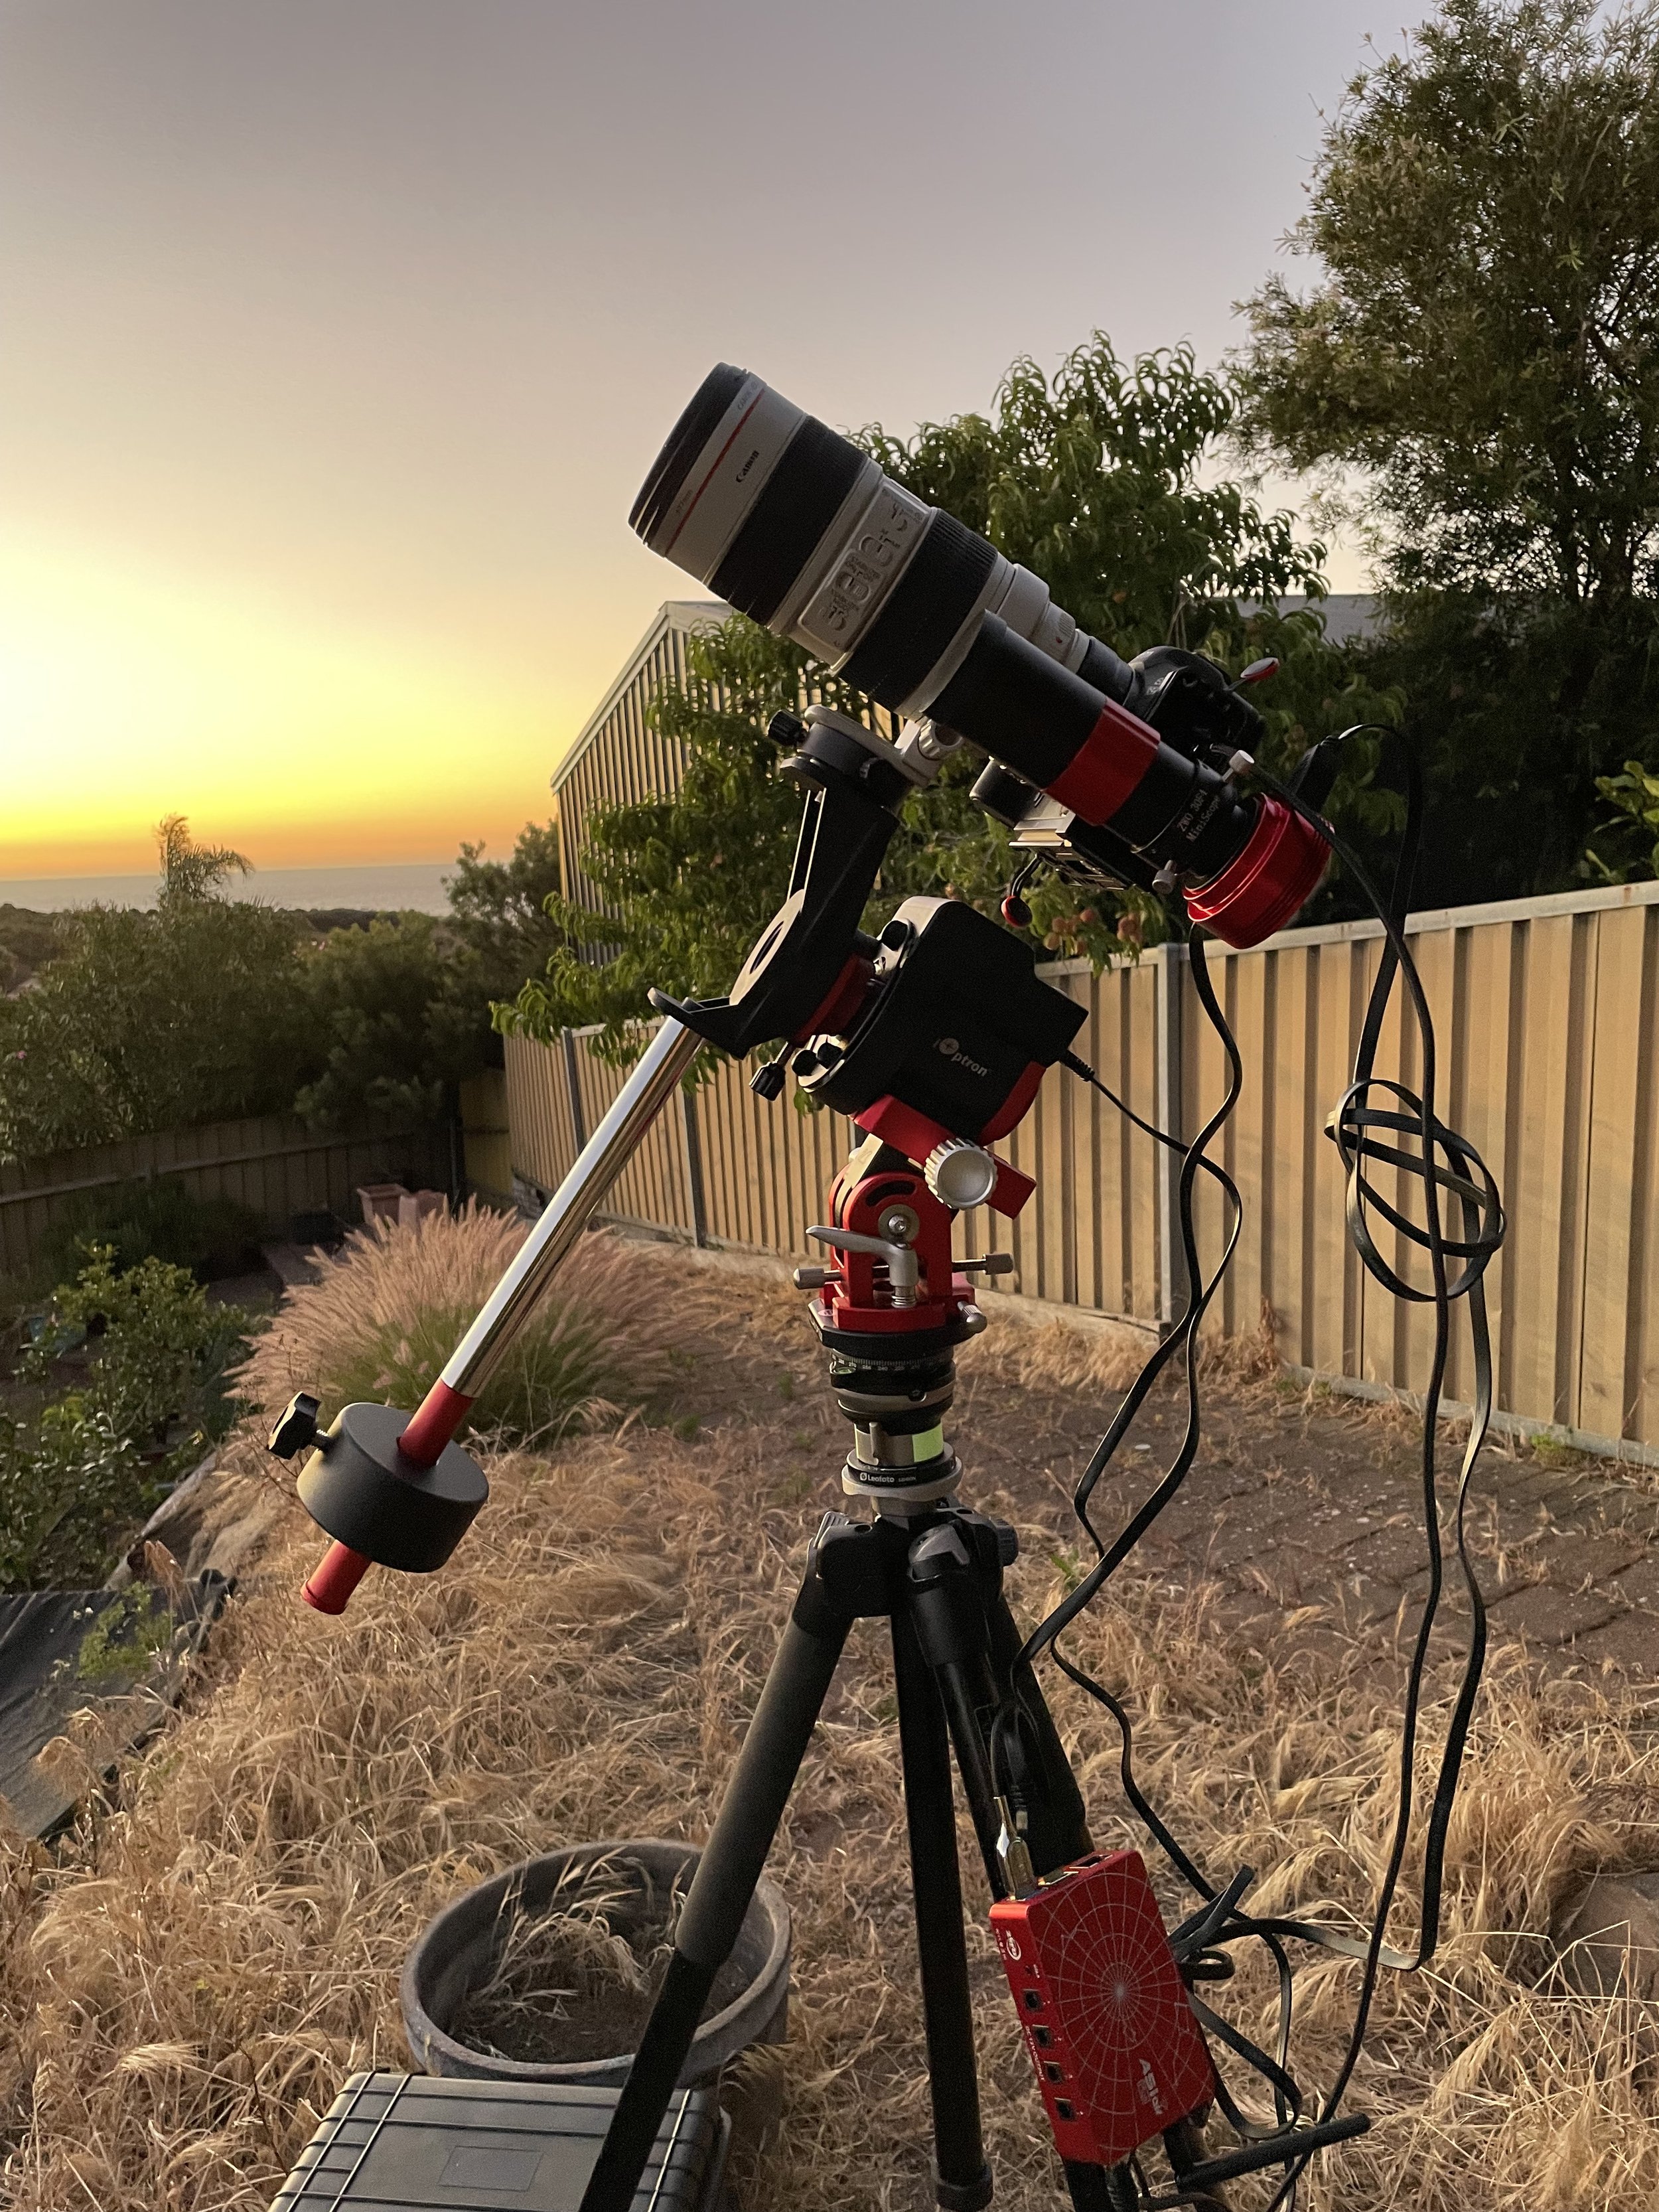
My original rig for trying to capture the deep sky (and the comet). Essentially what I use for Milky Way landscape images, just swapping out my wide angle lens for a 100- 400 mm zoom. Using this alone, in a decently dark sky site, is enough to capture a great image of Orion. Ioptron Skyguider, Canon R5 and ef100-400mm zoom.
Using the basic setup above, a star tracker and a decently long lens, you can get nice images of Orion and some of the other bright objects (it is pretty cool the first time you point a long lens at Jupiter and see its moons, bit tiny to photograph, but still one of those moments). You need to do image stacking to get rid of noise and light pollution is a total pain so travelling to dark sky sites helps, but you can get nice images.
However a simple star tracker like the above really struggles by itself to get longer exposures when with long lenses without star trails becoming evident. So the first upgrade is to improve this by adding what is called a guiding camera. This is a second small camera hooked to a computer and telescope that tracks stars and makes tiny adjustments to the tracking to make up for errors in the equipment and polar alignment. Using this kind of set up makes exposures of over two minutes (some people can get 4 or 5 minutes) possible with the above gear. These longer exposures are what you need when trying to collect the relatively scarce photons that have traveled 8000 light years or more from something like the Carina Nebula to our insignificant part of the our galaxy.
The addition of a guiding camera and computer can massively increase the length of the exposures you can take, and also has the advantage of making polar alignment way easier. Here I am using a dedicated astro computer in the little red box on the tripod leg, but any windows laptop will do the job.
You still need to collect lots of images and stack them. You also need to learn about calibration frames that you take as well to compensate for sensor noice, thermal noise and the imperfections of your optical system (Milky Way landscapes are definitely easier). Once set up, however, this gear can take really amazing images of deep sky objects, especially from dark sky locations.
So did I stop here, as any sensible and reasonably sane person would, no. Being the kind of person I am I began to get frustrated by things like:
the thermal noise generated by my R5 sensor (starting this process in a South Australian summer where overnight temperatures can tay above 30 degC occasionally was probably not that bright),
the imperfections in my lenses which while excellent for my daytime photography were not quite as satisfying when everything you are imaging is a point source of light
and the actual frustration of finding small faint objects in the night sky (the sky turns out to be a very very big place when you are looking through a 400 mm lens).
So began the mind melting process of going blind watching YouTube videos, reading huge numbers of forums and blogs and searching for second hand gear or great deals (and borrowing some thing from generous friends). All to set up a basic astro rig for semi deep sky objects.
My current astro set up, goto mount (Ioptron CEM26), 250mm f4.9 telescope (redcat51), cooled colour camera (ASI183mc pro), guide camera and scope and dedicated astronomy computer (ASIAir plus). Is this going to be the end of this process, well…….
Firstly I obtained a goto mount. These amazing pieces of gear not only track the movement of the stars, but using either the hand controller or an attached computer, will point your telescope directly at the object of interest and then stay locked onto it as the earth moves under the sky (really useful for someone as impatient as me).
Next was a dedicated astro camera. This is essentially a small digital sensor with a massive cooling unit attached to the back of it. No LCD screen, or controls either for that matter, all managed by a seperate computer. However it can cool itself down to -10 deg C or less on a warm summers night and is designed to put things like light pollution filters between it and the lens. Totally useless for my next landscape or product shoot, but it does give amazing low noise images when collecting images of the the night sky.
Then there is the telescope / lens (it says on the box that it can be used for normal photography, not going to replace my canon L glass any time soon). A 250 mm fixed 4.9 aperture telescope with amazingly clear optics. Actually less reach than my 400mm, but given that the camera sensor is much smaller than full frame it works out about the same.
Finally round it out with the guide camera and scope that I had acquired before and a dedicated mini computer that manages all these items and can be controlled from my iPad or phone (I hate cables and windows laptops) and I could really start acquiring data (the astro community talks about data and not photos it seems, probably to make it sound more scientific and justify those long nights alone :-) ).
Eta Carina, over 8000 light years away but huge in our souther sky. One of those red patches we often see in Milky ways shots. Mind blowing when you first see it come up on your computer as you take the images.
Is this all there is to taking deep sky astro images, not by a long shot. The post processing when you are collecting 10’s if not 100’s of images to make up the single final image is another whole learning experience. But I may save that for another blog if anyone is interested.
Is this the end of my equipment hunt for this particular area of photography…. probably not.
An obsession with a comet
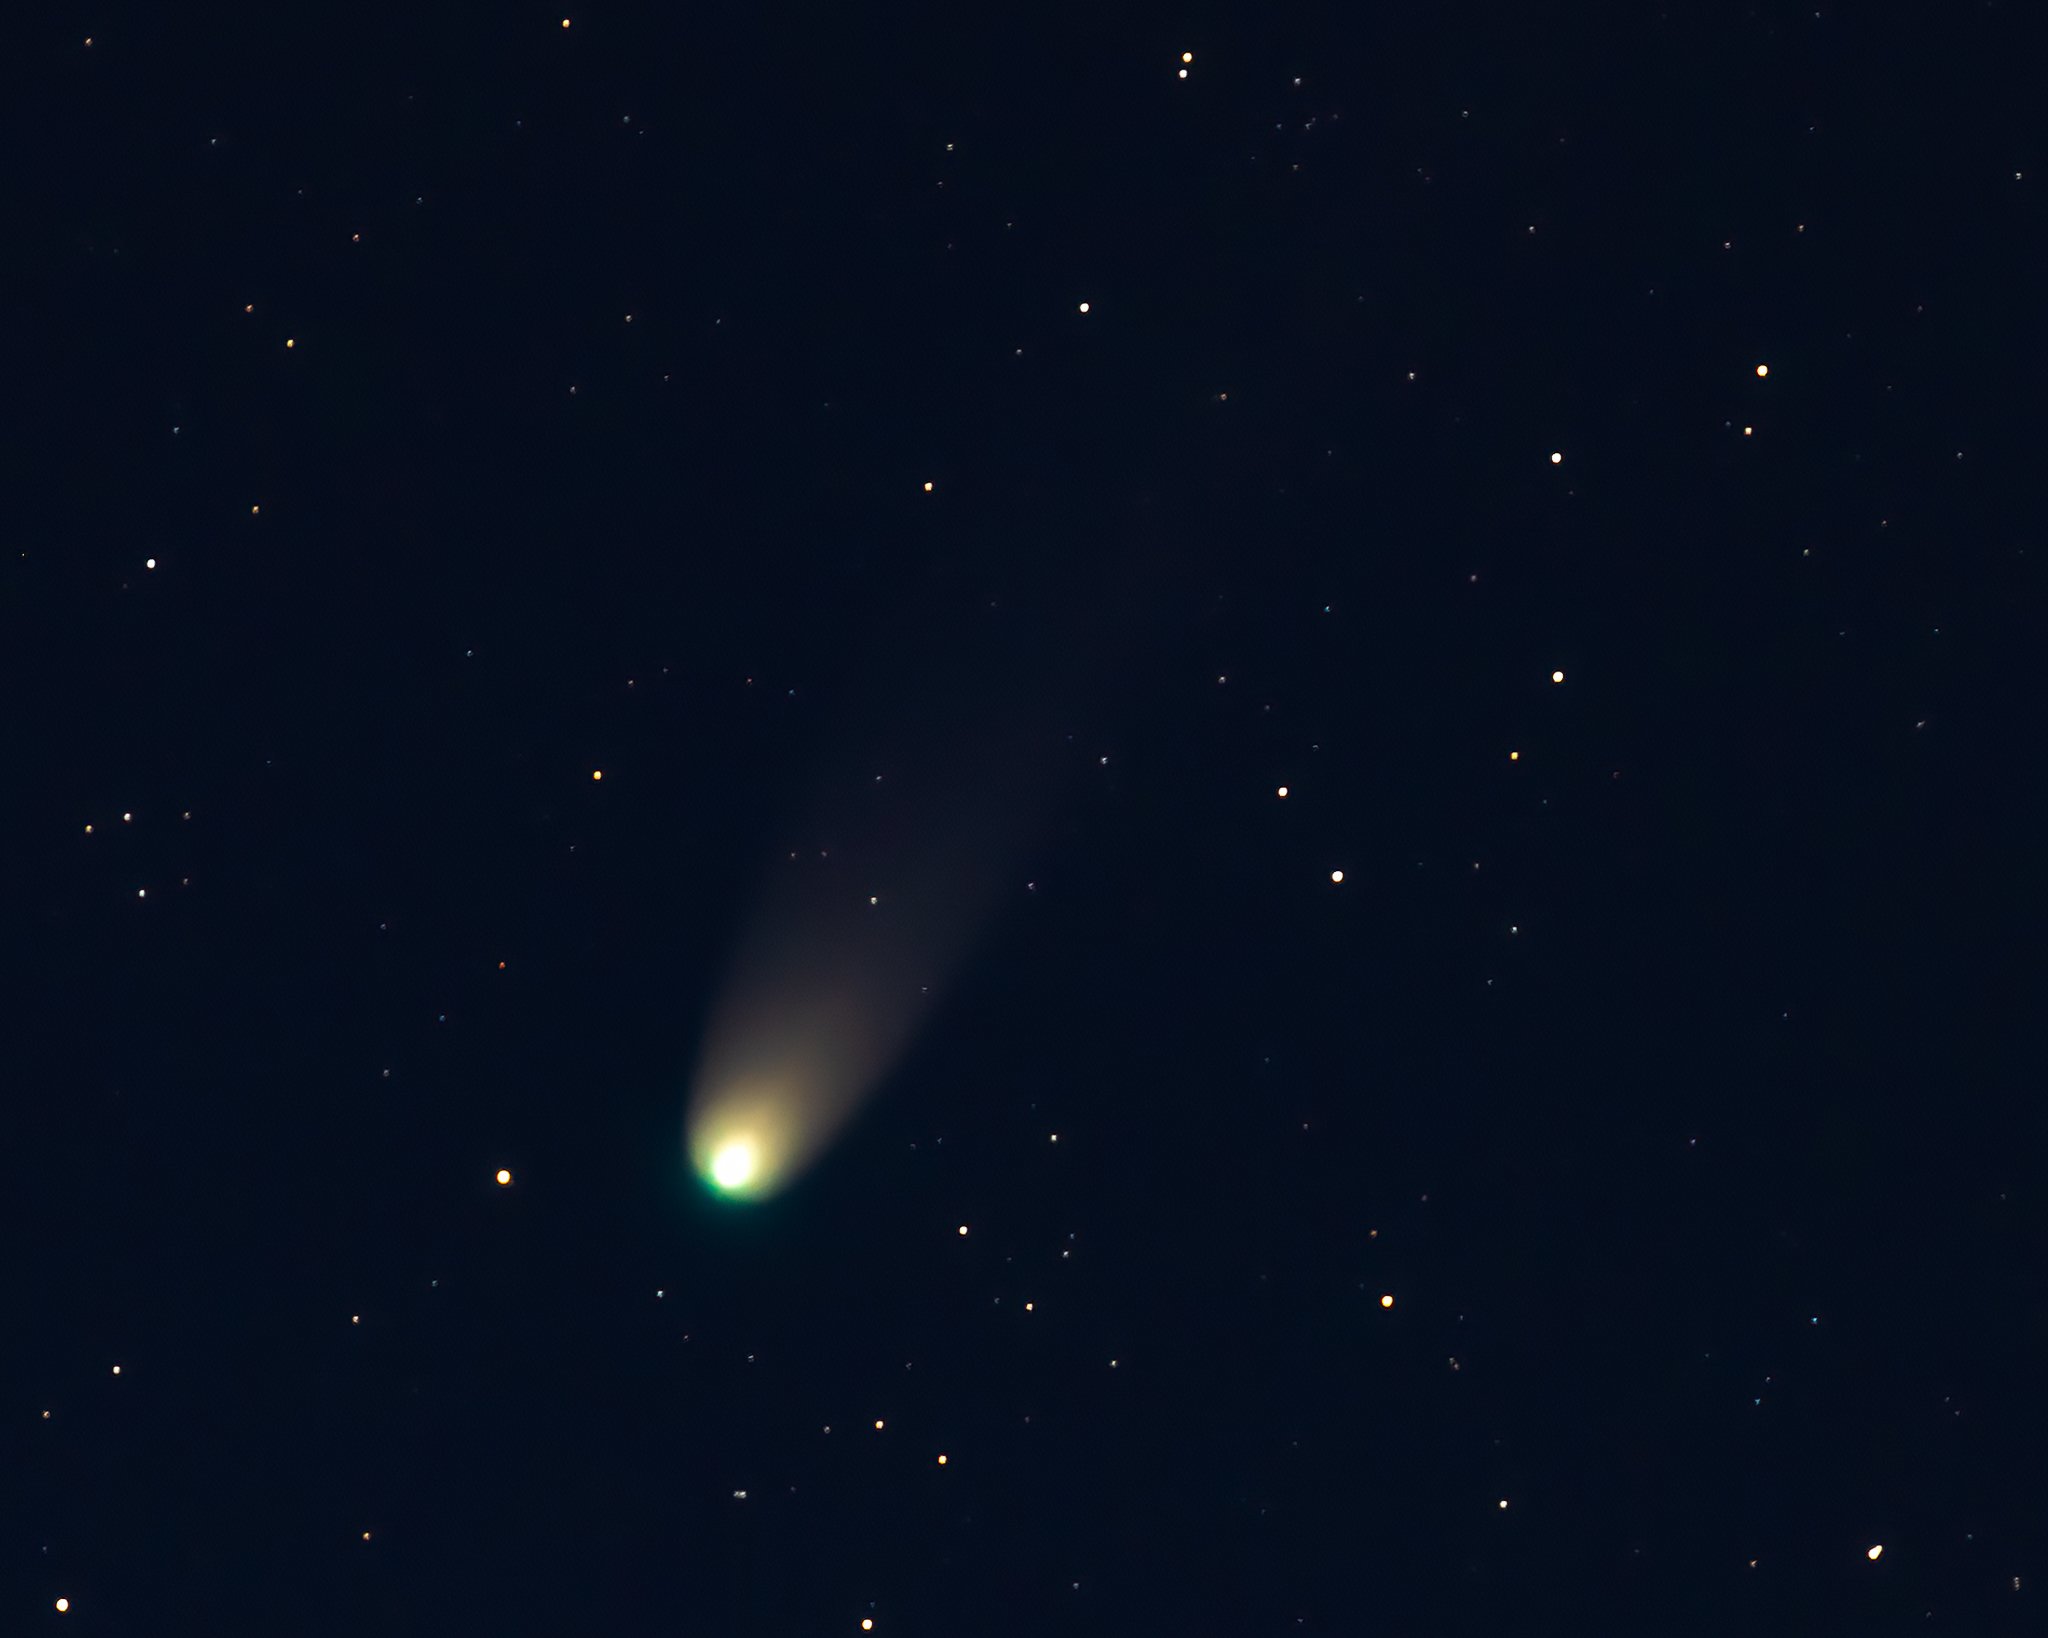
It started off innocently enough, can I photograph that comet they have been talking about?
What I hope is the final image that I will be happy with……
The process to getting here was a bit more complex than I planned, and definitely became a bit of an obsession. Not much text in this blog, but just the progression of the images.
First effort, realistically I was just happy to find it and getting any image at all.
Just in case you wondered, this image is is roughly at the normal angle of view with the comet circled in red, this is also from a much darker nearby location than all my other images which were battling the light pollution in my backyard. Really, it is not that easy to find and see with the naked eye
After seeing other efforts on the web, went back to it a few days later determined to get someone a bit more comet like. Got serious in using my star tracker.
Next it was getting more images to stack and learn how to post process, happy to see structure beginning to appear in the tail.
Decided to get more serious about this and brought out my new goto tracking mount, nice thing about this is that being computer controlled I did not have to work as hard to just find the comet :-) Also let me use my bigger 400mm lens
Was starting to get excited as I began to see real structure in the tail, but was still sure I could get more. Time to try some different processing software and a very steep learning curve.
This is probably my favourite version of my efforts, very similar effort to the previous image but after learning a huge amount about processing these kinds of images. This is the image that is printed and hanging on the wall. But I wanted to capture more of that amazing tail.
So close, but I thought I could do better if I could get my understanding of how to do calibration frame done properly.
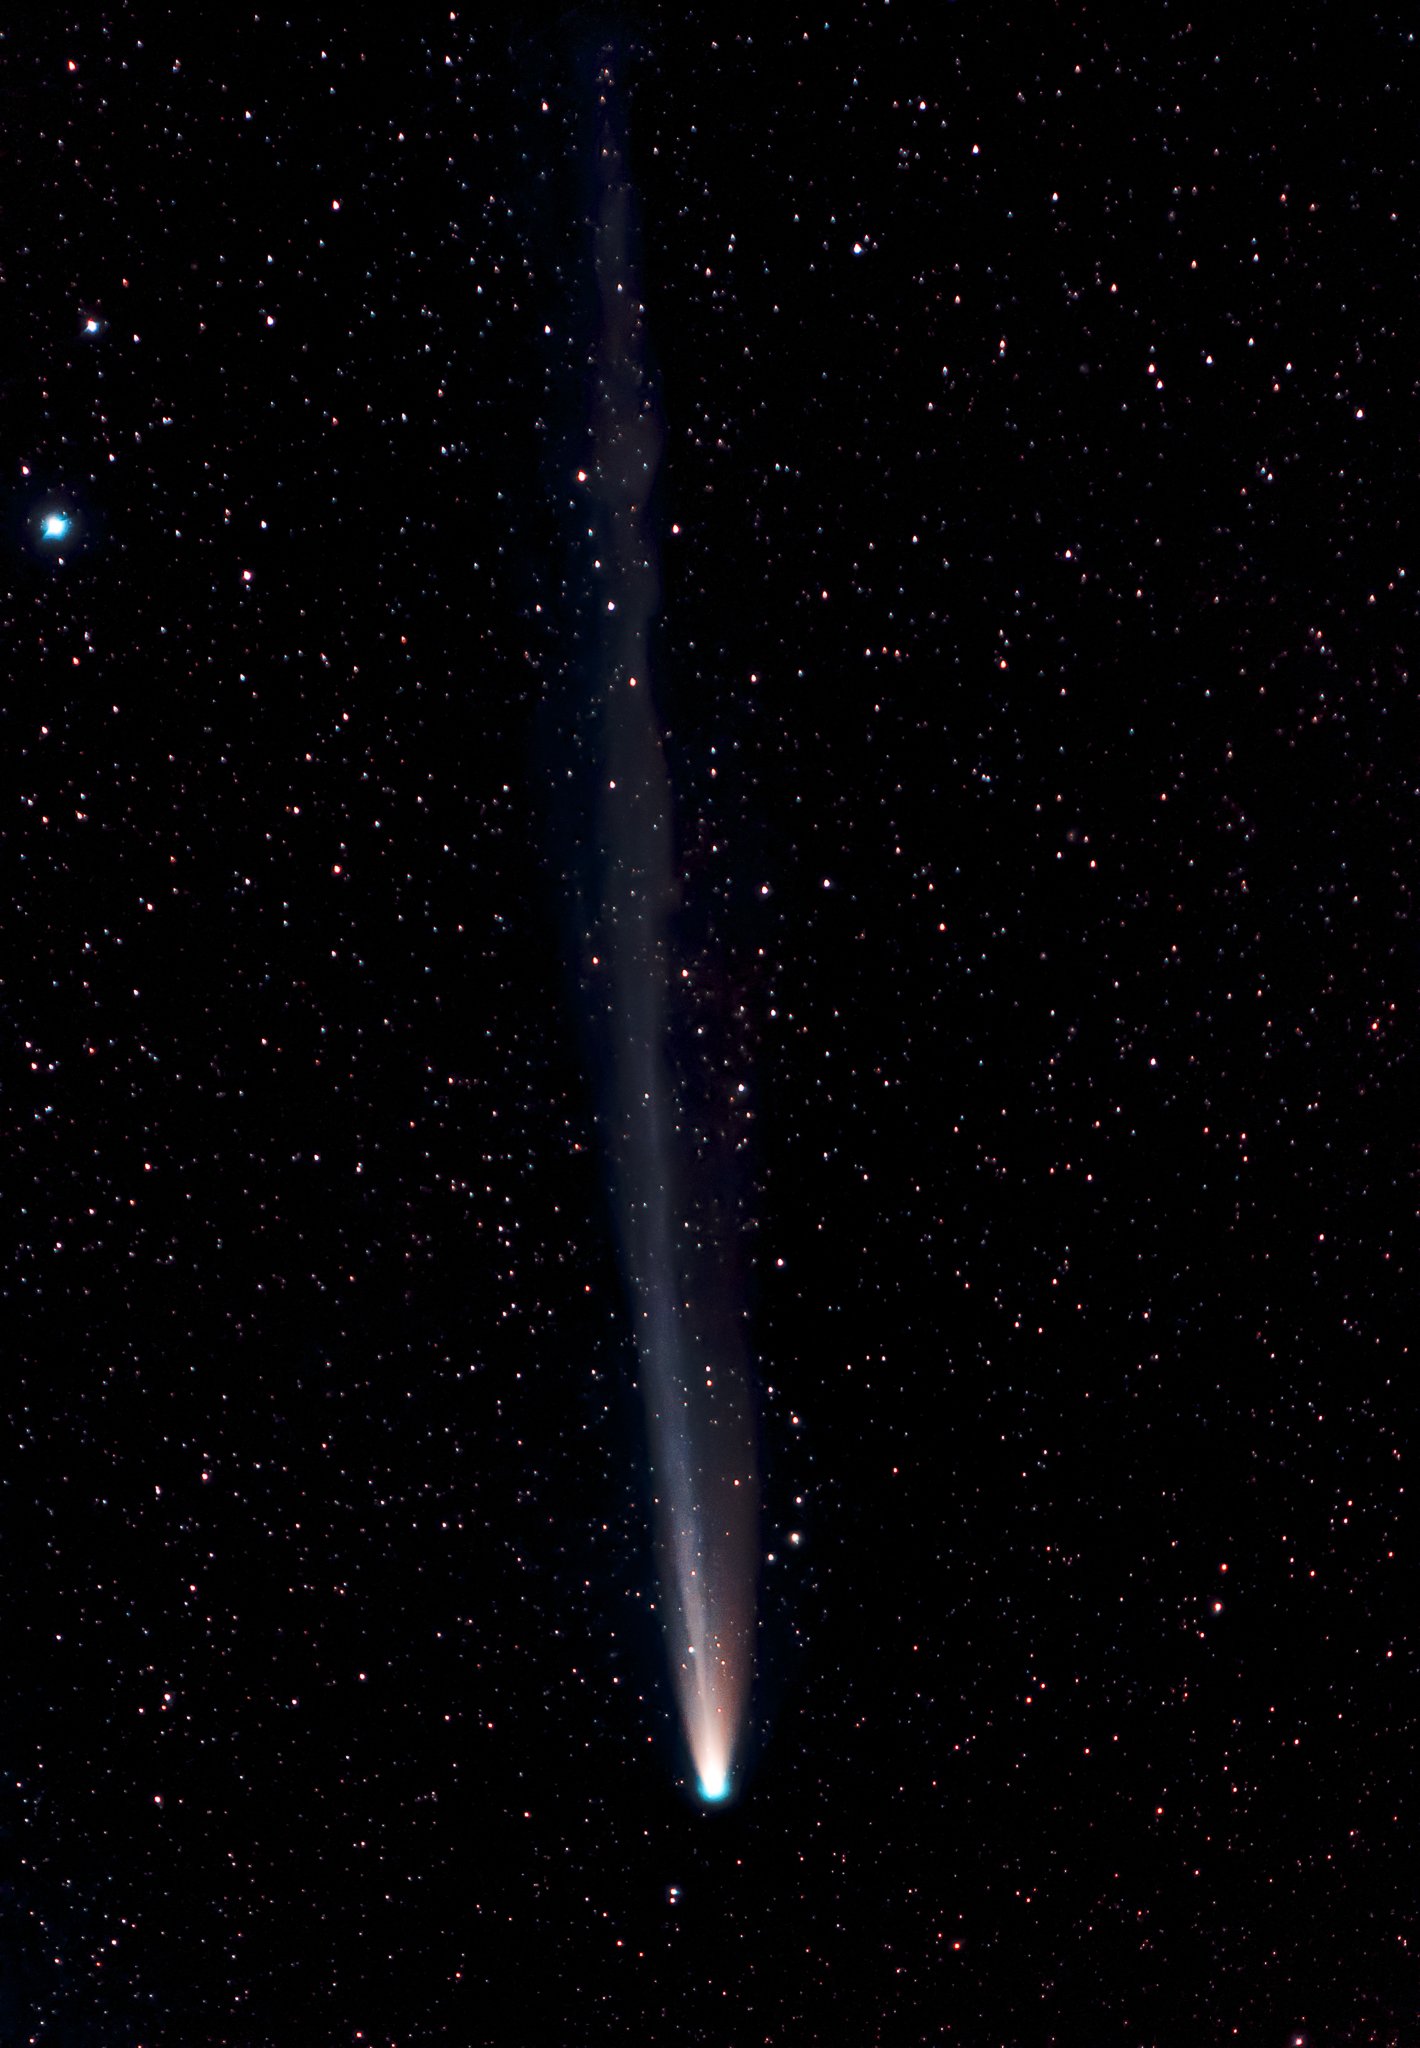
The final effort, I hope. This image is composed not only of 30 normal images stacked, but actually a further 90 calibration images to remove all the noise generated by the temperature, the sensor and the lens. It is not a perfect astro image and is nothing compared to many out on the web, but I’m pretty happy.
Milky Way Over Second Valley
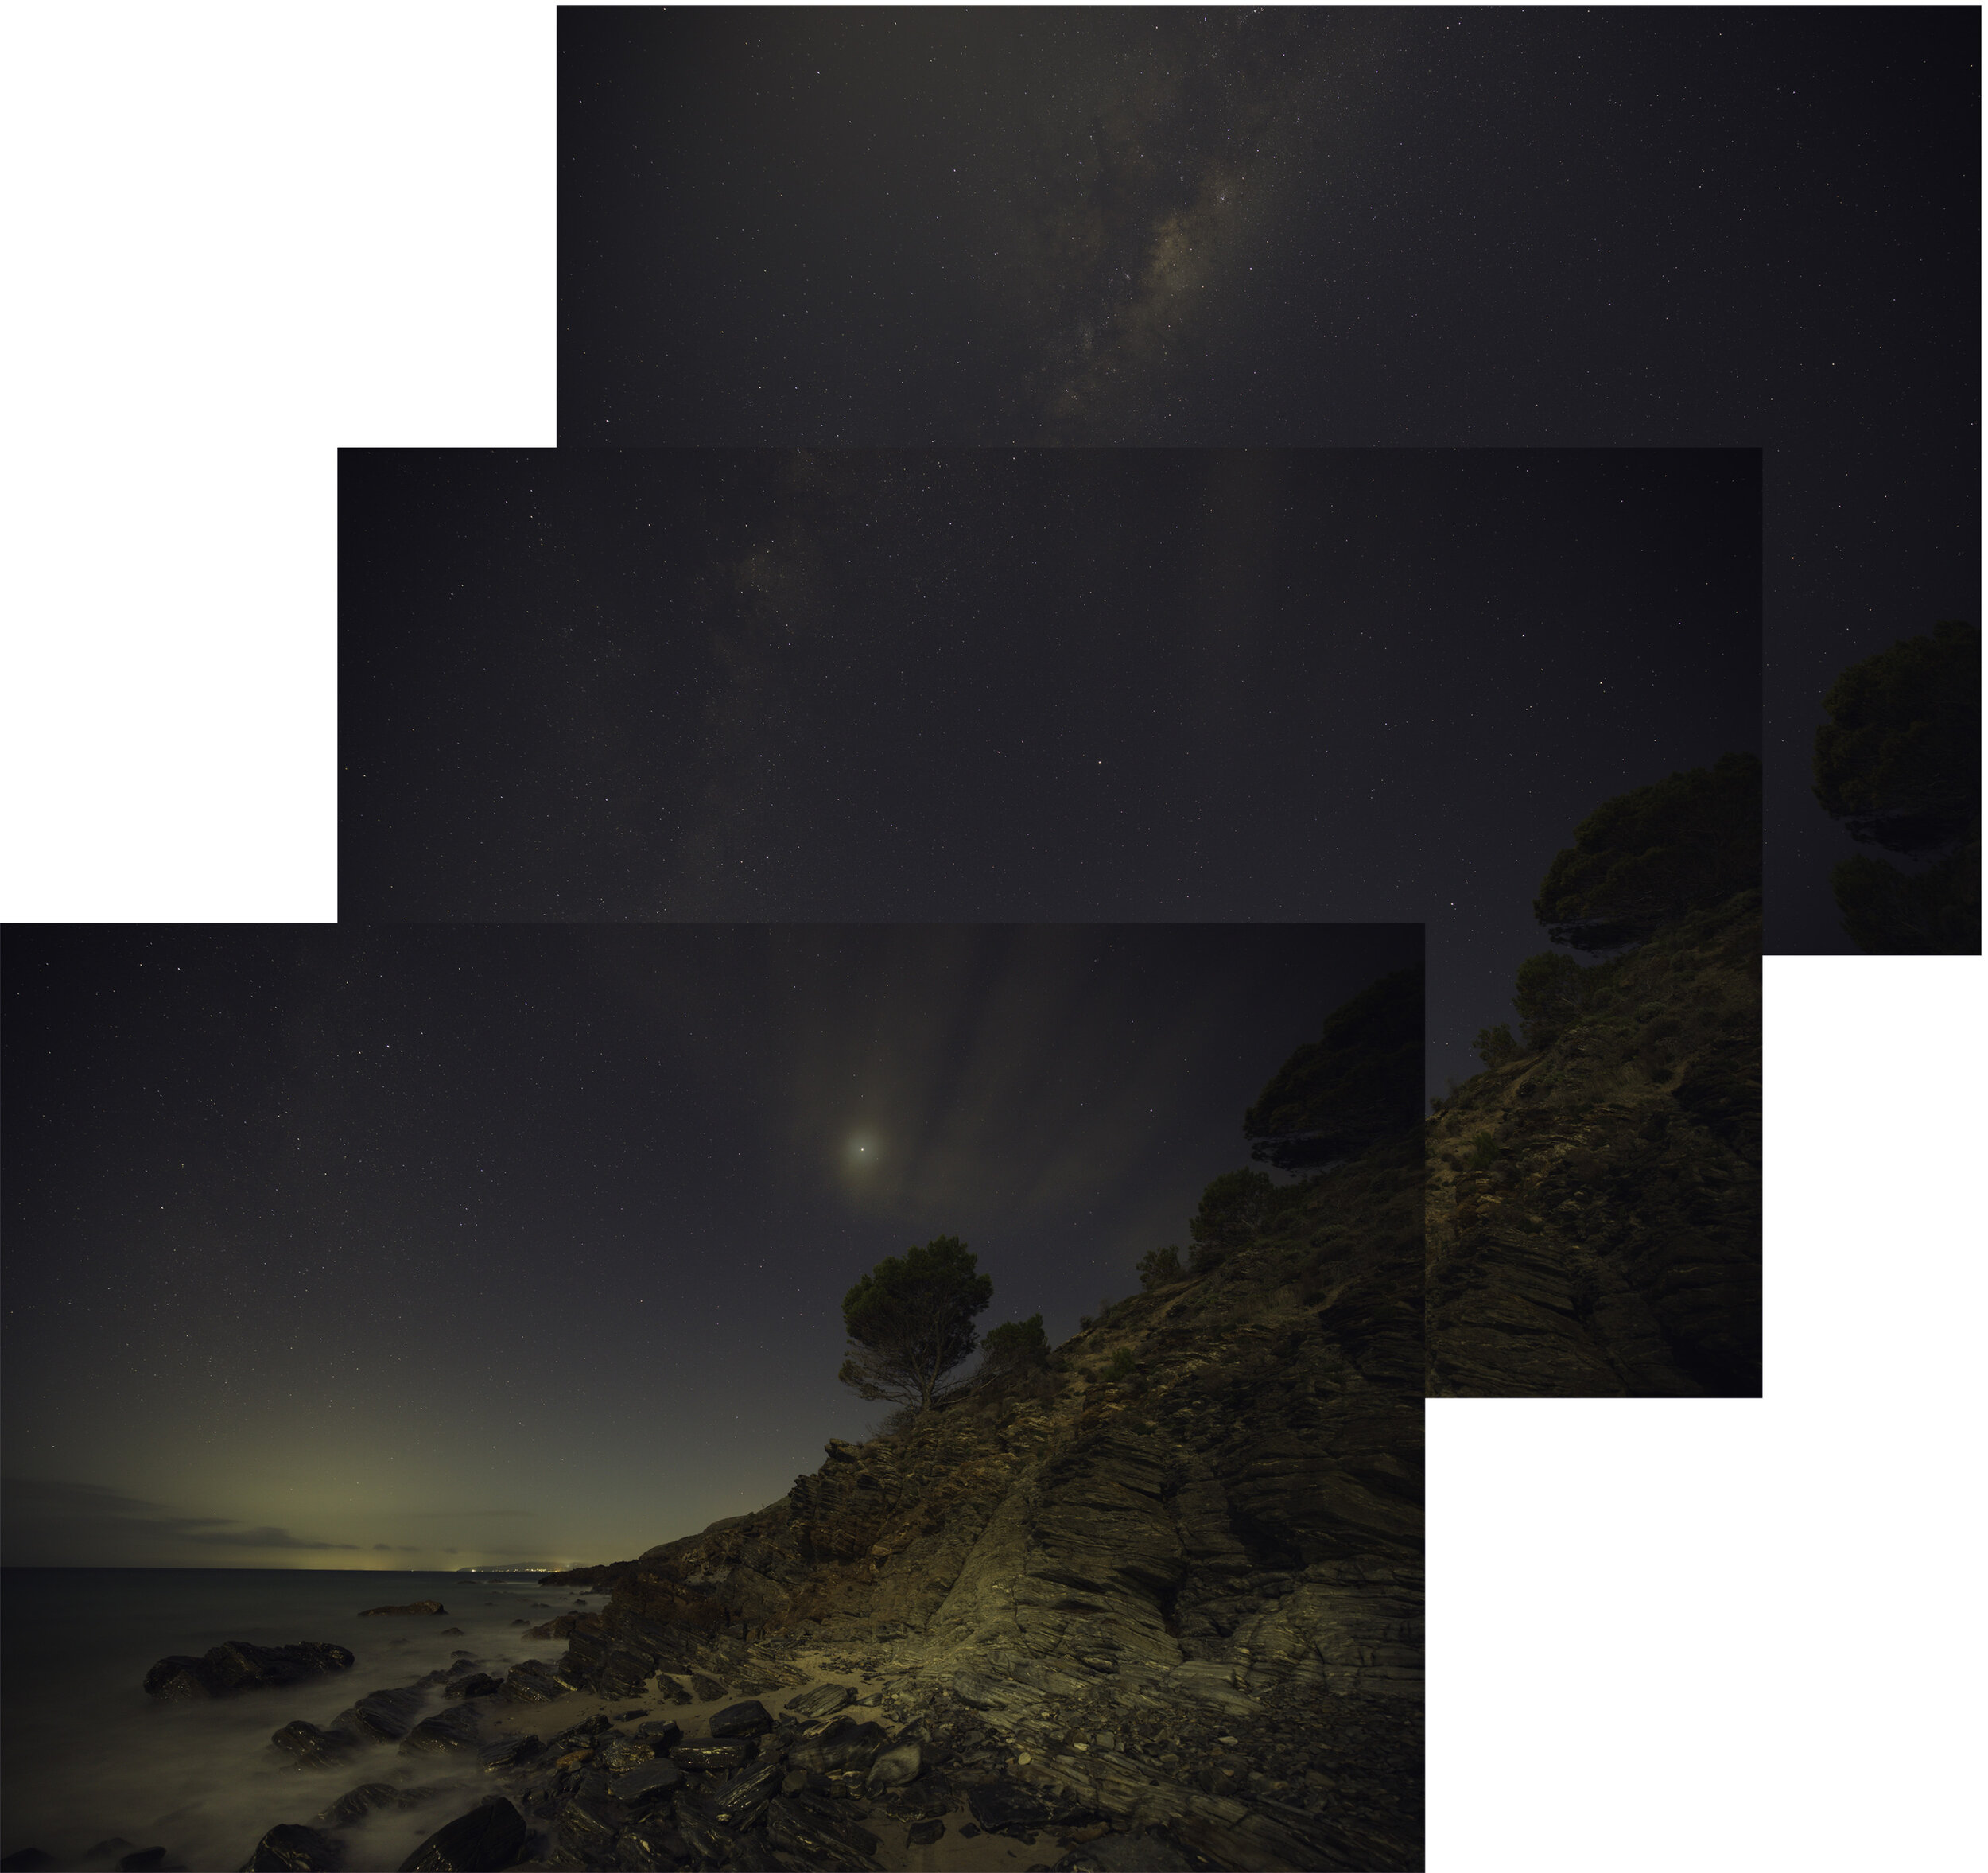
Milky Way over Second Valley, 24 images stacked into a 3 shot panorama.
It would be nice if images like my photo of the Milky Way above could be taken in a single shot, but to get the detail, low noise and amazing colours that accurately reflect how the night felt this essentially can’t happen, at least not with the technology we currently have. Please don’t mistake me, this is an image of an actual time and place, it is not a composite of a sky from a different location or a foreground from earlier in the day. Doing that (while definitely easier) is not my thing. However to get this image of a moon lit foreshore under a bright arch of the Milky Way did take quite a bit of work firstly on site, and then in Photoshop and Lightroom. Following is not a tutorial (although I am happy to do that one on one if asked) but just a taste of what was involved.
The first thing, as in most astrophotography, was planning. I had photographed this location before on a previous visit and it had occurred to me that it may make a good frame for a Milky Way shoot. A quick look on the PhotoPills app confirmed that it could work so it was just a matter of waiting for a clear dark night when the moon was relatively dark but in the right location to light the foreground at the same time as the Milky Way was arching over the shore. Not too much to ask surely.
The location on my previous visit almost two months earlier. A fantastic spot even without an amazing starry sky.
It was nearly two months later that I got the chance to go back on a weekend night (working for a living often gets in the way of my photography) when the moon was suitable. There was a fair bit of broken cloud about but I decided to take my chances because I was not sure if I would get another opportunity this year. There was a ~10% moon rising behind me and the core of the milky way was close enough to the horizon to make the shot work.
I always planned to shoot it as a vertical panorama, in this case across 3 shots. However, to make sure I got as much detail and as little noise as possible in the image I also wanted to use a technique called stacking. In this you take multiple images of the same scene and then combine them directly on top of each other which tends to remove the noise while leaving all the detail.
The 24 photos that all went into making the final image, originally meant to be 10 from each angle of the panorama, but the clouds started rolling in.
Starting from the top of the intended panorama I took 10 images, but then the cloud started to roll in so the next layer down was only 8 and final position just 6. All the images were done at the same exposure (ISO3200, f2.8, 10 sec) using a 15 mm lens, but I did forget to change the white balance from auto (doh) so did get some different colour tone as the clouds started to come in. Lucky I shoot in raw.
Once home the next thing was to create an image from the 24 seperate shots. The first step was to stack the individual shots into each of the 3 images that make up the panorama. You can do this in Photoshop, but the better (and way easier) option is to use a program like Starry Landscape Stacker which does most of the work for you. Because the stars are moving, relative to the foreground, this software (with a bit of input from you) aligns the stars while keeping the foreground still. Absolutely brilliant tool and well worth the small fee to buy it.
The three component images of the panorama after stacking the individual shots to remove noise.
So now we have gone from 24 to 3 images. Once again it may have been possible to stitch these images in Lightroom, but using a dedicated package gives way more options and in this case I used one called PTGuiPro. Definitely not a cheap piece of software, but so much more powerful. Not only is it much better at creating the panoramas, in this case it let me choose which regions I wanted from each image to include, allowing me to exclude the clouds from around the trees making it much easier process the next steps.
The stitched panorama, finally time to actually process the image.
Now that I actually had a single image the real work began in Photoshop. There are literally 100’s of YouTube videos and blogs on post processing Milky Way images (I know, I have watched an awful lot of them) so I am not going to go into the absolute detail of what I did, but the broad brush strokes are as follows.
After using transform warp and a little content aware fill to fill out the corners, the first step was to bring out the Milky Way and balance the sky while totally ignoring the foreground.
Image processed to bring out the Milky Way, hard to ignore how horrible the foreground looks, but we get to fix that next.
The essential steps were levels and curves to darken the sky and bring out the nebulosity, use the camera raw filter to balance out colour cast and add some dehaze and a touch of clarity. Another quick selective curves edit to pull out even more colour in the Milky Way, this time using individual colour channels. Next a custom action to reduce the stars as they tend to swamp the image otherwise (I know, how can you have too many stars, but it is a thing). After this a highpass filter to give more detail in the Milky Way, selectively masked so it does not add too much noise to the sky. Even more levels and curves followed by a final light dodge and burn, mostly to bring out the dust lanes (the dark bits) in the Milky Way and add a bit of depth to the image.
Seems to be a lot and it is, but this is really is what you need to do to make the sky pop. It does involve a lot of trial an error and going back and restarting. A really important part of this is walking away and coming back to it the next day. Invariably you see that you have gone over the top and need to back off some bits a little or change the overall colour cast.
After this the foreground was relatively easy. Went back to the original image, copy it up to a new layer at the top and create a layer mask to isolate the sky from the foreground so you can make edits separately for it. This is where Photoshop really shines with its selections tools. The only real trick I used here is after doing the mask for the foreground and the sea, I modified it by adding a gradient to bleed in the sky and clouds from the foreground into the Milky Way part of the sky. Once the mask had been done I could use the camera raw filter to balance out the moon lit foreground to personal taste and give it that extra punch with a small brightness and contrast adjustment. If anything the foreground was a little to sharps so added a light Orton effect to it using the same mask to give more of a moonlight dreamy feel. From here a little healing brush to fix some small artefacts, a final levels and curves to adjust global colour and a light vignette to focus the eye.
Finally finished in PhotoShop.
After this all that was required was back into Lightroom to do some localised adjustments to the colour tone of the Milky Way, brightening the surf and a touch of vibrance. I also removed the moon glow from the upper left part of the image with a gradient and a radial filter. All in all two weeks of occasional work, and rework, but was happy enough with the final result to make it into an A3 print for my wall, which I don’t do that often.
Fun Compositing
In a fit of nostalgia I decided to have an old Mac I had acquired refurbished and that led to me wanting to put it in a picture as a bit of spoof on the difficulties of working from home during various lockdowns. I had a clear idea of what I wanted the image to be, but setting it up with a single shot started to look more and more difficult.
The deep black background was not a problem as I had recently purchased some Vantablack cloth which absorbs around 99% of light that hits it (yeah, it is really cool). But I quickly realised messing around that I could not get the the lighting to work the way I wanted to in a single set up. It was meant to be a quick effort (I had to give the dining table back) and I did not want to mess around with much more than my Phottix M200R led light panel. So a composite shot was the obvious answer.
Only needed two shots in the end. The first lit lightly from the left to actually show the computer and the keyboard. Then the second with the light position on the keyboard lighting my face.
Then it was into PS with the images on two layers, the side light one on the top. A simple layer mask on the top image and I could paint myself and the lit keyboard in, hiding the direct light and the tabletop. Still needed to paint in a glow for the screen as the poor old Mac does not generate that much light.
Then back to Lightroom, pull back the highlights and balance the colour in my face. Clone out the logo on my jacket and put a gradient from left to right to darken that side of the image. Simple in the end.
Actually like the way it turned out and it got heaps of likes on the retro computer Facebook page :-), one for the nerds I suppose.
Creating a mega pano
I have been learning a lot more about doing pano’s ever since I set out to do some Milky Way shots and was disappointed in some of my first efforts. This led to lots of You Tube videos and purchases of nodal brackets and pano heads. During the week I decided to try out a Syrup Geni II to automate the process as I had been unhappy with a few of the manual options to do the overlaps for each photo (and lets be real, it is cool tech and that is enough for me). Decided it would be best to try it out in daylight and so off to sunset at an obvious nearby location.
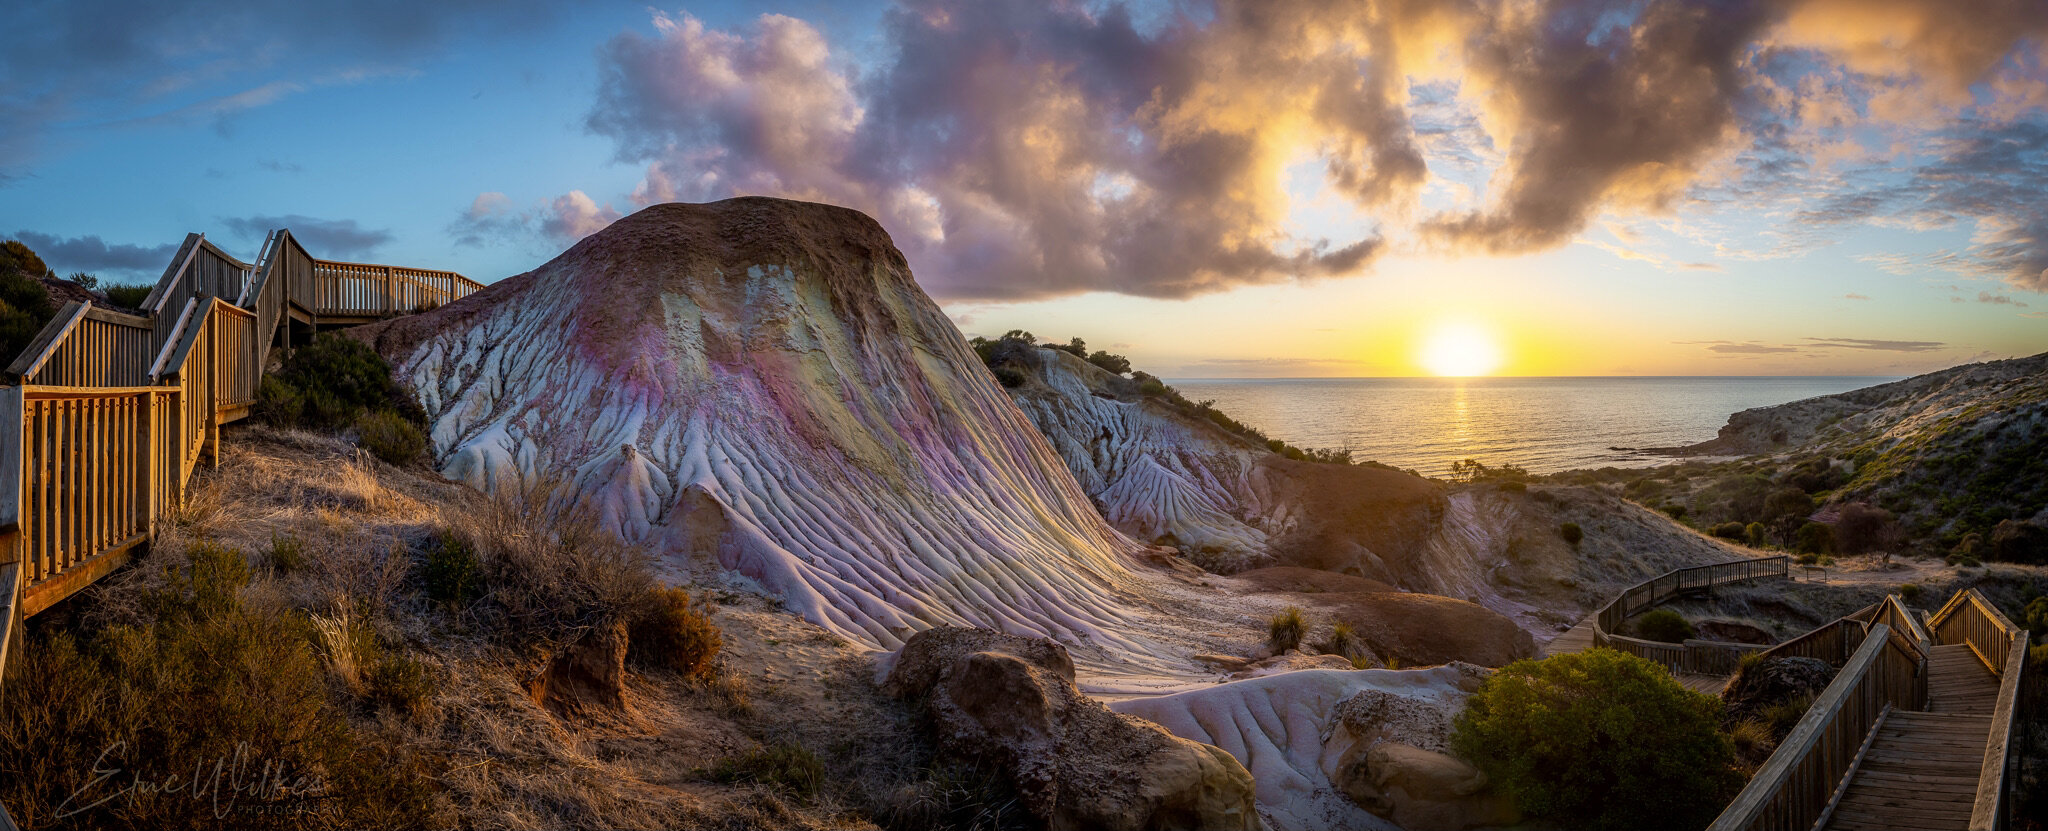
Canon RP, RF 35mm 1.8, ISO 100, f14, 1/15sec, 10 images in 2 rows.
First thing I had learnt in my understanding of getting panos with close foregrounds is the need to rotate the camera about the lens nodal point and not the sensor frame to avoid parallax issues. This just requires a nodal bracket (and a level tripod :-) ), pretty cheap from eBay.
Nodal bracket, note also the pan and tilt tripod head, makes life much easier with panos.
This set up had worked quite well for me when I did the pano of the Milky Way in the Flinders last year, but getting consistent overlap (really important for good image stitching) was a pain and the indexed panning heads I had tried never worked that well. So after a bit of research I got hold of Genie mini II from Syrp which is a motorised pan head which you can control from your phone with it doing all the calculations for the overlap for a given lens and angle of image.
The Genie mini also lets me control my camera settings from my phone, quite clever
So set a start point, and endpoint, press the button, it take the first 5 photos, tilt the camera for the next row (you can have two of the units and it will do both pan and tilt but I am too cheap for that) press a button and the second row is done. Too easy. Then it is into the computer to put it all together.
10 images ready to be put together, as always exposed to the right to try and reduce blown highlights.
Once into the computer with such a constant set of images the Lightroom function to stitch them together worked brilliantly with no need to jump into any 3rd party software.
It stitched together beautifully with no artefacts at all. Only problem was the image size of 510 MB which was interesting to work with. Glad I used the RP and not the R5.
After this it was back to my normal post process for landscapes. Bring out the shadows and dial down the highlights (a lot, massive dynamic range in this image), some curves to add some punch, and some work with HSL sliders to bring out the colours. Some local adjustments with clarity and tone to add a bit more texture to the foreground and remove some annoying sensor spots. Then crop down to a more friendly aspect ratio.
Finally into photoshop to add a very light Orton effect using luminosity masks to restrict it to the midtowns and highlights and a gradient mask to keep the foreground crisp (I find the Orton effect works much better if it gains strength as you move into the image). A saturation layer to boost the colour just a little more and then a soft vignette to finish.
Really happy with how it turned out in the end and yes, could have done it all with a ball head and a bit of patience, but really I am way to lazy and impatient for that to work.
Catching a wave
CanonR5, EF100-400mm f/4.5-5.6L IS II USM, 400mm, ISO800, f11, 1/640
I do love this image, but didn’t really think anyone else really would even look twice at it. Too my surprise it is actually one of the most liked photos I have ever pasted on Facebook. For me it is all about getting the feel of the classic Japanese wave painting, capturing the energy while at the same time the glassy clarity of the water.
Of course, as usual for me, I did not set out to get this image but rather I was hoping to practice some bird in flight photos. As can be predicted, for the first time in living memory there was hardly a seagull to be seen in the cove. So sitting myself on a rock near the headland I decided to take some detail photos of the wave breaking on the rocks using the long (and heavy) lens I happened to be toting around.
As you can probably guess the initial image was not quite so dramatic, but one of the real skills in photography is to recognise the potential and to try and optimise it.
One of the most important things in capturing this kind of image is trying to find locations where you can look along the length of the wave.
As can be seen in the original above even with a 400mm tele there is a lot else happening with the image, but even as I pressed the shutter I new I had what I wanted with this image (There of course were around 20 other attempts, some of which are nearly as good, but lets ignore them).
Once back at the computer it was time to make some editing decisions. For this image it really was about the crop as not much was needed in post process. I actually love all the things going on around the outskirts of the image, but they don’t really focus the attention on incredible detail of the glassy section of the wave as it rolls over. I decided that a square crop would really work well here as it seems to align better with the kind of abstract image I was after. In the end I cropped in even tighter than I was going to originally, probably only using 20% of the original image.
Post was pretty straight forward, add some contrast and clarity, pull back the highlights a touch and then a very soft vignette to focus the image and it was all done.
The moral, not much of one really but essentially I suppose no time with a camera is really ever wasted, there is always something to shoot that can make an image. Now to look for some more birds.
Making a splash
Absolutely beautiful day on an Easter weekend with not a cloud in the sky, which didn’t really bode well for landscapes at golden hour and since I was still fighting a cold and was not meant to be socialising thought I would revisit the studio and some splash photography.
Canon R5, RF24-105 f4L, 70mm, ISO800, f16, 0.6 seconds, 2 speed lights and Pluto drop valve and trigger.
Started out with some wine glass shots but then decided to move onto a coffee shot because, well, I felt like it. This kind of image is about getting a second droplet to collide with the spire formed by the first droplet landing in the liquid like the one below.
Obviously, this is all about the timing, getting a photo at the exact moment two drops collide. Luckily it is all made a bit easier with special camera triggers like the one from “Pluto” and associated electronically driven dropping valve, all run from your phone. No fast shutter speeds required (this one was done at 0.6 seconds) with the actual flash duration freezing the action. But not all easy as it still takes a heap of trial an error with well over 200 shots in this one photo session.
I won’t go into the setup in detail as it is easier to watch one of the 100s of YouTube videos on the subject, but the set I used is in the picture below. Needless to say it is very satisfying when you get an image to work.
Getting up close and personal
Well over a year since my last blog post, oh well so much for good intentions……
This image is one of those one which really was not planned in any way. Stuck at home with a cold (something that has a whole new meaning in the era of covid) and wandering aimlessly around the garden when a closer look at the lemon tree revealed a caterpillar. I have a macro lens, a ring flash, I can get a picture!
Not the most likely looking spot for a photo effort, but it pays to keep your eyes open.
Getting the image turned into a truely gymnastic effort with the tripod legs splayed all at different angles and lengths, squeezed between the lemon tree and the retaining wall so I could get the angle I wanted. In hindsight I could have cut off the small branch the caterpillar was on and set up in a comfortable and perfectly lit spot, but that is hardly the point is it.
One of the things I find incredibly helpful for this kind of image is having a ring flash attached to the front of the lens. Really changes the dynamic of getting the image and allows you to isolate the subject in a way which just can’t happen with natural light. I use a relatively cheap Yongnuo version I bought off the web which now has a broken battery door which I need to keep shut with big rubber band, but it still does the job.
Even with lots of contortions it was hard to get close enough to take full advantage of the macro lens
Even with all these efforts I could only get so close and definitely could not get him to fill the frame so to speak. Was also keen to try out the focus stacking on the EOS R5 (I have gone totally mirrorless now), only to find out it would not trigger my flash in that mode. Much grinding of teeth.
After a little bit of playing however I realised the most effective image was one where I got fully front on and let his body fade to out of focus and just get his/her amazing face. Ridiculously human like markings there and I do not know what is what, but it makes a cool image.
Canon Eos R5, EF100mm 2.8 macro, ISO 100, 1/200, f11 with ring flash
Once I had the image post was pretty straight forward. Cropped hard to the subject (45 megapixels does give you some serious latitude) adjusted whites and blacks, a little bit of clarity, some noise reduction and sharpening and a light vignette (all in Lightroom). The final result was pretty worth it, not bad for a backyard effort.
And what happened to the caterpillar? I left him be, he was not eating that much.
Into the studio for a lighting challenge
When I decided that I would like to redo my work’s stylised logo as a real photo to present as a framed print as a farewell gift for a friend I said to myself it shouldn't be too hard. It seems that is what I always seem to say to myself before a couple of days of my weekend disappear into studio work. Yeah, I never learn.
Composite of two images, Canon 5DIV, EF24-105 F4L, 82mm F11 1/125, Elinchrom 100W strobe
The basic set up for each of the two images was not that difficult. Essentially a single strobe through a scrim backlight to produce a high key image with black cards to the sides and above to give definition to the edges of the glass and the flask, as well as shading to give each image depth.
The first challenge was that while two parallel cards worked fine for the glass, for the conical flask they had to be set at an angle that matched the sloping sides of the conical flask or the edge shading looked uneven and weird. Lots of experimentation and redos to make it even close to right. For both images each subject also had to be right in the centre or it just didn’t work. Needless to say even though it sounded easy it took a lot of time and redos with minute tweaks to get everything right.
Amazing what you can do in your dining room with some card, a strobe and some masking tape (the bottle of excellent Scotch didn’t hurt either).
Once the basic images were done it was onto the computer for the next challenge, getting the markings to disappear from the flask as I wanted it to look clean and unmarked (I won’t even talk about the amount of time I took cloning out dust specks from both glass and the flask). In the end cloning out the markings just didn’t work well enough, leading to too many artefacts in the subtle shading. After a few hours of mucking around a much simpler way of doing it occurred to me so it was back into the studio (well, dining room) and retake the flask image with the markings to one side. After lots of mucking around getting the positioning right, back onto the computer, duplicate the image, flip it horizontally, and mask one side so that I essentially reflected the image down the centre and the markings disappeared.
Some final tweaks to the balance the light in the two images and then the compositing in photoshop only took a few minutes. Back into light room for a few final white balance and clarity tweaks and then onto the printer. Printing high key images is always a little of a challenge as any colour cast shows up badly, but not too many test prints were needed. Then into a nice frame (eventually winning the battle against stray cat fur which is always a challenge in our house with any white object). Have to admit I was pretty pleased with the final result and so I think was my friend.
Always a relief to actually see the print looking good, especially in A3.
And the end result ready to be wrapped :-)
The power of post processing
I am continually amazed by the amount of light modern digital cameras can pull in. We have gone from the days when cameras struggled to capture what we could see to being able to photograph things almost invisible to the naked eye. Milkyway photography is a great example of this. While just staring at the night sky is a reward in itself, using a camera to amplify what is there can have amazing results. However they do require a little bit of processing on computer bring out those amazing images we see on the web.
Original raw image from the camera after stitching two images together. Pretty but not really spectacular.
Nothing has really been added or subtracted from the original image. Some distortion from the stitching process has been removed and then it really is just a process of amplifying the light that has been captured in the digital image while trying to keep the dark bits, well dark. Still learning lots about doing this, but got lots of hints from David Magro whose workshop I was at when I captured this image earlier in the week. Essentially to get the final image below involved adjusting the dehaze, clarity and contrast sliders in Lightroom, using luminosity masks in Photoshop to burn in the lights and dodge the darks as well as removing noise, adding some vibrancy to the finished image and increasing the exposure in the foreground.
Petrel Cove, South Australia, Canon Eos 5D IV, EF 16-35mm f2.8L II, 16 mm, ISO3200 f2.8 30s, 2 photo stitch
While this image is not amazing for lots of reasons, I do love that I have caught the Milky Way, our two neighbouring galaxies and the bioluminescence in the surf in one shot. All in all feeling quite happy with my nights work.
Unexpected opportunities
Not a particularly picturesque lighthouse, but still a lighthouse and beggars cannot be chooser.
I was looking through online news and saw a post from our local member of gov about a working bee in one of the nearby conservation park around the lighthouse…… hold on, what lighthouse! Lighthouses are always handy locations so after after a bit of google maps research (it is actually within walking distance embarrassingly, so much for my in depth local knowledge) I set out with my Canon RP and phone to do some location scouting. It was the middle of day so was not planning on taking any real shots, just some location reminders.
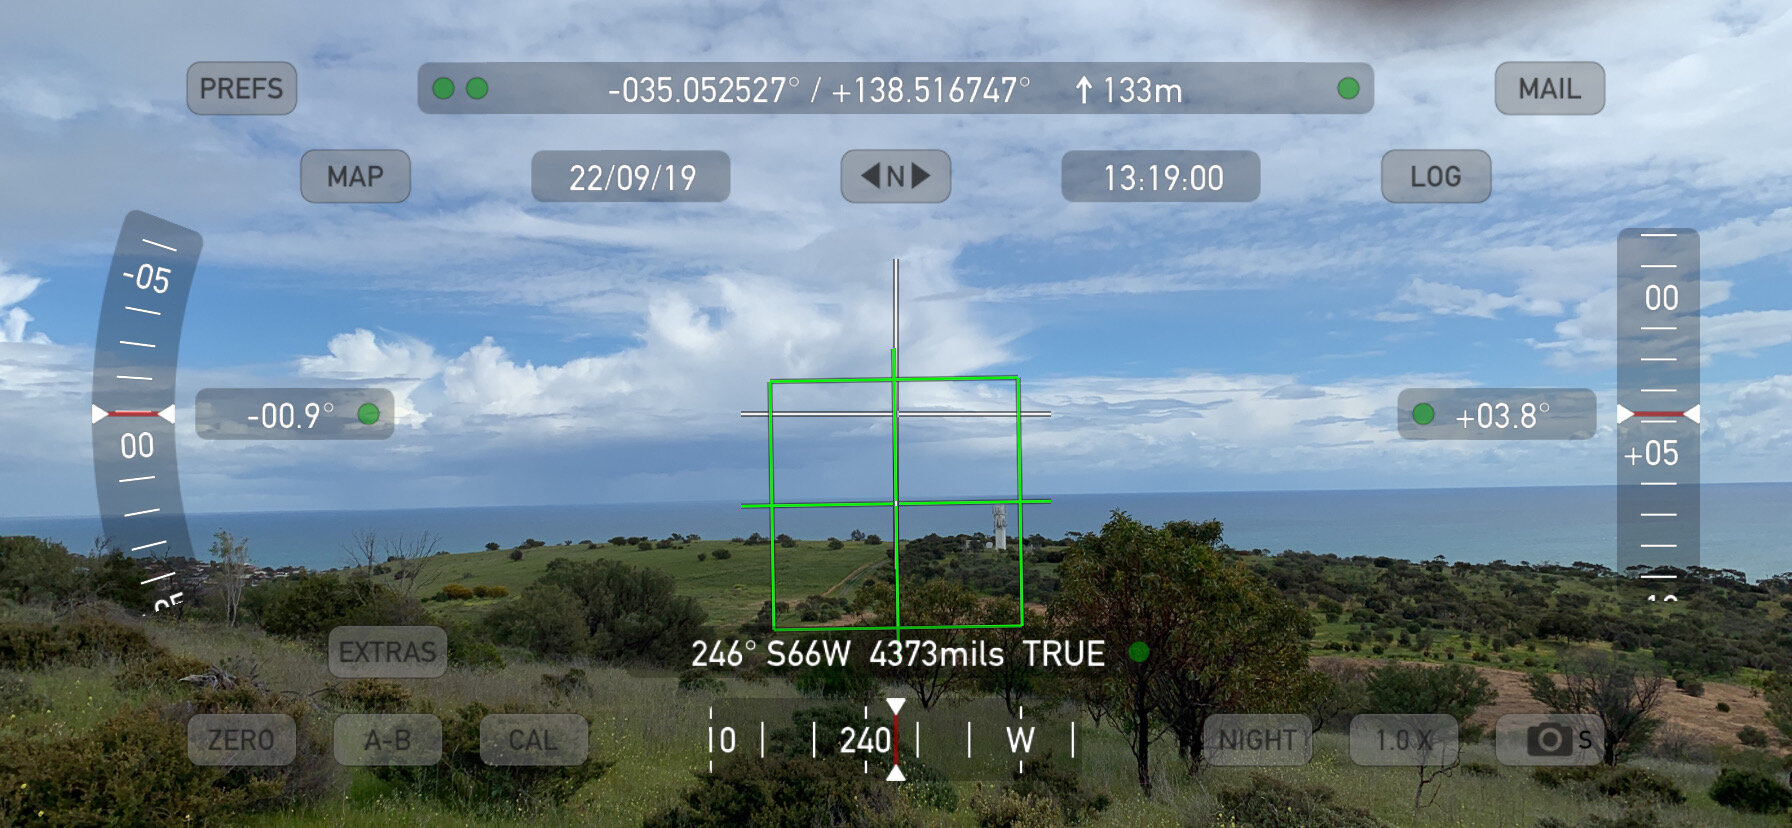
Just one of the weird apps I find useful for planning photos and remembering locations, “theodolite”
It really didn’t look like it would work for any of the evening or night shots I was hoping to do and so I wandered through the conservation park to the next hill looking for some long lens shots that may work. Just when I got to the top of this hill I looked across and saw an epic cloud framing the lighthouse. I didn’t have time, or the gear, to set up anything special so I just took some handheld images leaning towards under exposure to try and get some separation between clouds and sky. I think I always had it in my mind to try and turn it into a B&W to highlight the drama of the clouds, but really had no idea if it would work until I got home and could have a look at the image if it was going to be a keeper. I think it was in the end.
The final image is obviously enhanced from the original. Essentially all I did was convert it to B&W using two seperate luminosity masks on the one image. One lights mask to capture and define the sky and clouds, and a less aggressive mid tones mask to convert the land and lighthouse to monotone. In case you are wondering I use TK panels (https://goodlight.us/writing/actionspanelv7/tk7.html) to generate the masks in PhotoShop CC, they work incredibly well. Then the biggest challenge was to decide on the best crop. Just reinforces that you should always be ready to capture an image when it comes along.
Canon EOS RP, RF 24-105mm, f8 1/800s ISO100
In the mountains at dusk
I was really looking forward to a chance to take photos of snow capped mountains when I visited a friend in Queenstown NZ. Probably because they are bit hard to come by where I live in Adelaide. The experience didn’t disappoint.
The location in the ski field carpark was far from glorious, or pristine.
I had spent the majority of the day hiking to a beautiful spot called Sylvain Lake in warm sunshine and we had to rush back to Queenstown and the ski fields to try and get a sunset shot that I had really wanted. The change in temperature was some what bracing as I got out of the car.
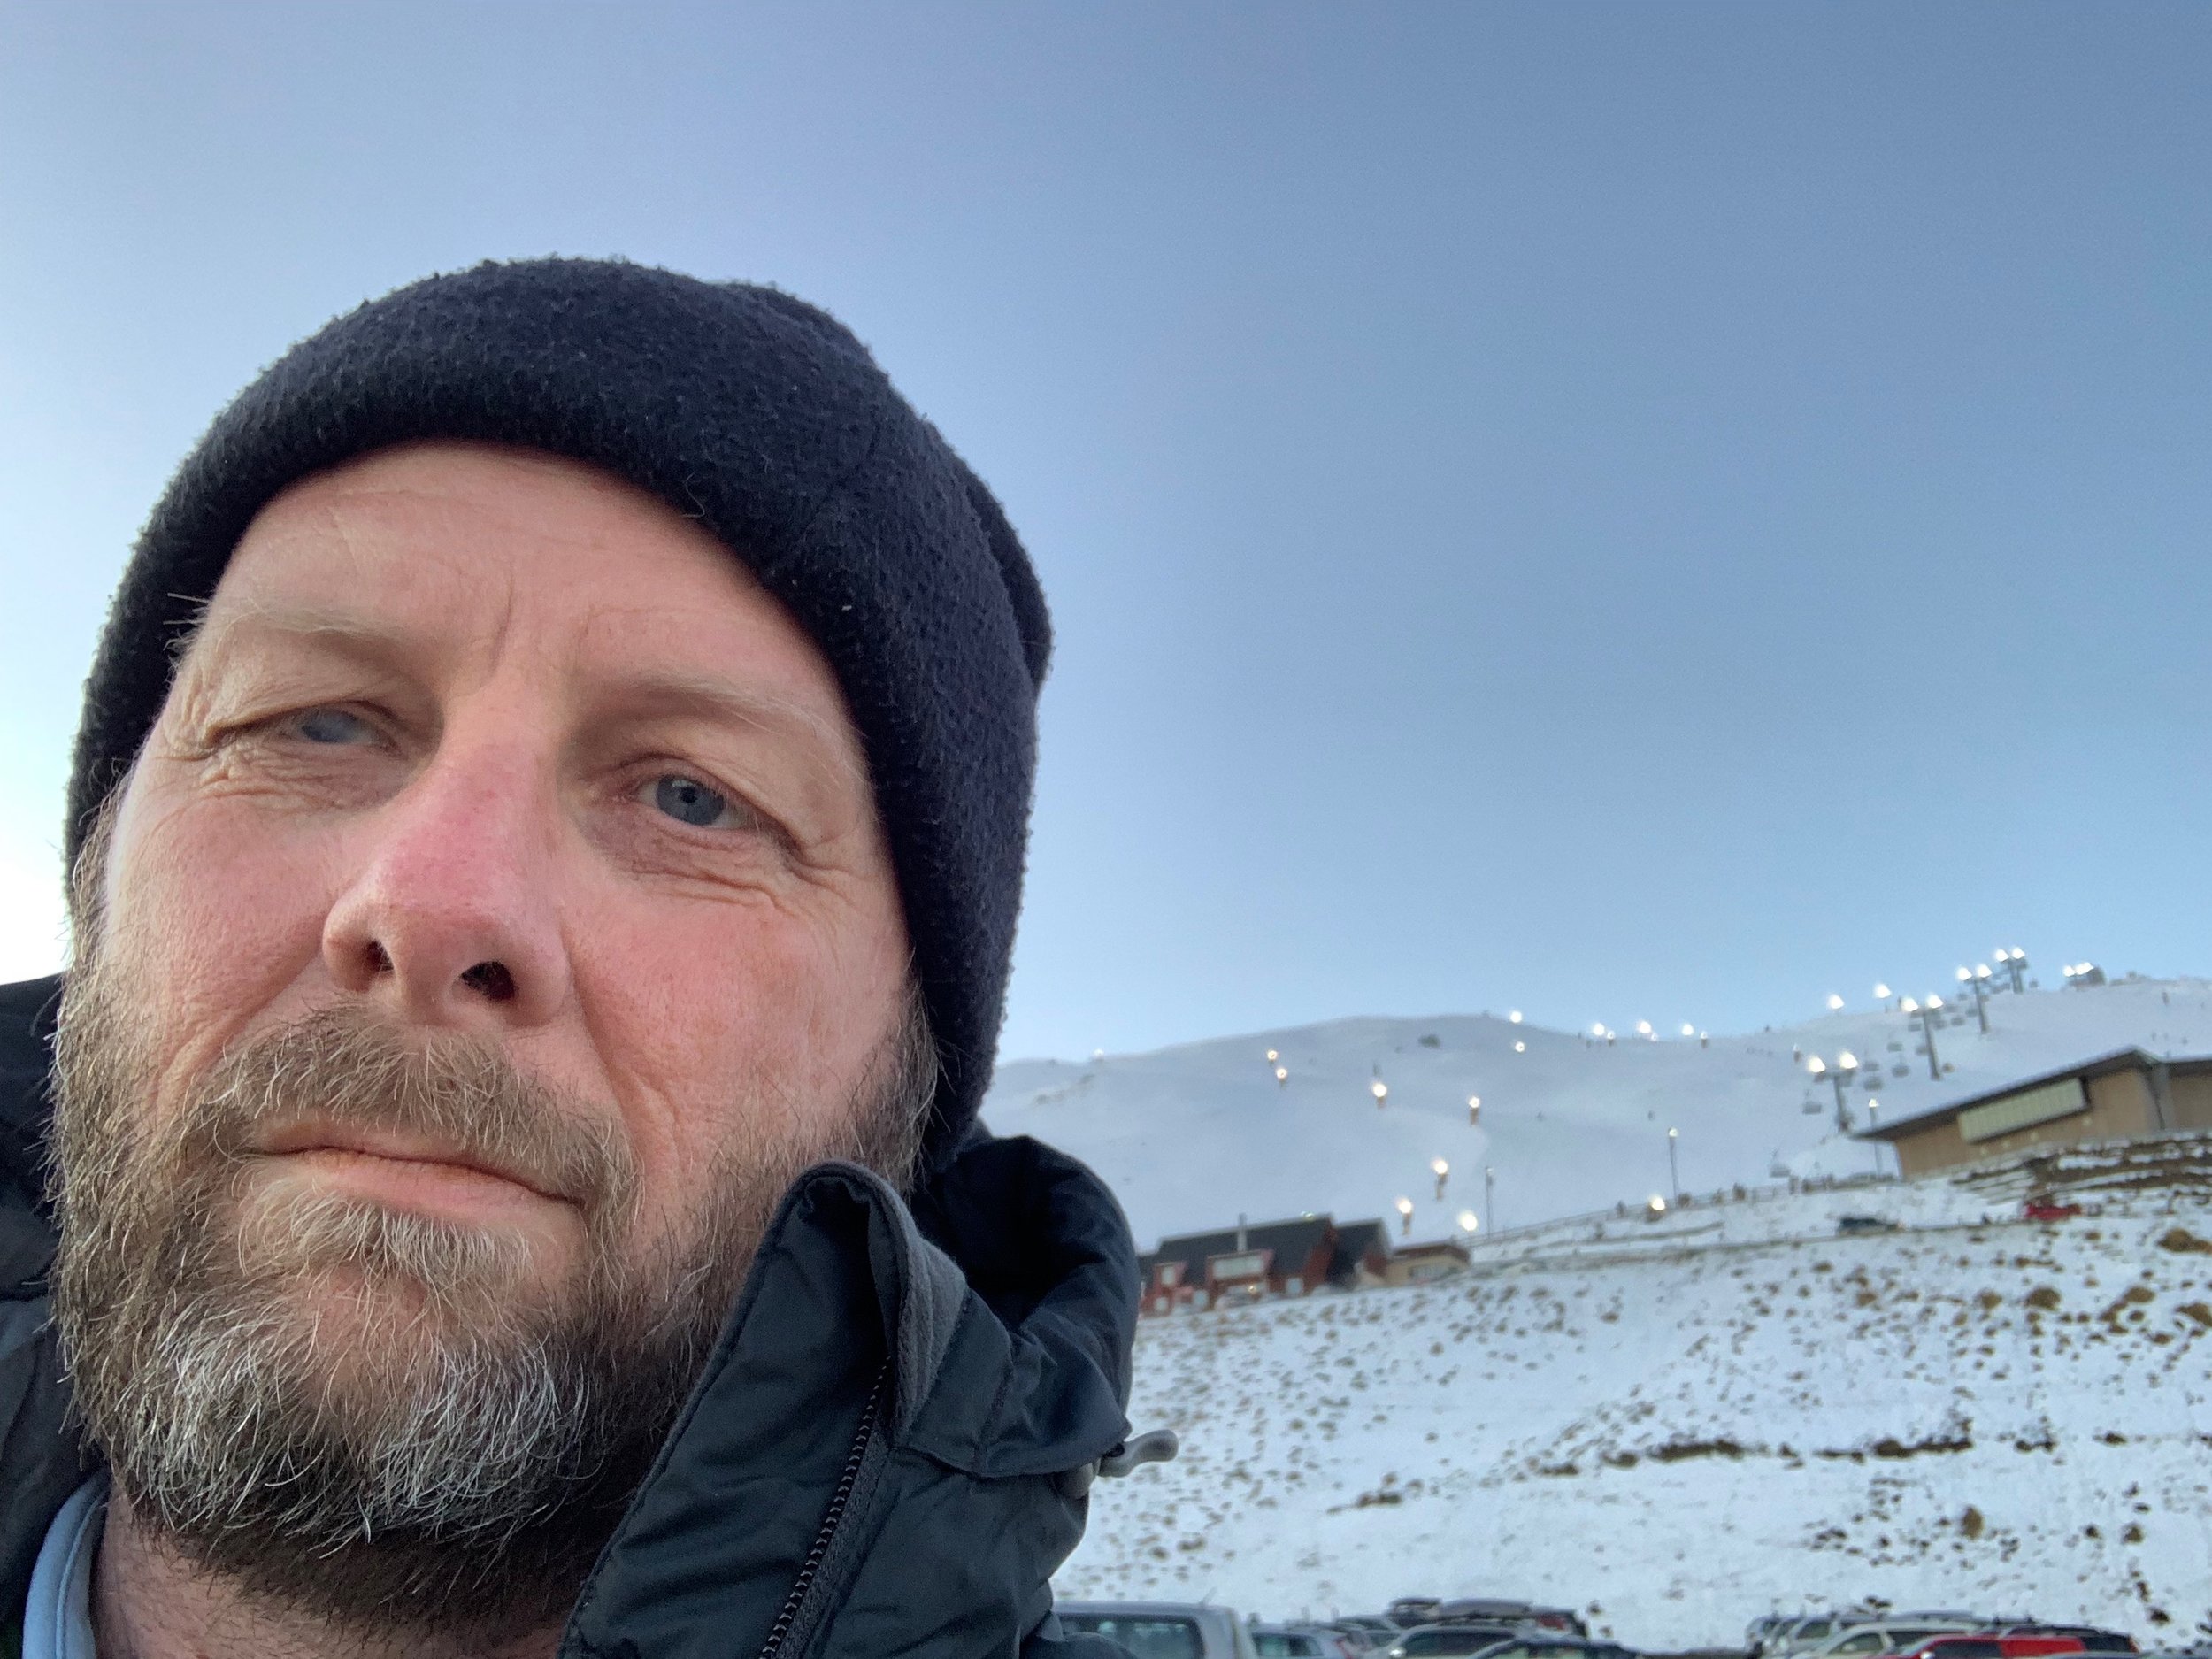
A little colder than I am used to!
The carpark that my friend had taken me too was muddy, dirty and as soon as we got out of the car we were confronted with beer bottles and someones partially digested lunch. But walking to the edge of the carpark and looking towards the Remarkables range it was definitely worth it.
the pinks of the Alpin glow. Definitely worth seeing
In the limited time I had to capture the colour I tried quite a few lines, panos and compositions, however the one I chose in the end was simply done using my favourite 24-105 at about 50 mm cropped down to a classic pano view. In processing had to use some graduated filters in Lightroom to lighten the foreground an d balance the sky, but in general just a really simple image that I think works and, for me at least, a really fun introduction to mountain landscapes.
Canon EOS RP, RF24-105mm F4 L IS USM, ISO 100, 50mm, F8, 2 seconds. No filters
